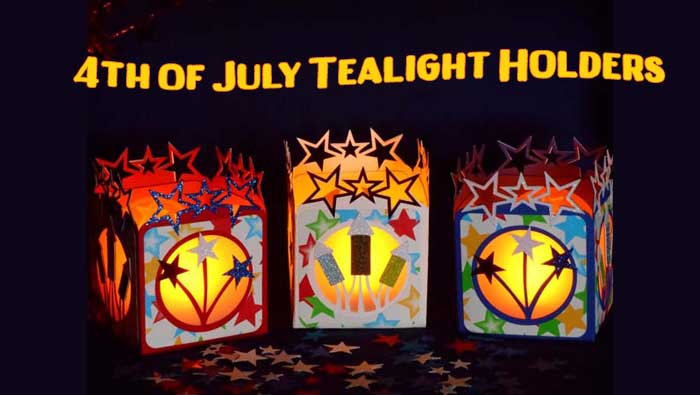
4th of July Tealight Holders by Jana
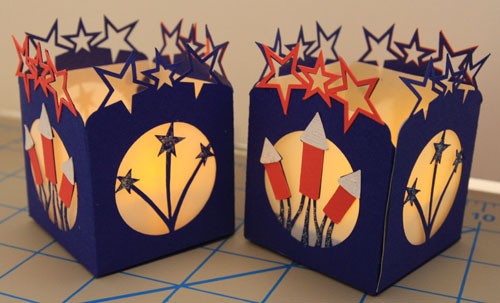
This month, Jana designed these three tealight holders for 4th of July using the FREE 4th of July Tealight Holder SVG.
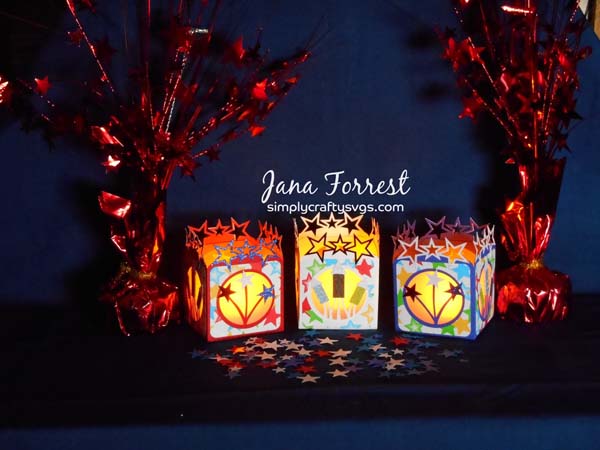
Jana Forrest, DT Member Simply Crafty SVGs
This month, Jana designed these three tealight holders for 4th of July using the FREE 4th of July Tealight Holder SVG.
Jana Forrest, DT Member Simply Crafty SVGs
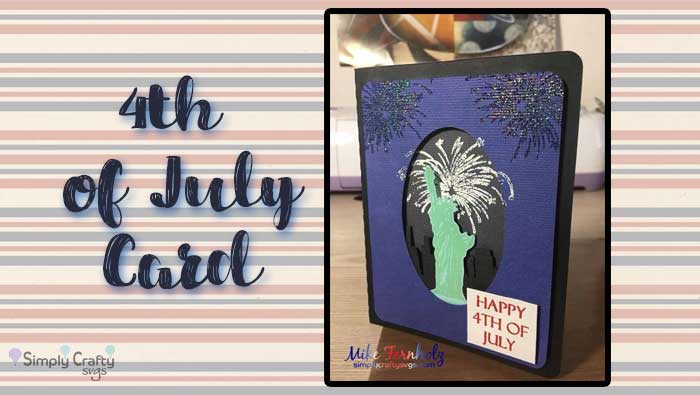
Mike used a variety of techniques and some stamps to make this 4th of July Card using one of the frame sets from the A2 Frame Card Set 1. Starting with the oval frame, he created a Statue of Liberty scene with fireworks with a silhouetted city. A variety of mediums were used to create this effect, including but not limited to multiple shimmery embossing powders.
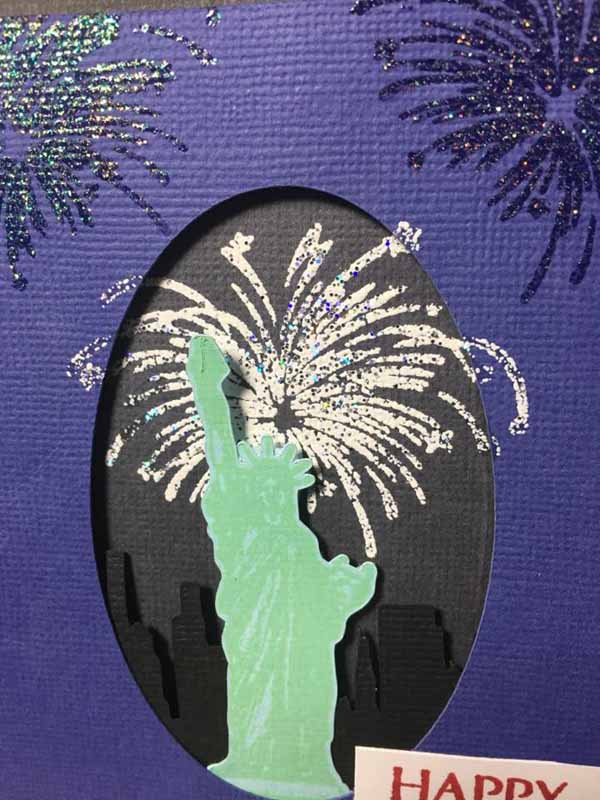
Mike Fernholz from DeZinesbyEM, DT Member Simply Crafty SVGs
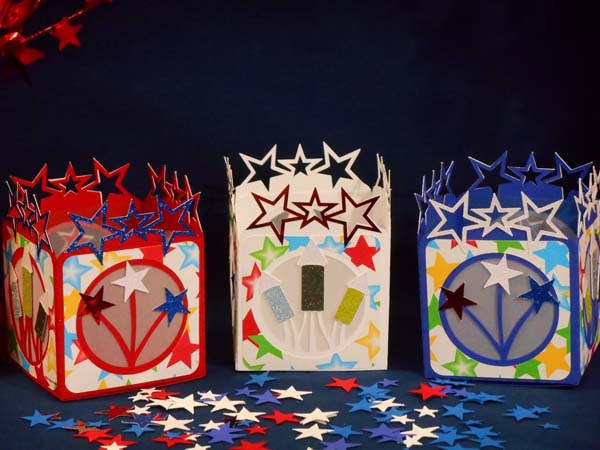
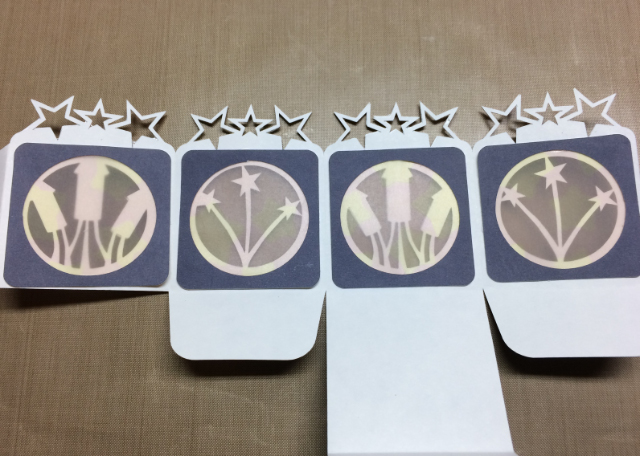
To celebrate the upcoming Independence day, I created this 4th of July Tealight Holder SVG. Get it for FREE!
NOTE: This design contains intricate cuts, so make sure you pick appropriate paper. Fibrous or really thick paper will not cut well. Each machine handles cuts differently.
This tealight is easy to assemble. Assembly instructions are included within the ZIP download. Here is an overview of the process.
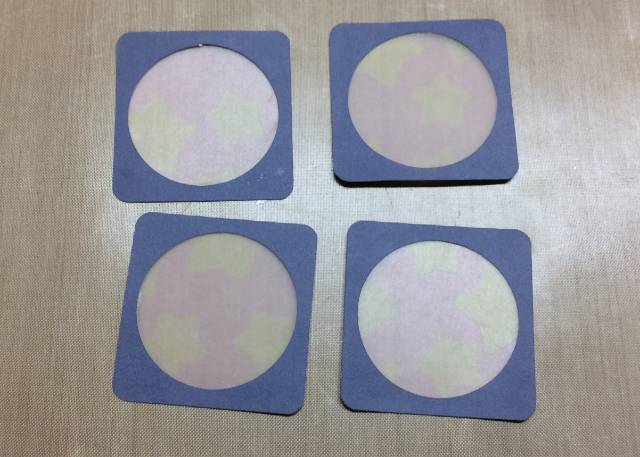
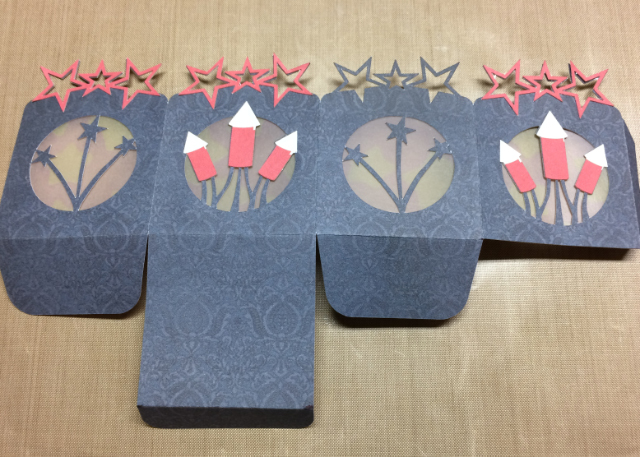
After cutting out the files, piece together optional vellum inserts. You can make the box without the inserts. Use vellum or translucent paper, for best results.
Score and fold the box. Glue the vellum inserts to the inside of the box and glue on star and firecracker pieces.
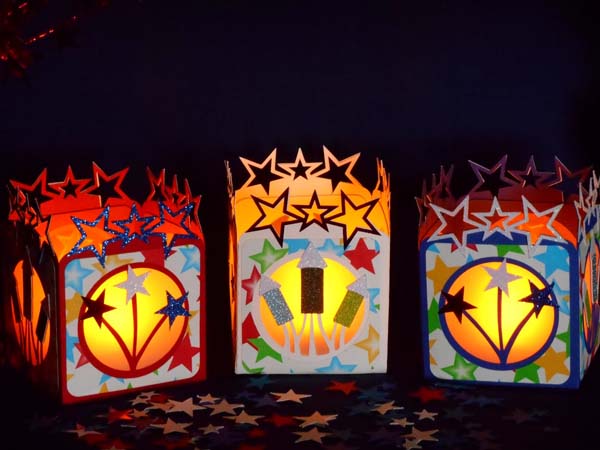
Add glue/adhesive to the side tab and glue to the inside of the opposite side of the box. Fold over the side flaps and close bottom of the box, tab in. No glue is required on the bottom of the box, as I wanted to make sure this box could be stored easily. To store, simply open the bottom tab and flaps and fold flat!
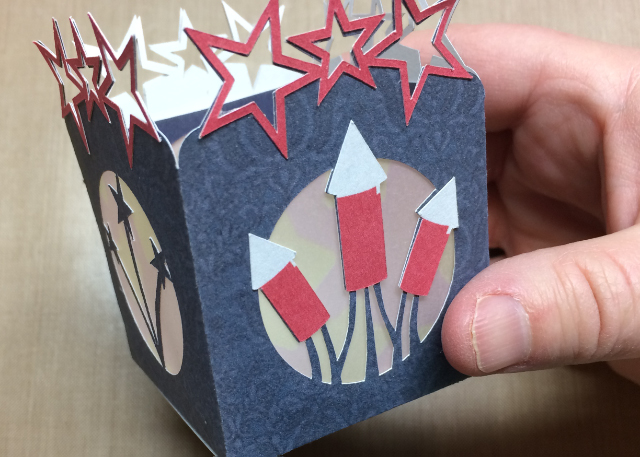
It just looks cool when the light flickers! Here is what a few of mine looked like!
Go now and make some for your household or for a friend/family member. Share this info with a good friend! Happy 4th, you all!
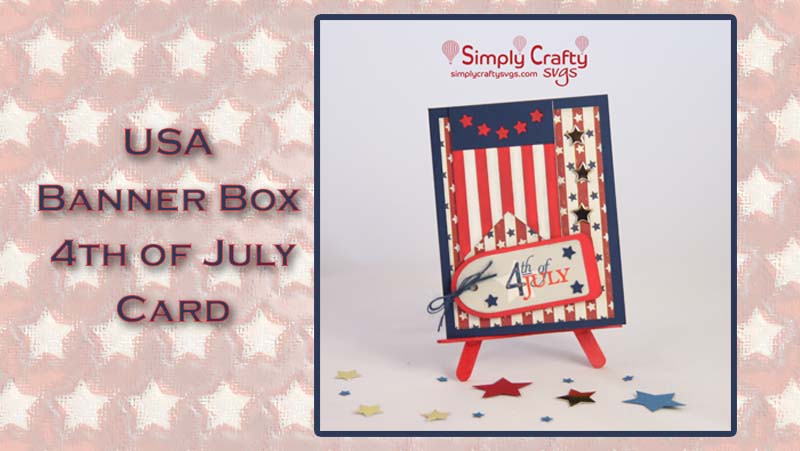
Here is a card I designed using the Free USA Banner Box SVG. The card is A2 size. I simply used one banner as and a simple background, tag with 4th of July image from Cricut, and a few star brads.
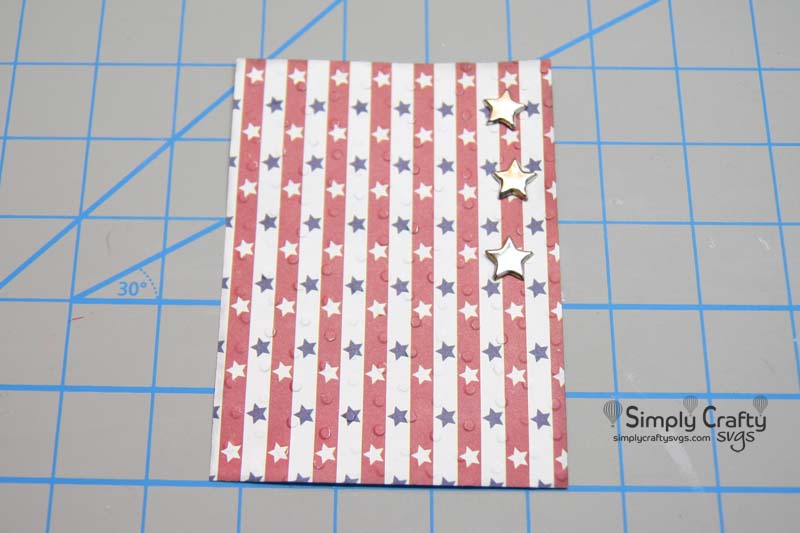
I first added the star brads to the paper background, to add a little dimension.
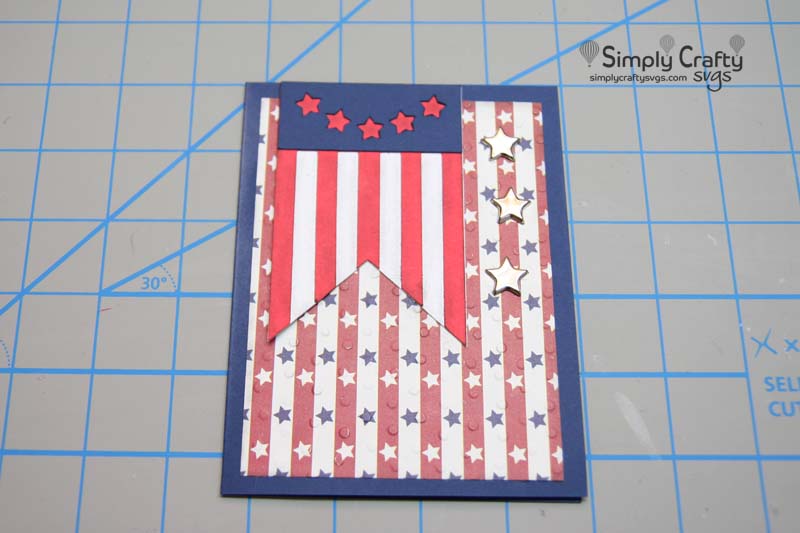
Then I added the enlarged banner from the USA Banner Box design after adhering the paper background to the card.
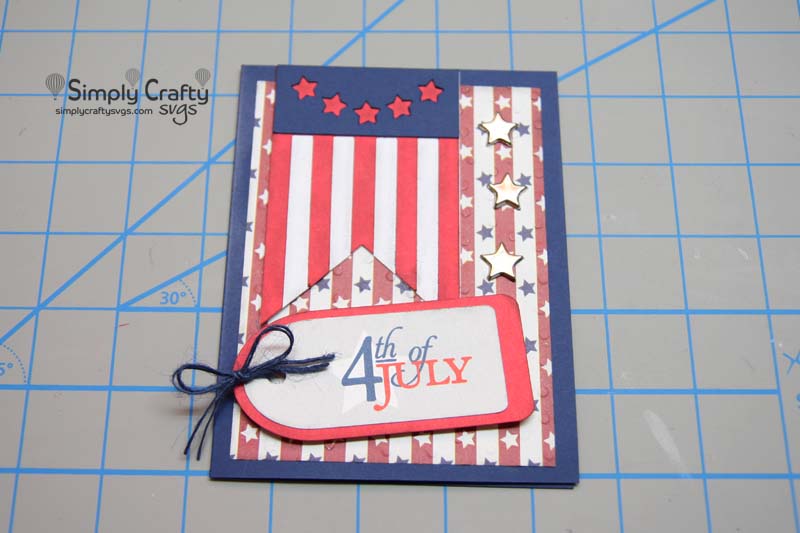
I then added the tag with twine to finish it off. The tag and image are from Cricut’s Design Space library.
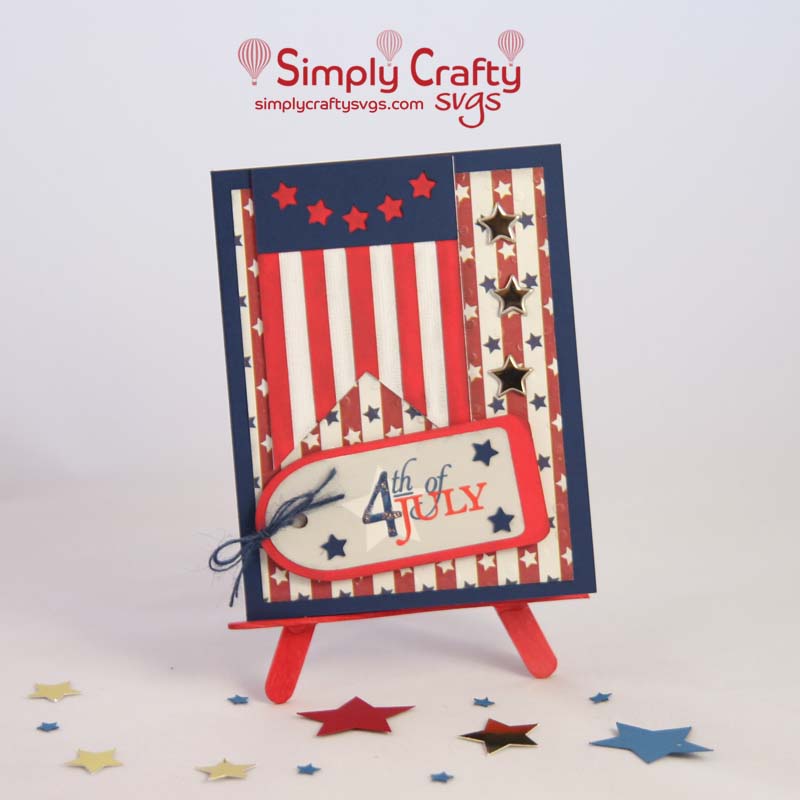
This is just another simple card project you can make with this free USA Banner Box SVG file. I thought it might be fun to make an actual banner one of these days out of the same file, with just a little bit of modification!
Here is a new free design in time for Memorial Day and Fourth of July. Download the FREE USA Banner Box SVG to make this box as a decoration or to hold plastic utensils for a party.
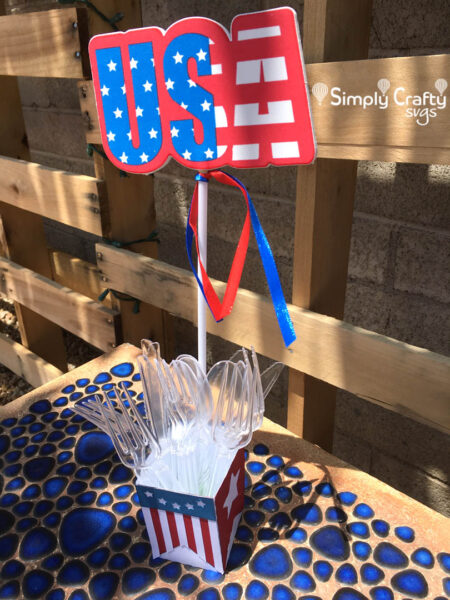
It is a quick way to dress up a table.
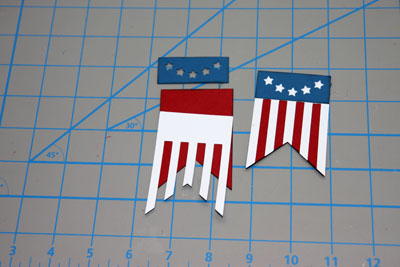
The file contains two SVG files, one with the box and the other with the banner panels. If you do not know how to work with ZIP files, see the Frequently Asked Questions page.

Add a flag, ribbons, shiny things, or nothing! You can make it anything you want!