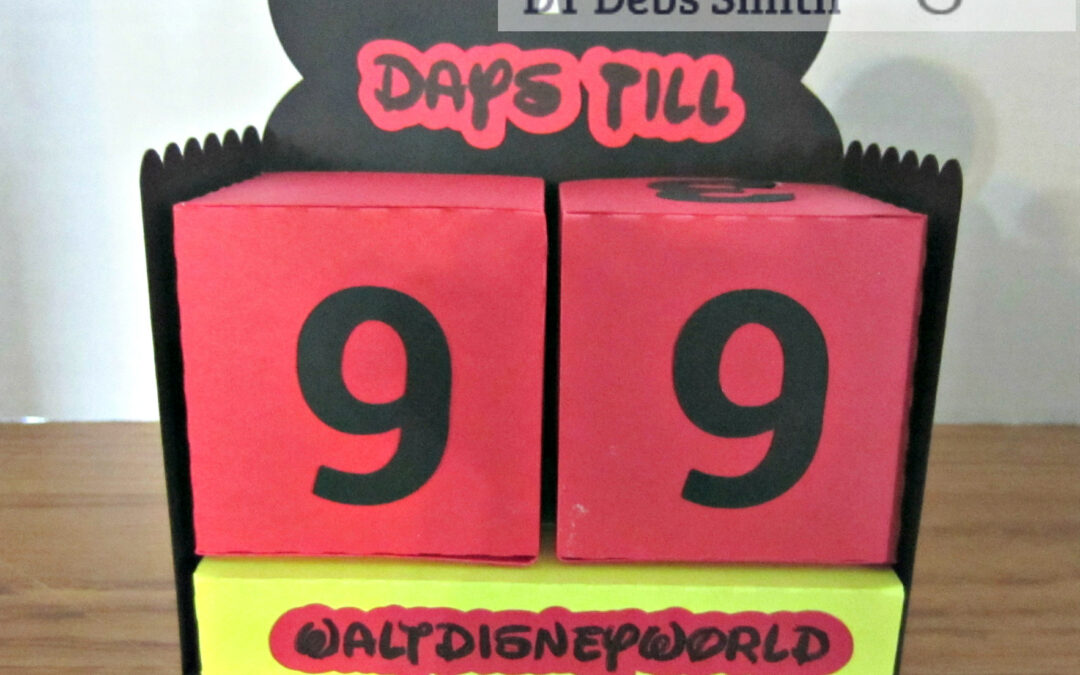
The other day I posted the Perpetual Calendar SVG Design and promised you a different spin on the file. My family and I are heading to Walt Disney World in September so what a better way than having a countdown clock that can be used time and again. You can make it to cater to your vacation.
I cut out two 2 inches circles for the ears and used my silhouette Cameo and that Waltograph font for the writing and offset it . Colours are of course Mickey mouse. I did have to make an extra block and cut out more numbers since the countdown started at 99 days.
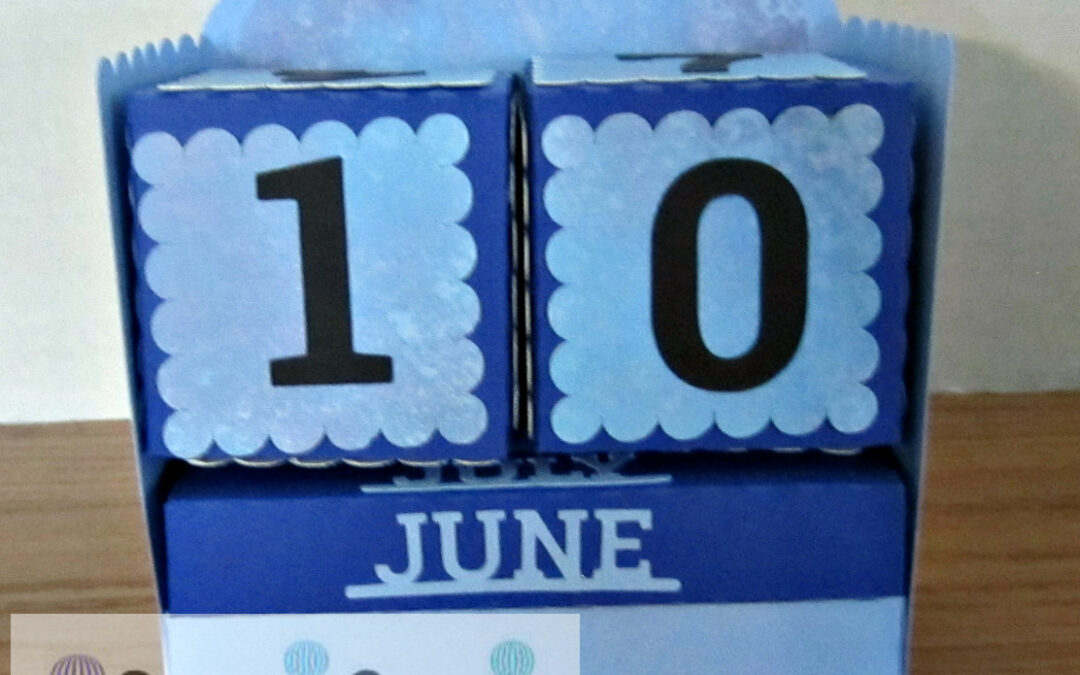
I am so excited to be sharing with you my first Official post as a member of the new Design team for Simply Crafty SVGs. Today I am showing off the Perpetual Calendar SVG Design.
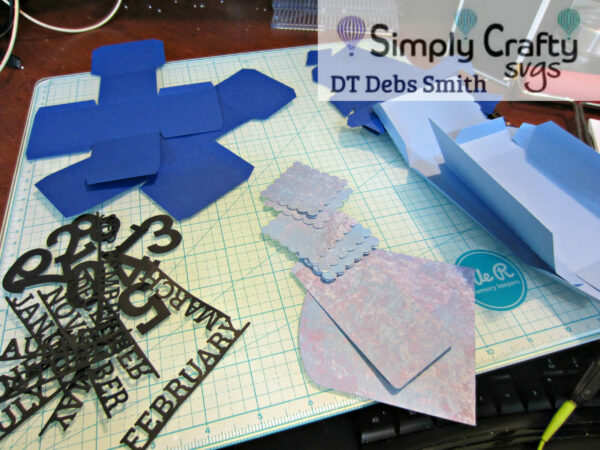
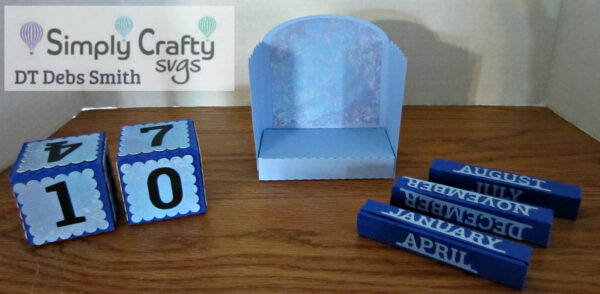
What I love about this is the colours are unlimited to your imagination you can even customize the bottom tray to put the person’s name on it, anything at all. The instructions were so easy to follow for putting this together that a beginner to advanced 3D builder can follow. Here are the pieces and as you can see not that many.
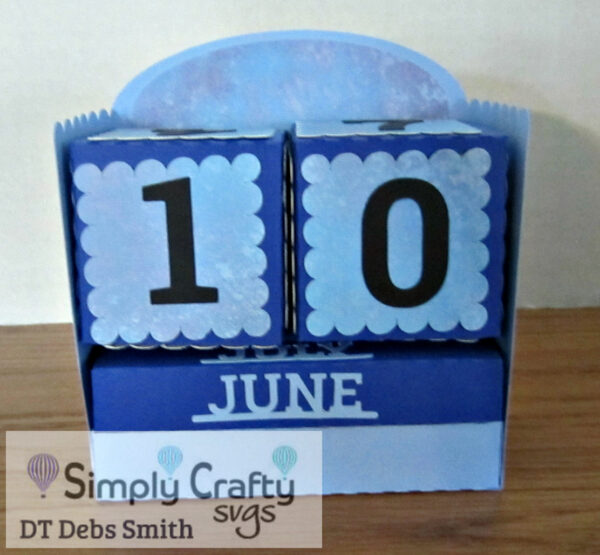
And here the pieces put together.
All in all, this was a fun piece to put together and will be used everyday!!
Stay tuned tomorrow to see how I took this file and made a vacation countdown!!! Keep on crafting my friends!!!!
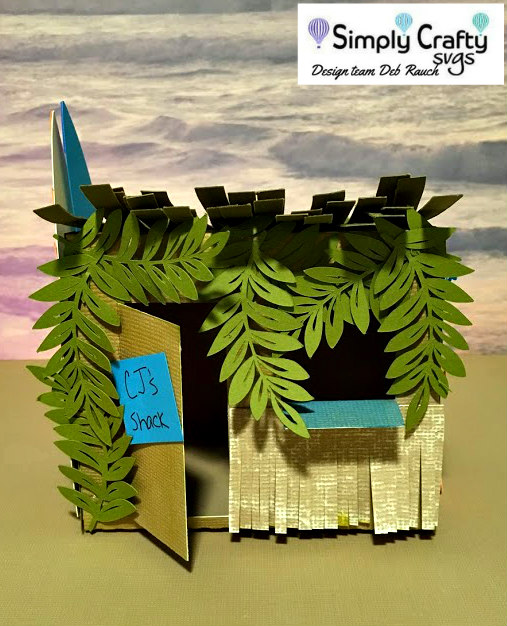
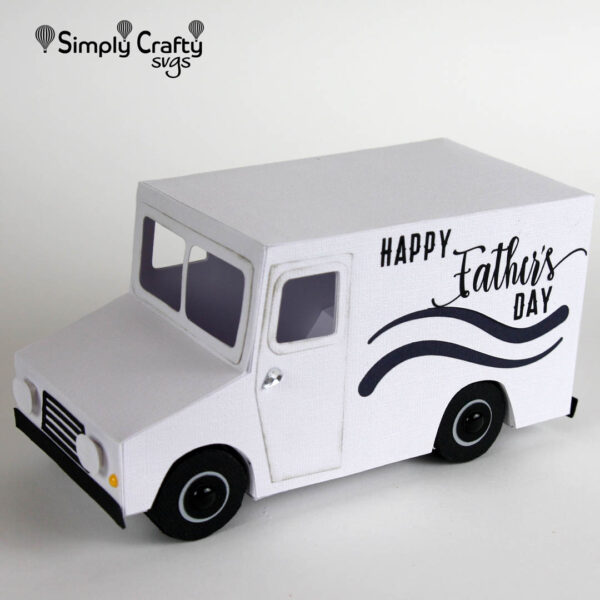
Simply Crafty SVGs is very pleased to have our first post by our Design Team Member, Deb Rauch. She took our Garden Shack SVG and made it into a Surf Shack!!!
I’m very excited to announce that this is my first project for Simply Crafty SVGs! The file I started with was Garden Shack SVG File. I’m the kind of person who doesn’t like to follow the file exactly, and usually put my own spin on them.
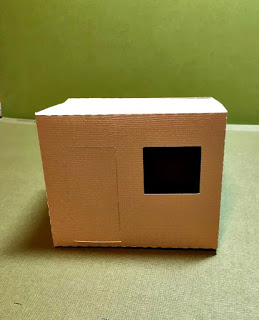
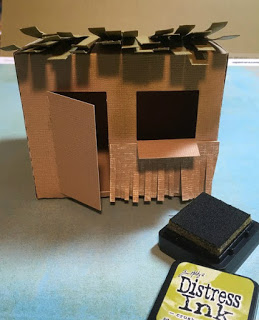
For this Surf Shack, I cut out the pieces labeled Box 1 and Box 2. I removed the cut window piece, folded it in half, and glued it inside the shack to make a shelf. From there, I glued the actual box pieces together. I did leave the side piece unglued so that you can open the side and put a little gift or even a battery tea light.
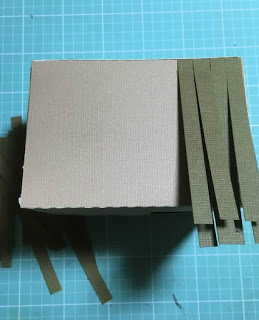
From there, I needed to figure out a way to make the thatched roof. I cut a 3″ strip of 12″ long paper and with my paper cutter, I cut strips 1/4″ wide to make the thatching strips. To apply the strips to the roof, I added a small glue dot on the back end and stuck it down on the back of the roof. I overlapped the strips so that the whole roof was covered.
Then, I needed to put my thinking cap on. The whole shack was a tan color with a green thatched roof. I needed color on the front, sides, and back. For the front, I used Crushed Olive Distress Ink and covered the whole front, including the door. For the shelf, I used Peacock Distress Ink.
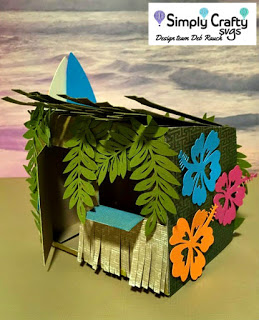
For the sides, I added a piece of olive green patterned paper from my stash. Then, on the right side I cut out some colorful hibiscus flowers with my electronic cutter and applied them to the side. Then I went back to the front. I cut a 2″ long piece of paper and cut it into thin strips, then sandpapered it for a distressed look. I added that under the shelf. I felt like I still needed some tropical feel to this shack, so I cut some palm leaves with my electronic cutter and placed them around the front window, next to the door, and across the top.
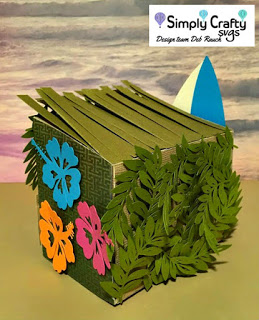
For the back, I continued placing the palm leaves until I covered the entire back.
You can’t have a surf shack without surfboards!! I, once again, cut a couple surfboards out with my electronic cutter and pop dotted them on the side so that they would be a little dimensional.
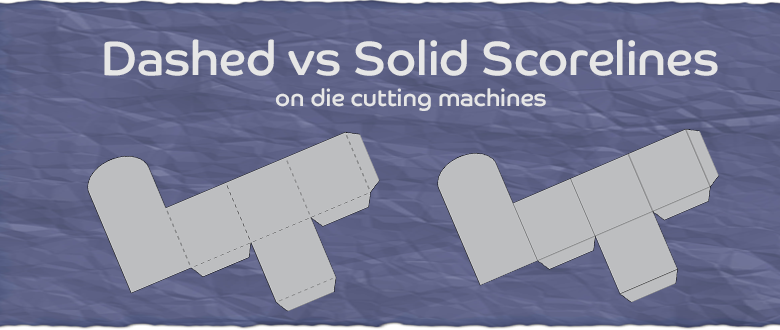
For years, consumer SVG cutting files for boxes, bags, and cards included dashed scorelines only. This is because earlier die cutting machines had the capability to cut the dashed line to allow folding. With technology advancements, the consumer die cutters continue to get better and better. Some now even have the capability of scoring solid lines! This is the reason we are now are including two different scorelines versions in all our new Simply Crafty SVG files. One will be in the traditional dashed format AND the other a solid scoreline version.
What does that mean to me and should I really care?
If you are using a machine capable of using solid scorelines, you might care. Using the files located in the solid_scorelines folder will allow those with Cricut Explore and Sizzix eClips2 to score a solid line, instead of dashed lines. Many people prefer this, as it is a cleaner look. If you do have a compatible machine, we have included these files to use instead of the files with dashed scorelines. So, when you see a file with a dashed scoreline, check the solid_scorelines folder and import that version instead of the dashed version.
Cricut Users:
Cricut Design Space users, this means you still have to attach and change the solid scorelines to “Score” within Design Space to use with your score tool. You can will use the dashed scorelines version, if you prefer. Some people still like to “cut” their scorelines instead of using the score tool, which is sometimes preferable for 3D type projects. Click here for additional Cricut help. We have some more scoring tips here.
Why do you still include the dashed scorelines?
We still include the dashed scorelines is to make sure our files are compatible with most die cutters that use SVG file, even if they do not have the capability to use the solid scorelines. Also, it is much easier to fold 3D designs and boxes using traditional perforated score lines. We are not into exclusion. We love all technology!
What if I have a Silhouette Cameo? Is there a way I can cut solid lines?
Great news! We created this video tutorial to show you how you can use the second tool with a ratchet blade to easily score using a light kiss cut. Click here to view the video. I use it all the time and it works great! For more Silhouette help, click here.
I hope this was helpful to you all! Happy Crafting!
NOTE: This design contains intricate cuts, so make sure you pick appropriate paper. Fibrous or really thick paper will not cut well. Each machine handles cuts differently.
This tealight is easy to assemble. Assembly instructions are included within the ZIP download. Here is an overview of the process.
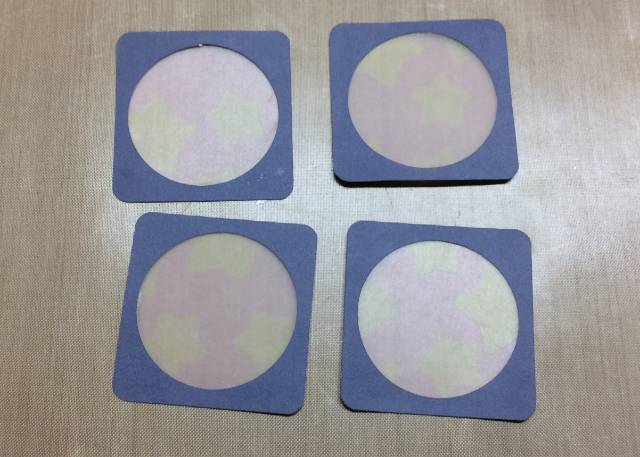
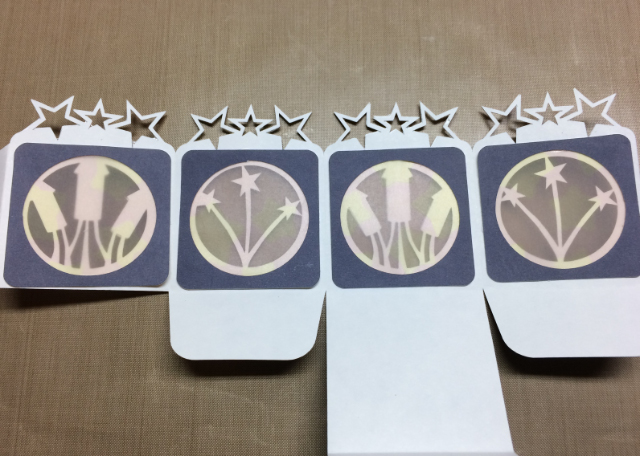
After cutting out the files, piece together optional vellum inserts. You can make the box without the inserts. Use vellum or translucent paper, for best results.
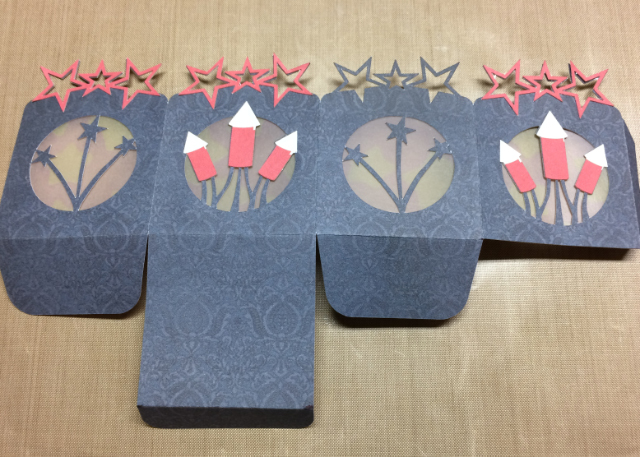
Score and fold the box. Glue the vellum inserts to the inside of the box and glue on star and firecracker pieces.
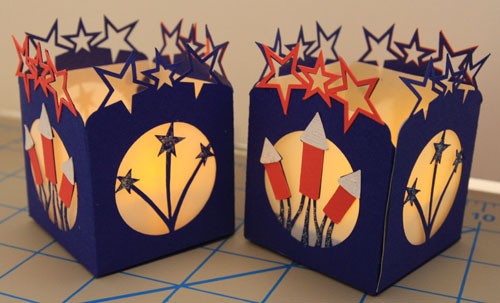
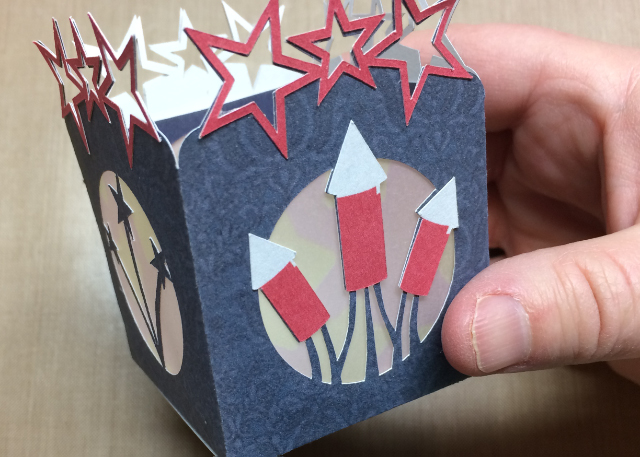
Add glue/adhesive to the side tab and glue to the inside of the opposite side of the box. Fold over the side flaps and close bottom of the box, tab in. No glue is required on the bottom of the box, as I wanted to make sure this box could be stored easily. To store, simply open the bottom tab and flaps and fold flat!
It just looks cool when the light flickers! Here is what a few of mine looked like!
Go now and make some for your household or for a friend/family member. Share this info with a good friend! Happy 4th, you all!