So excited. I was asked to be a guest designer over at Simply Crafty SVGs and also on facebook at Simply Crafty SVGs. What a great honor. I love the files that this site has and the owner Sandy is a fabulous designer. Her design team is top notch. Their examples with Simply Crafty SVGs 3D files are beautiful. Please go on over and say hello and look around.
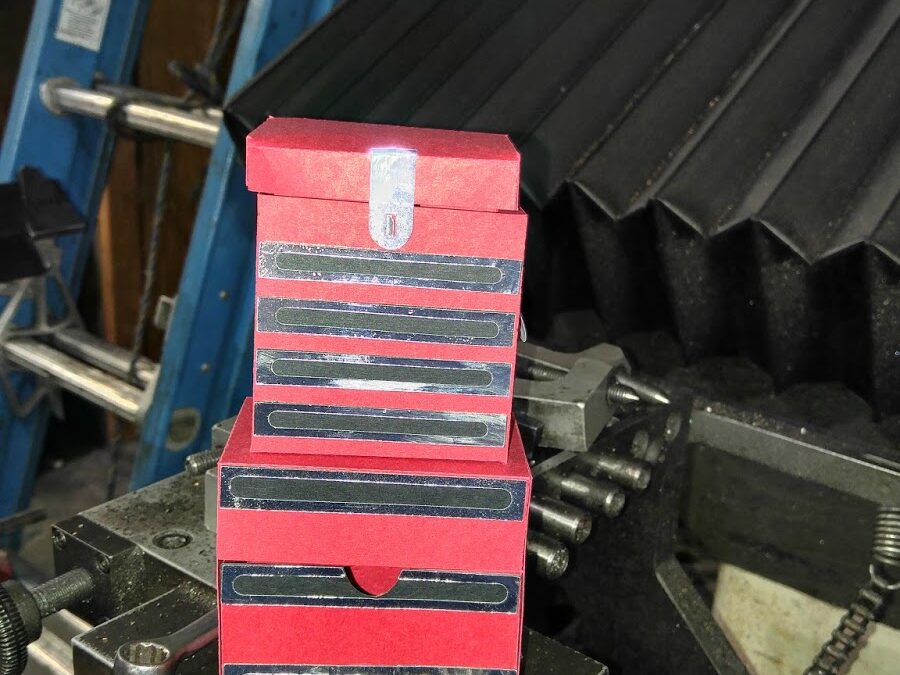
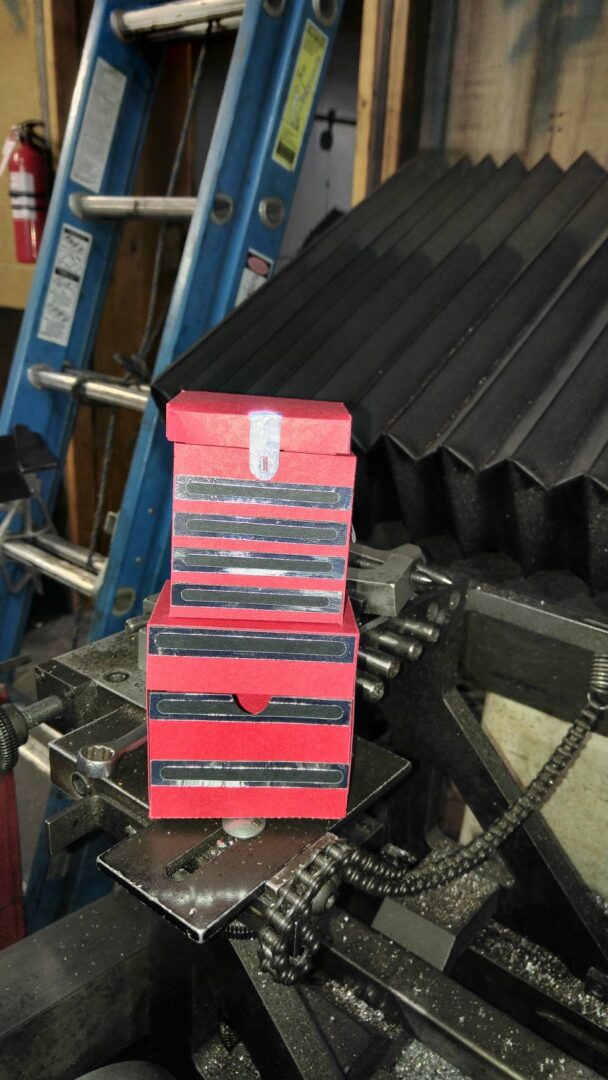
So for my project I wanted to make something for Bobs birthday which is in a couple of weeks. Bob is a machinist. We own a machine shop and he is in high demand. So the file I chose is a 3D Tool Box. It looks just like the 4 that we have in the shop. This one is able to be filled with what ever you want. It has a top section and a lower section. I used standard cardstock and my ATG gun. I think I will go to a candy store and look around. Might be able to put some saltwater taffy in the bottom. So here is how my Simply Crafty SVGs 3D Tool Box Turned out.
Jana Forrest, Guest Designer for Simply Crafty SVGs
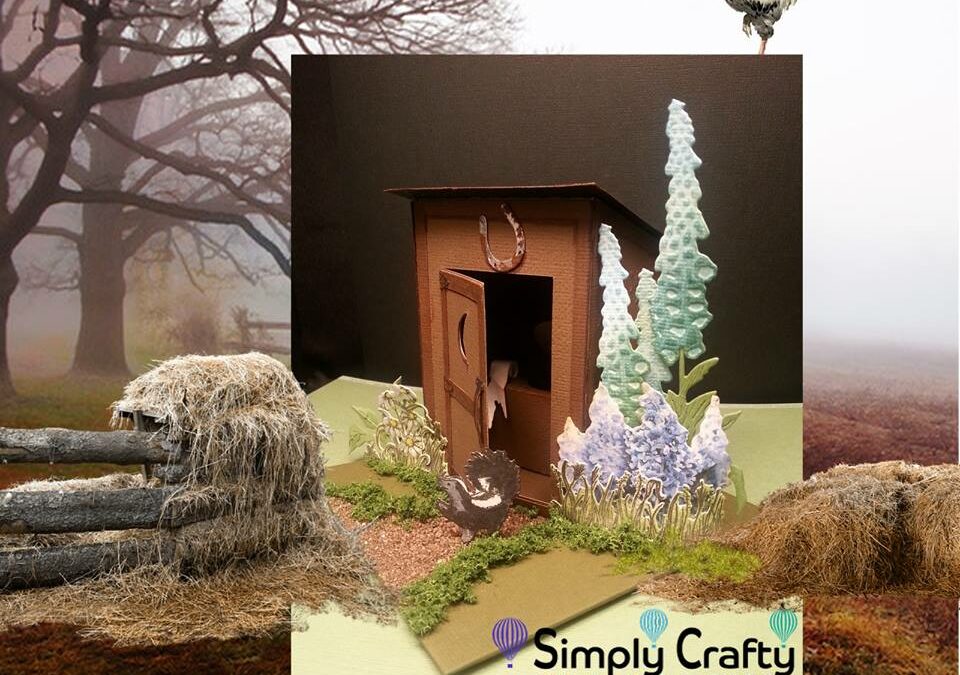
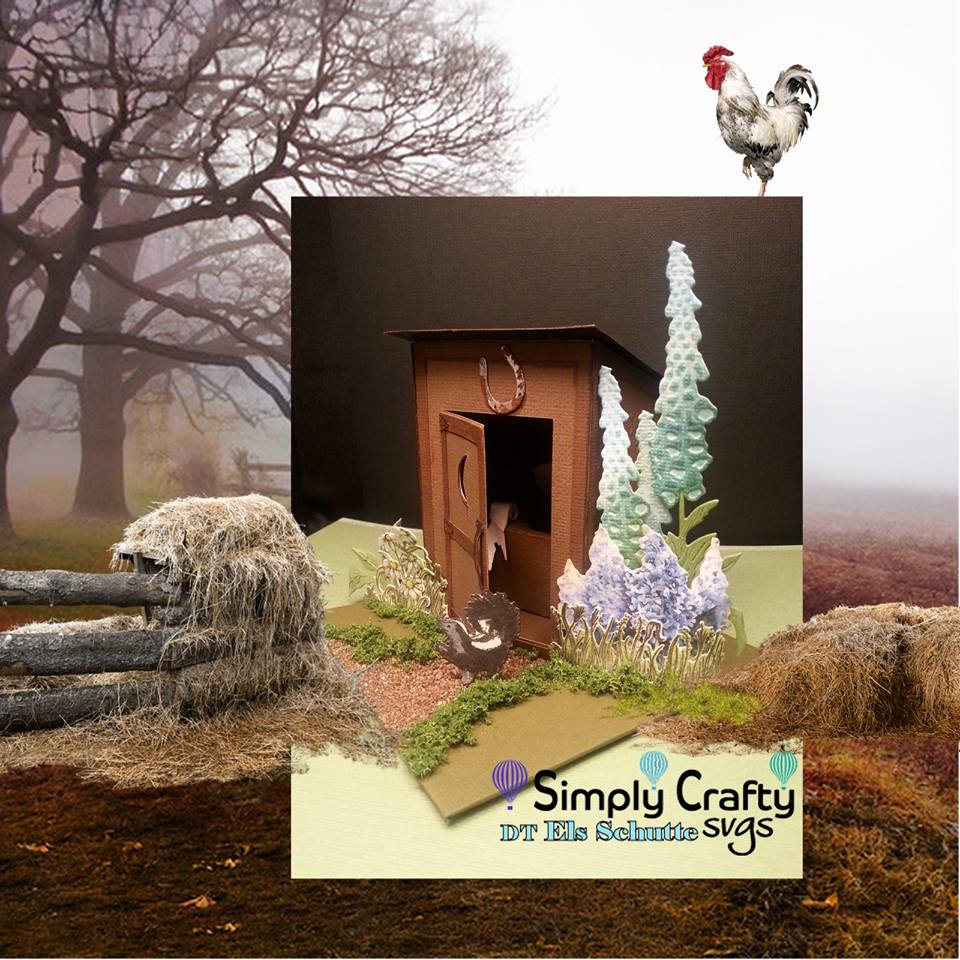
This Wonderful Outhouse was created by our DT member Els!! Use the Outhouse SVG File to make a fun and unique gift and box. The outhouse door open to reveal an optional toilet bench insert with toilet lid and roll of toilet paper. Use it any time. This would be a great box to make for an outdoors man, hunter or camper.
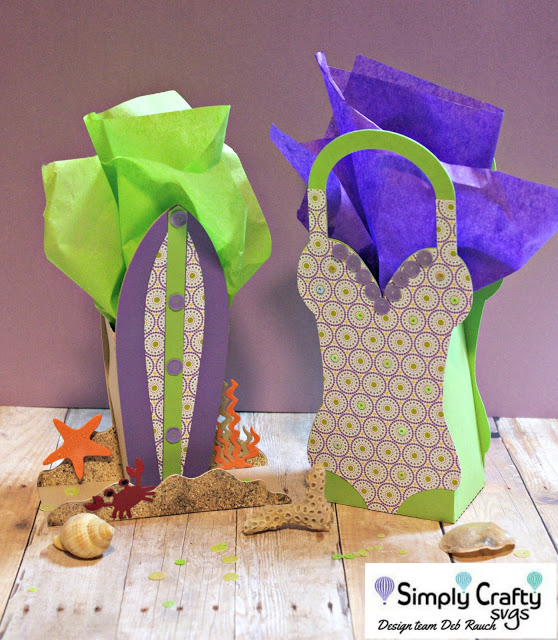
It’s that time of year when everyone is swimming and surfing. Soo….why not make some treat boxes for your son’s or daughter’s party using Simply Crafty SVGs Swim and Surf Box Set!
Today I used the girl’s version of the boxes. I have to say, these are the cutest party favors I’ve seen in a long time! The first thing I did was cut out the pieces for each box set. There are PDF instructions explaining how to put the boxes together.
I added some Kat Scrappiness sequins to the bathing suit to give it some dimension and shine. Its kind of difficult to see in the picture, but there are small lime sequins in the center of some of the circles. I also added a few sequins to the surfboard because that center line looked a little plain.
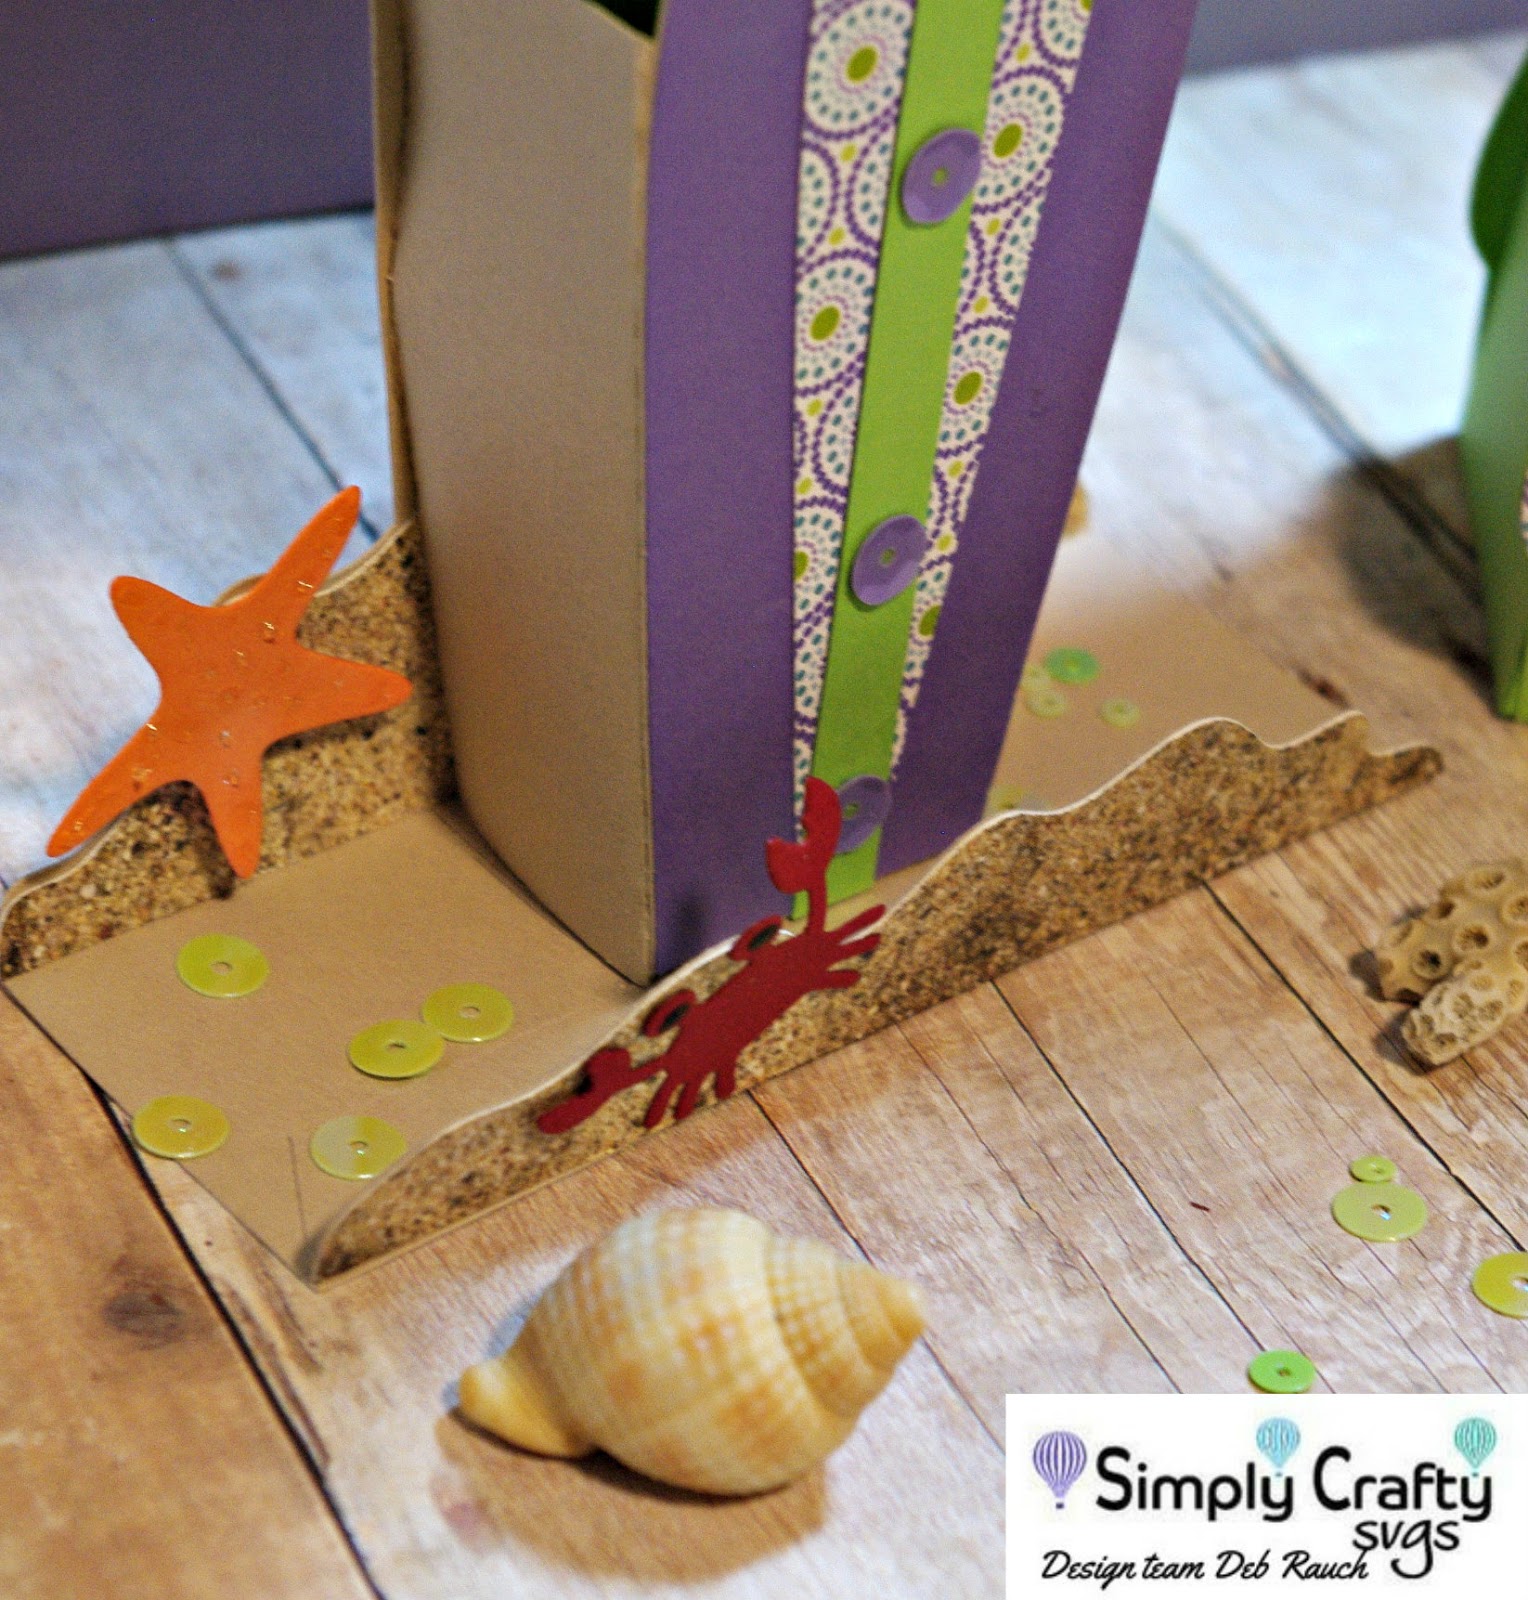
Here’s a close-up of the surfboard base showing the elements I added to give it a little more color and fun.
I hope I inspired you today to make something summery! Have a crafty day!
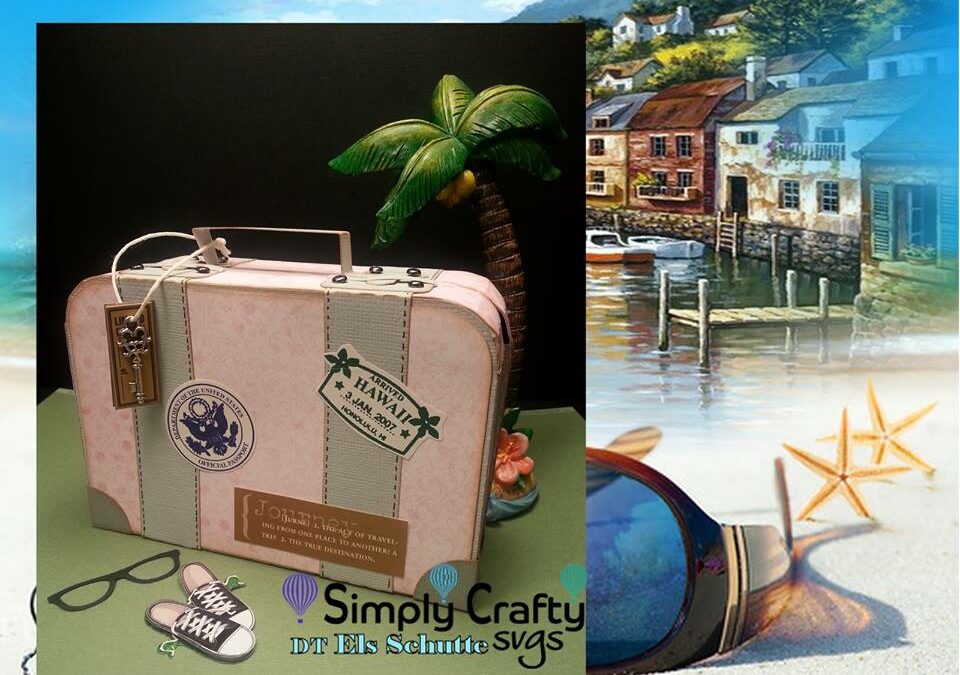
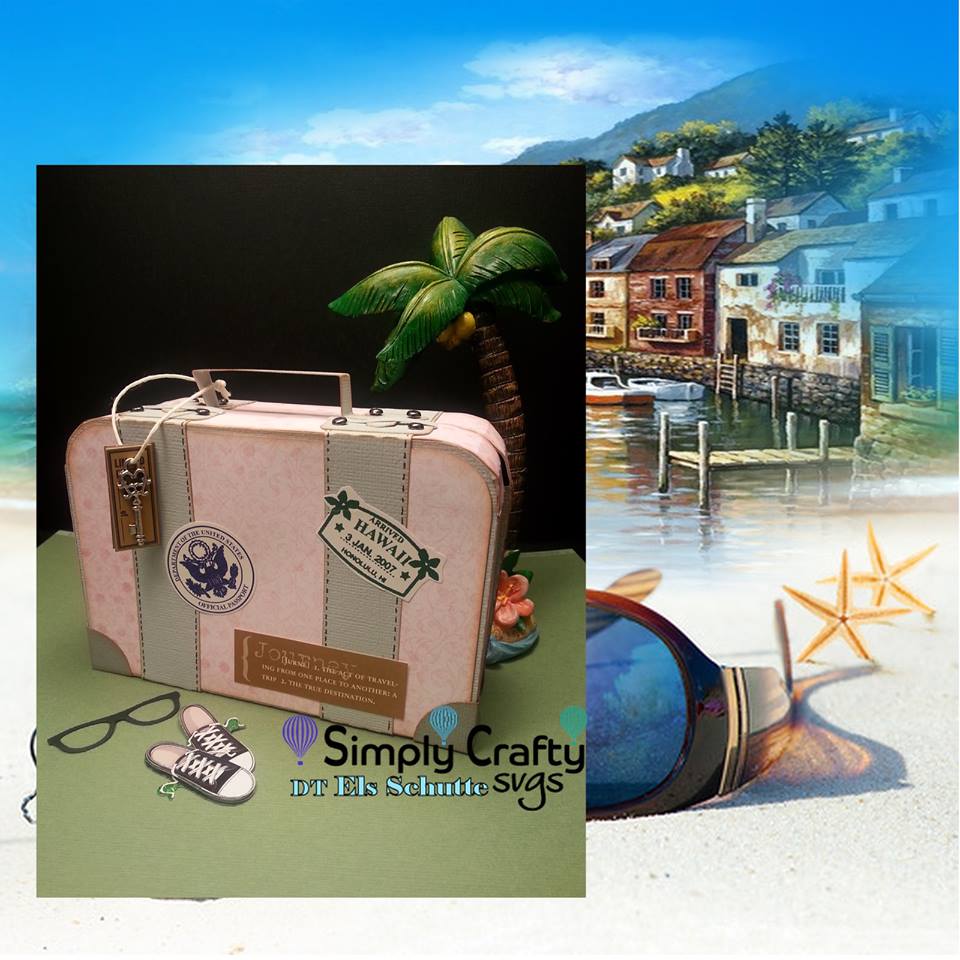
DT Els Schutte made this great Vintage Suitcase. This would make a great little gift box for your favourite traveler. Add a Gift card and some candy for their trip. Perfect Gift!
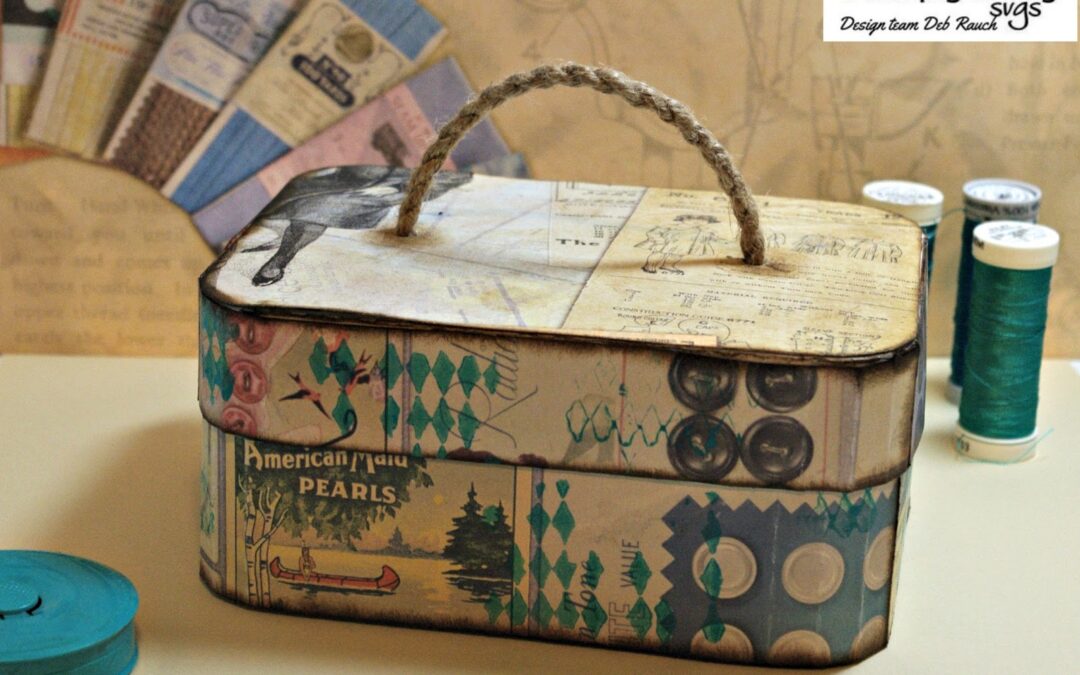
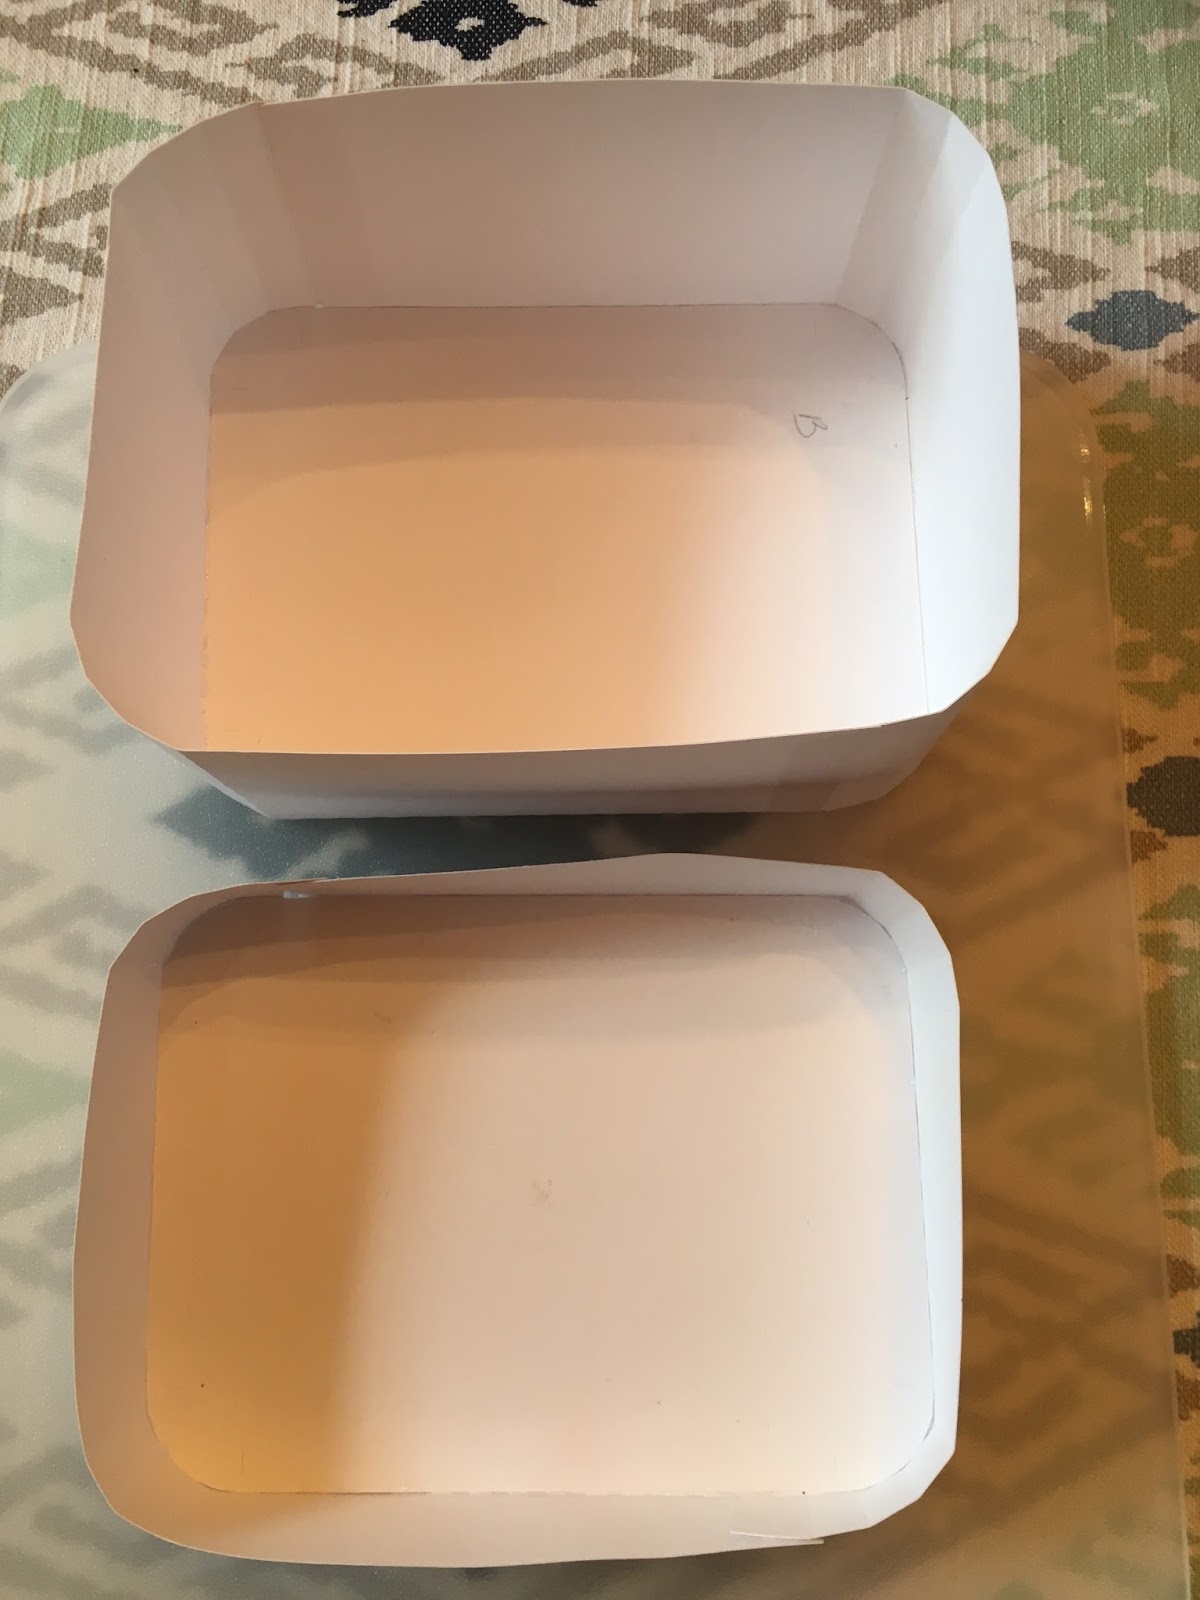
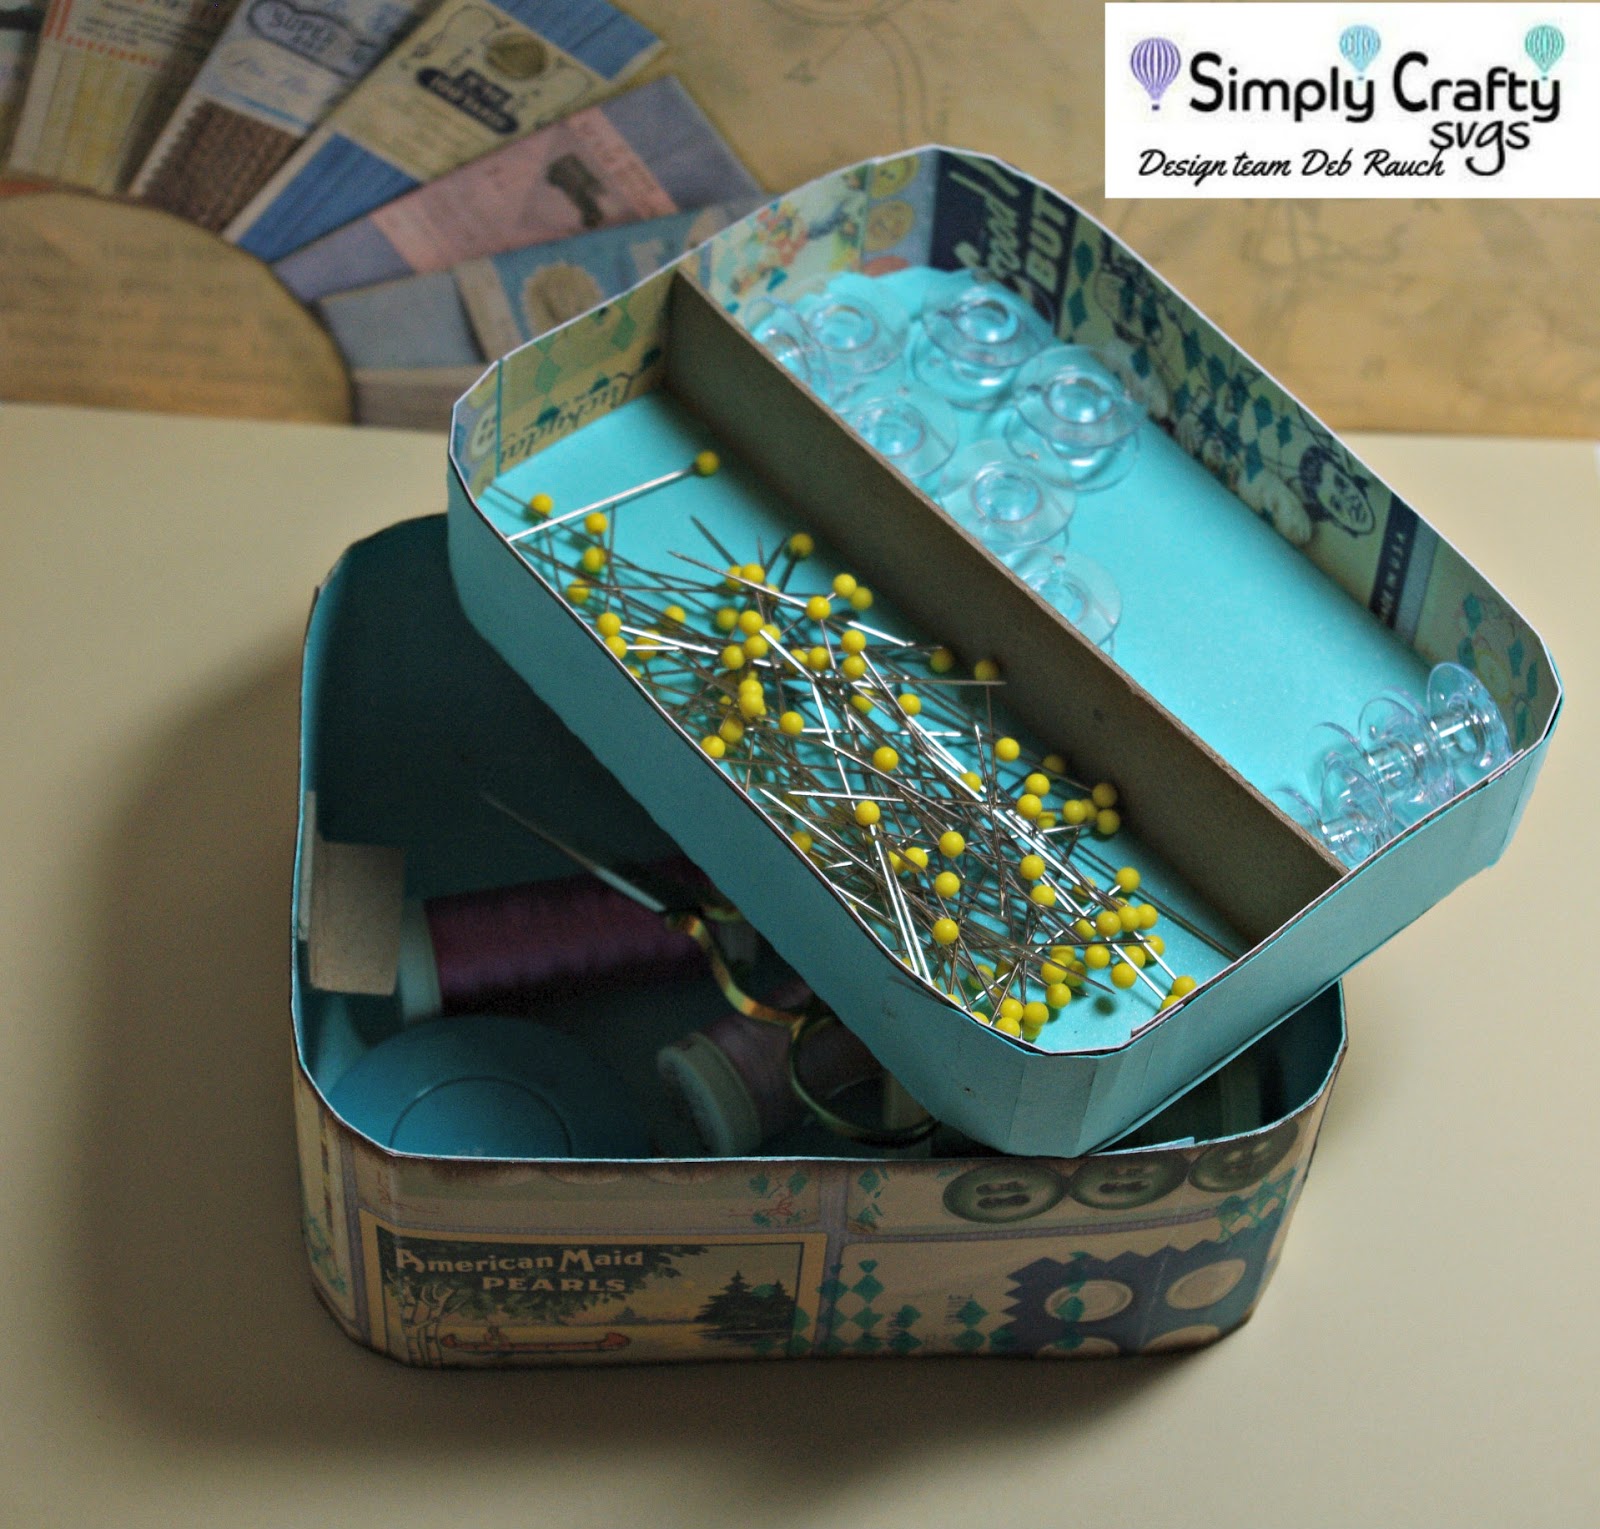
Hi there! I’m back today with my version of Simply Crafty SVGs Vintage Vanity Case. When I saw the Vanity Case file, the first thing that popped into my head was a little sewing box. I did made some modifications to this file to meet my needs. The first thing I did was cut out the bottom pieces. I knew I wanted the top to overlap the bottom so I enlarged the top pieces just a tinch. For the inside tray, I decreased the top piece a small bit, but it actually took about 3 tries to get it right. With trial and error, I got all the pieces cut, put together, and they fit like a glove! It’s a good thing I have patience haha.
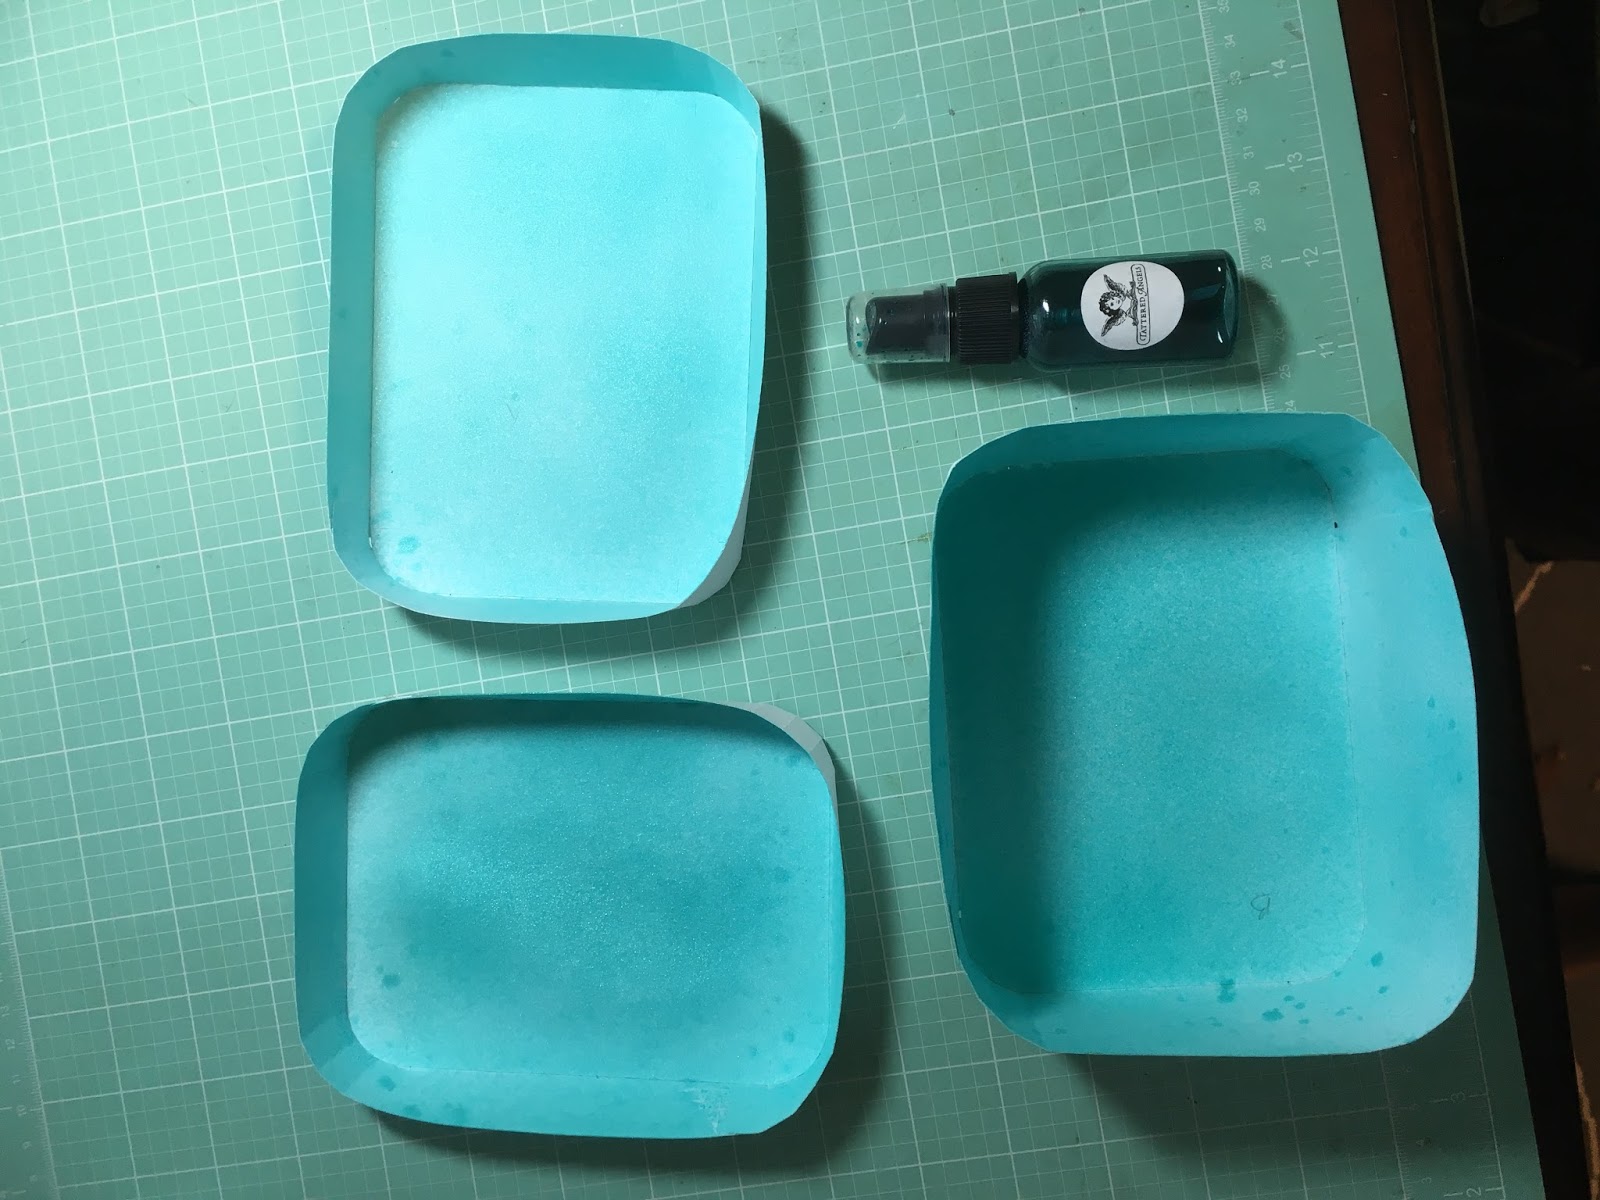
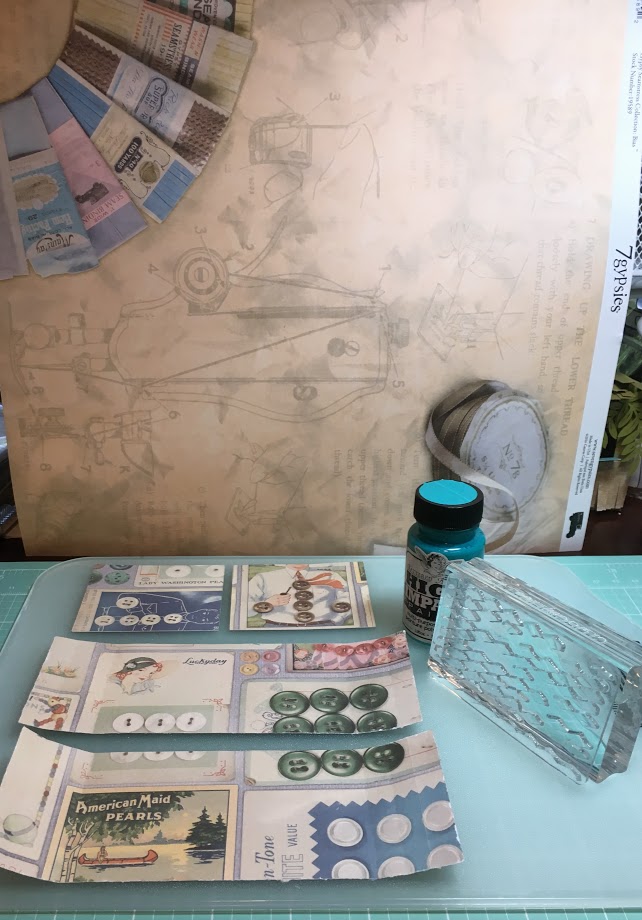
Now that I have all the pieces sized correctly, I wanted some color on the inside. I sprayed the inside of all the pieces with Tattered Angels Glimmer Mist in Turquoise Blue. I just love using Tattered Angels Glimmer Mists as they give good coverage with a nice sparkly sheen.
Next up was the covering for the box. I had chosen two different sheets of paper by 7 Gypsies. On the bottom and the top side I used Gypsy Seamstress 12 x 12 Buttons. For the very top of the box, I used a coordinating piece of 7 Gypsies paper, Gypsy Seamstress 12×12 Patterns. I used my electronic cutter to cut out the top and bottom pieces, making sure to make the top piece a tiny bit larger so that it fits over top of the bottom. This paper is very thick so you have to set it to Cardstock 120 lb. to get a good cut.
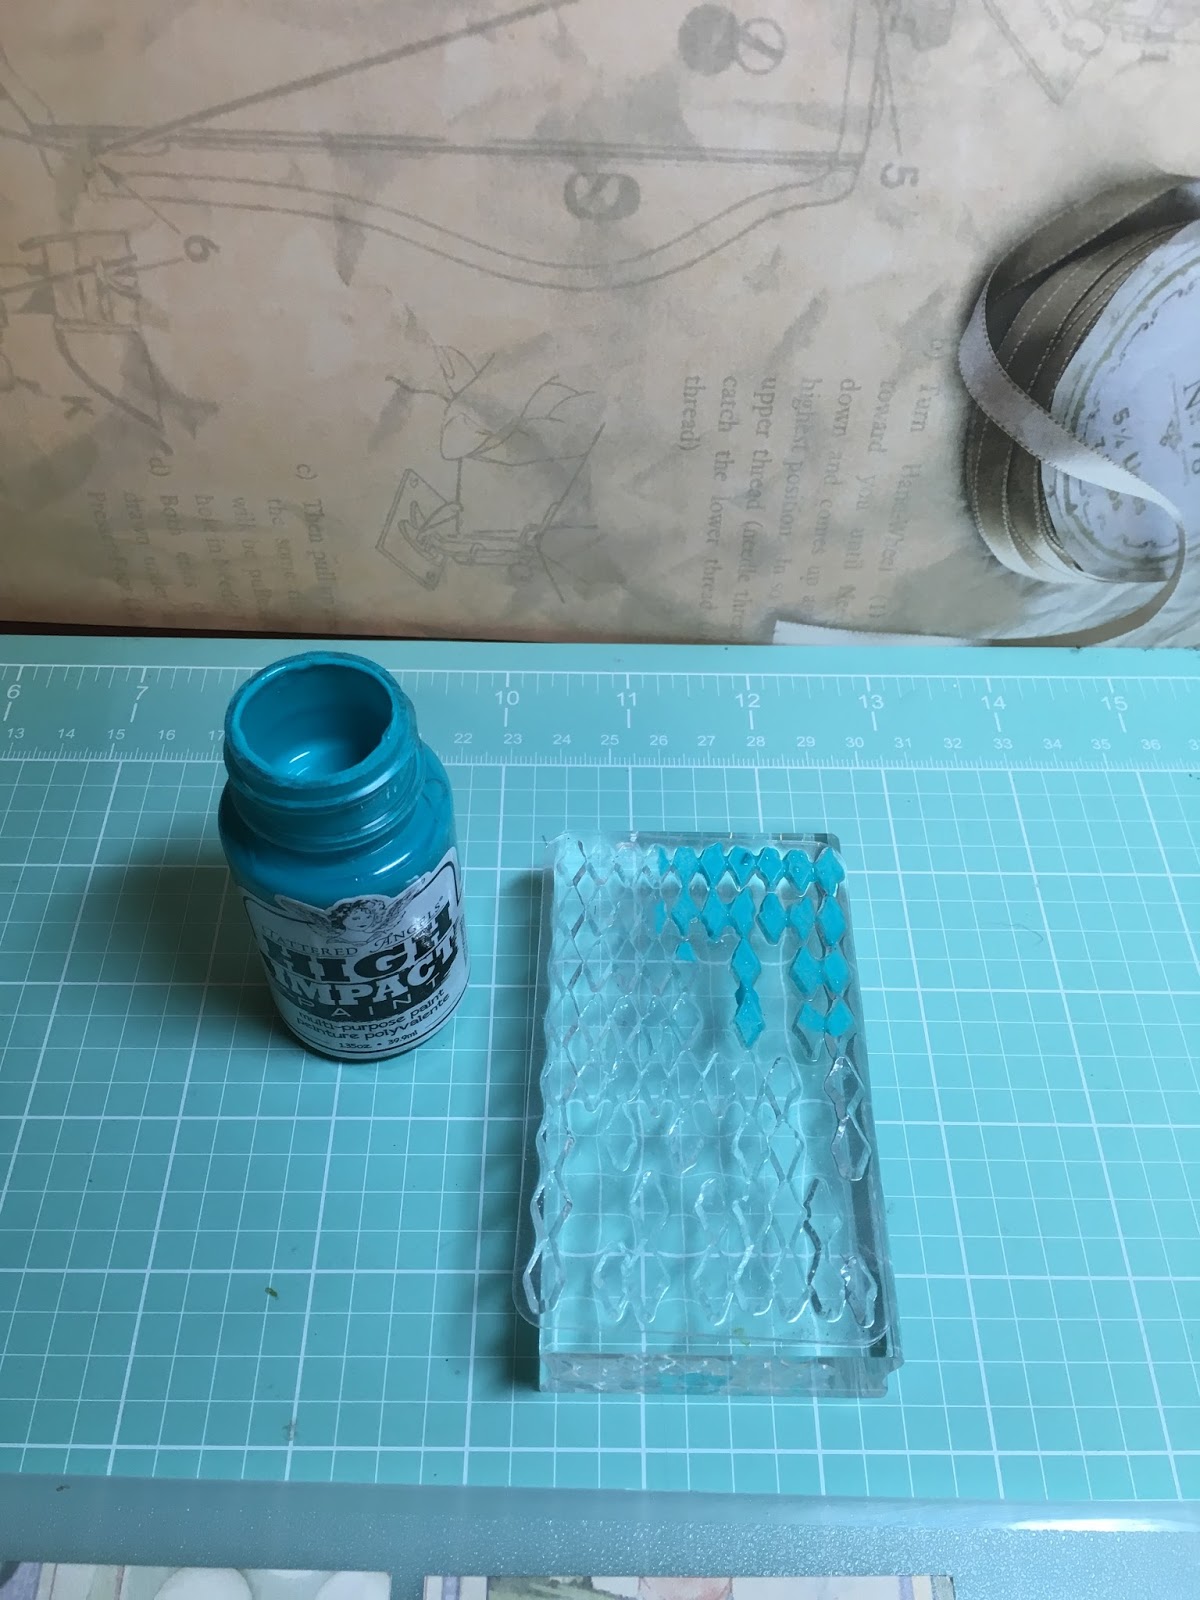
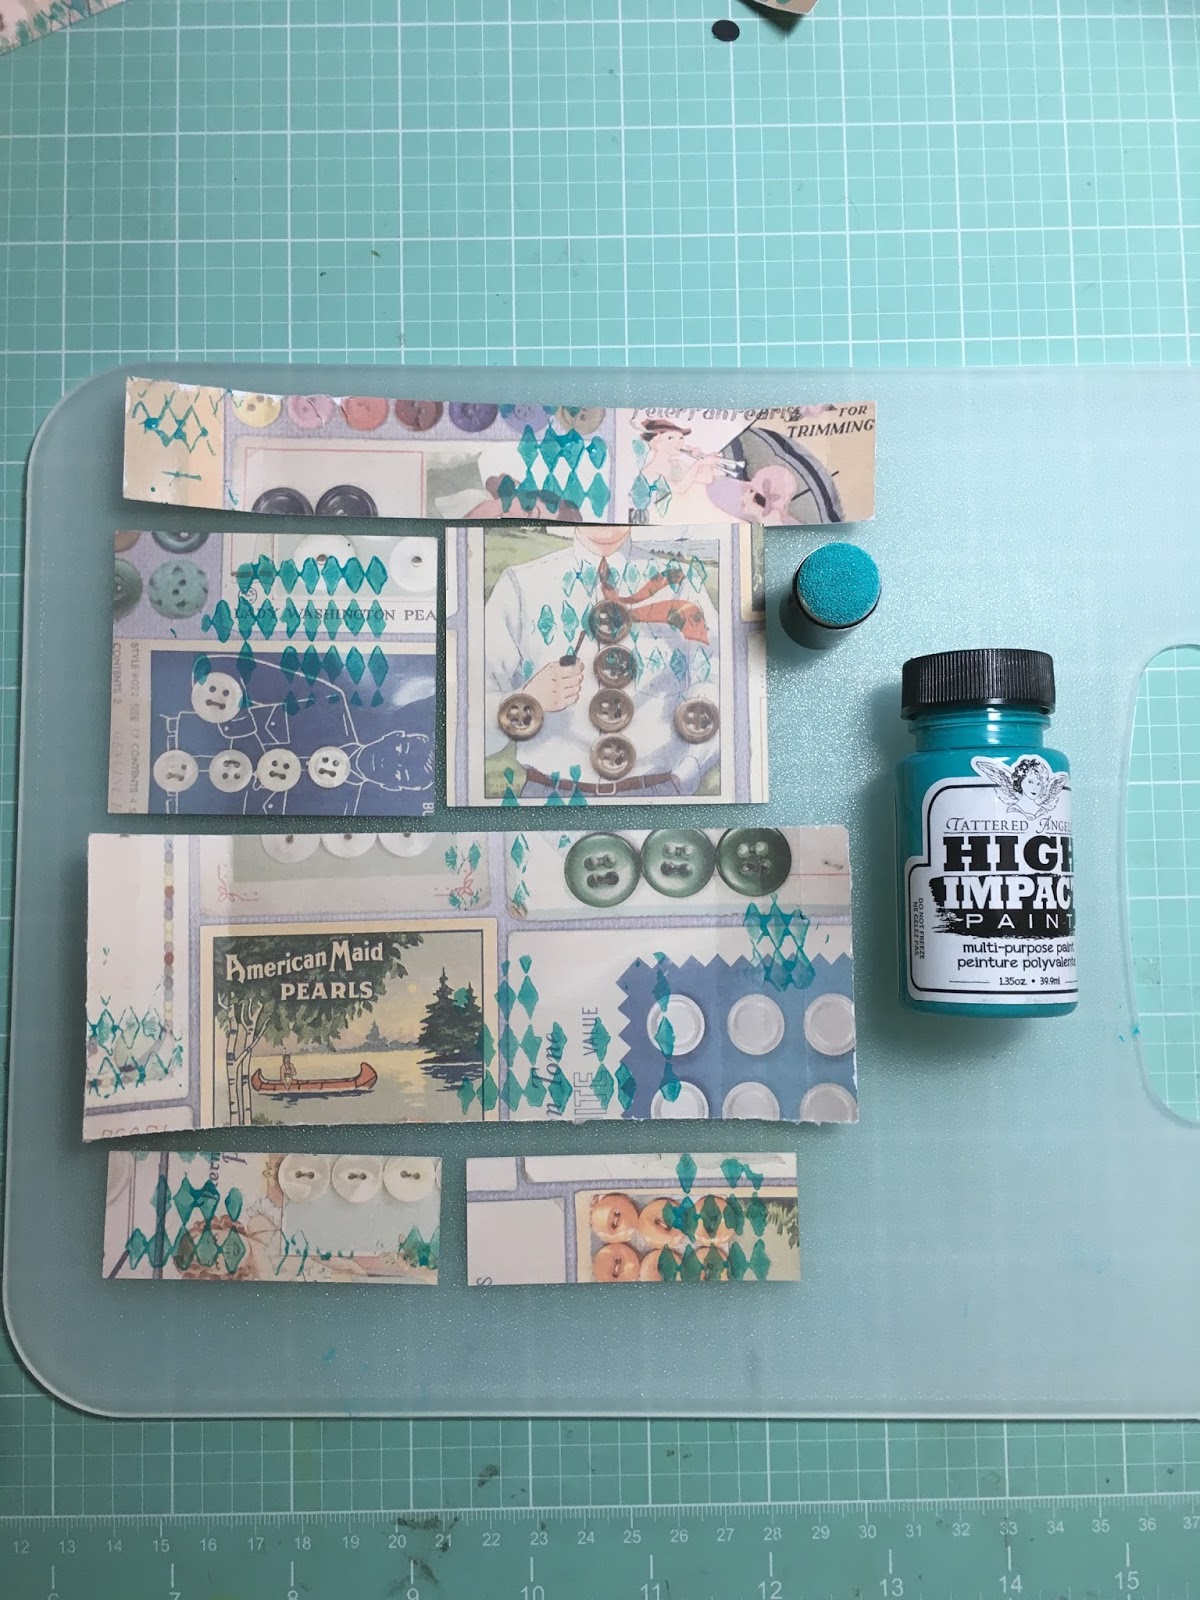
At this point, I felt like the cover pieces needed a little color and texture. I got out my Dylusions Basic Background Stamps and chose the diamond stamp, and for color, I used Tattered Angels High Impact Turquoise Paint. I used a small dauber and applied the paint to the stamp and just stamped randomly on the outside pieces of the box.
I then glued all the cover pieces onto the box. For the pull-out tray, I cut the small pieces for the top and applied them inside the tray piece. I also added a very heavy piece of chipboard to make a separation in the tray. For the tabs to hold the tray in place, I used the same heavy chipboard, cut a small square, and folded it in half. I glued one half to the side of the box. To make the tab stand up, I added quite a bit of hot glue underneath the “tab” portion that sticks out.