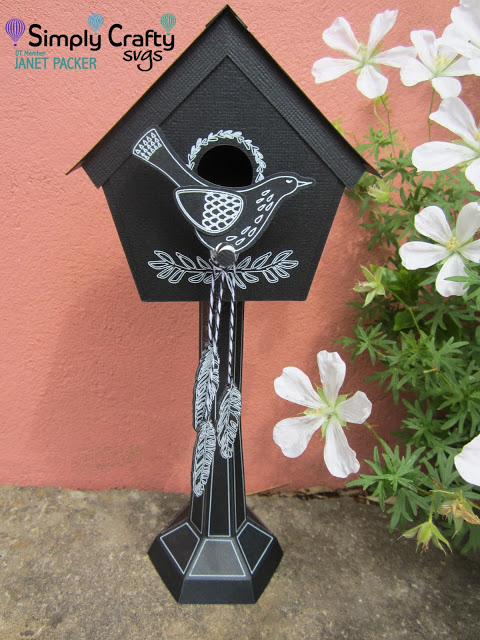
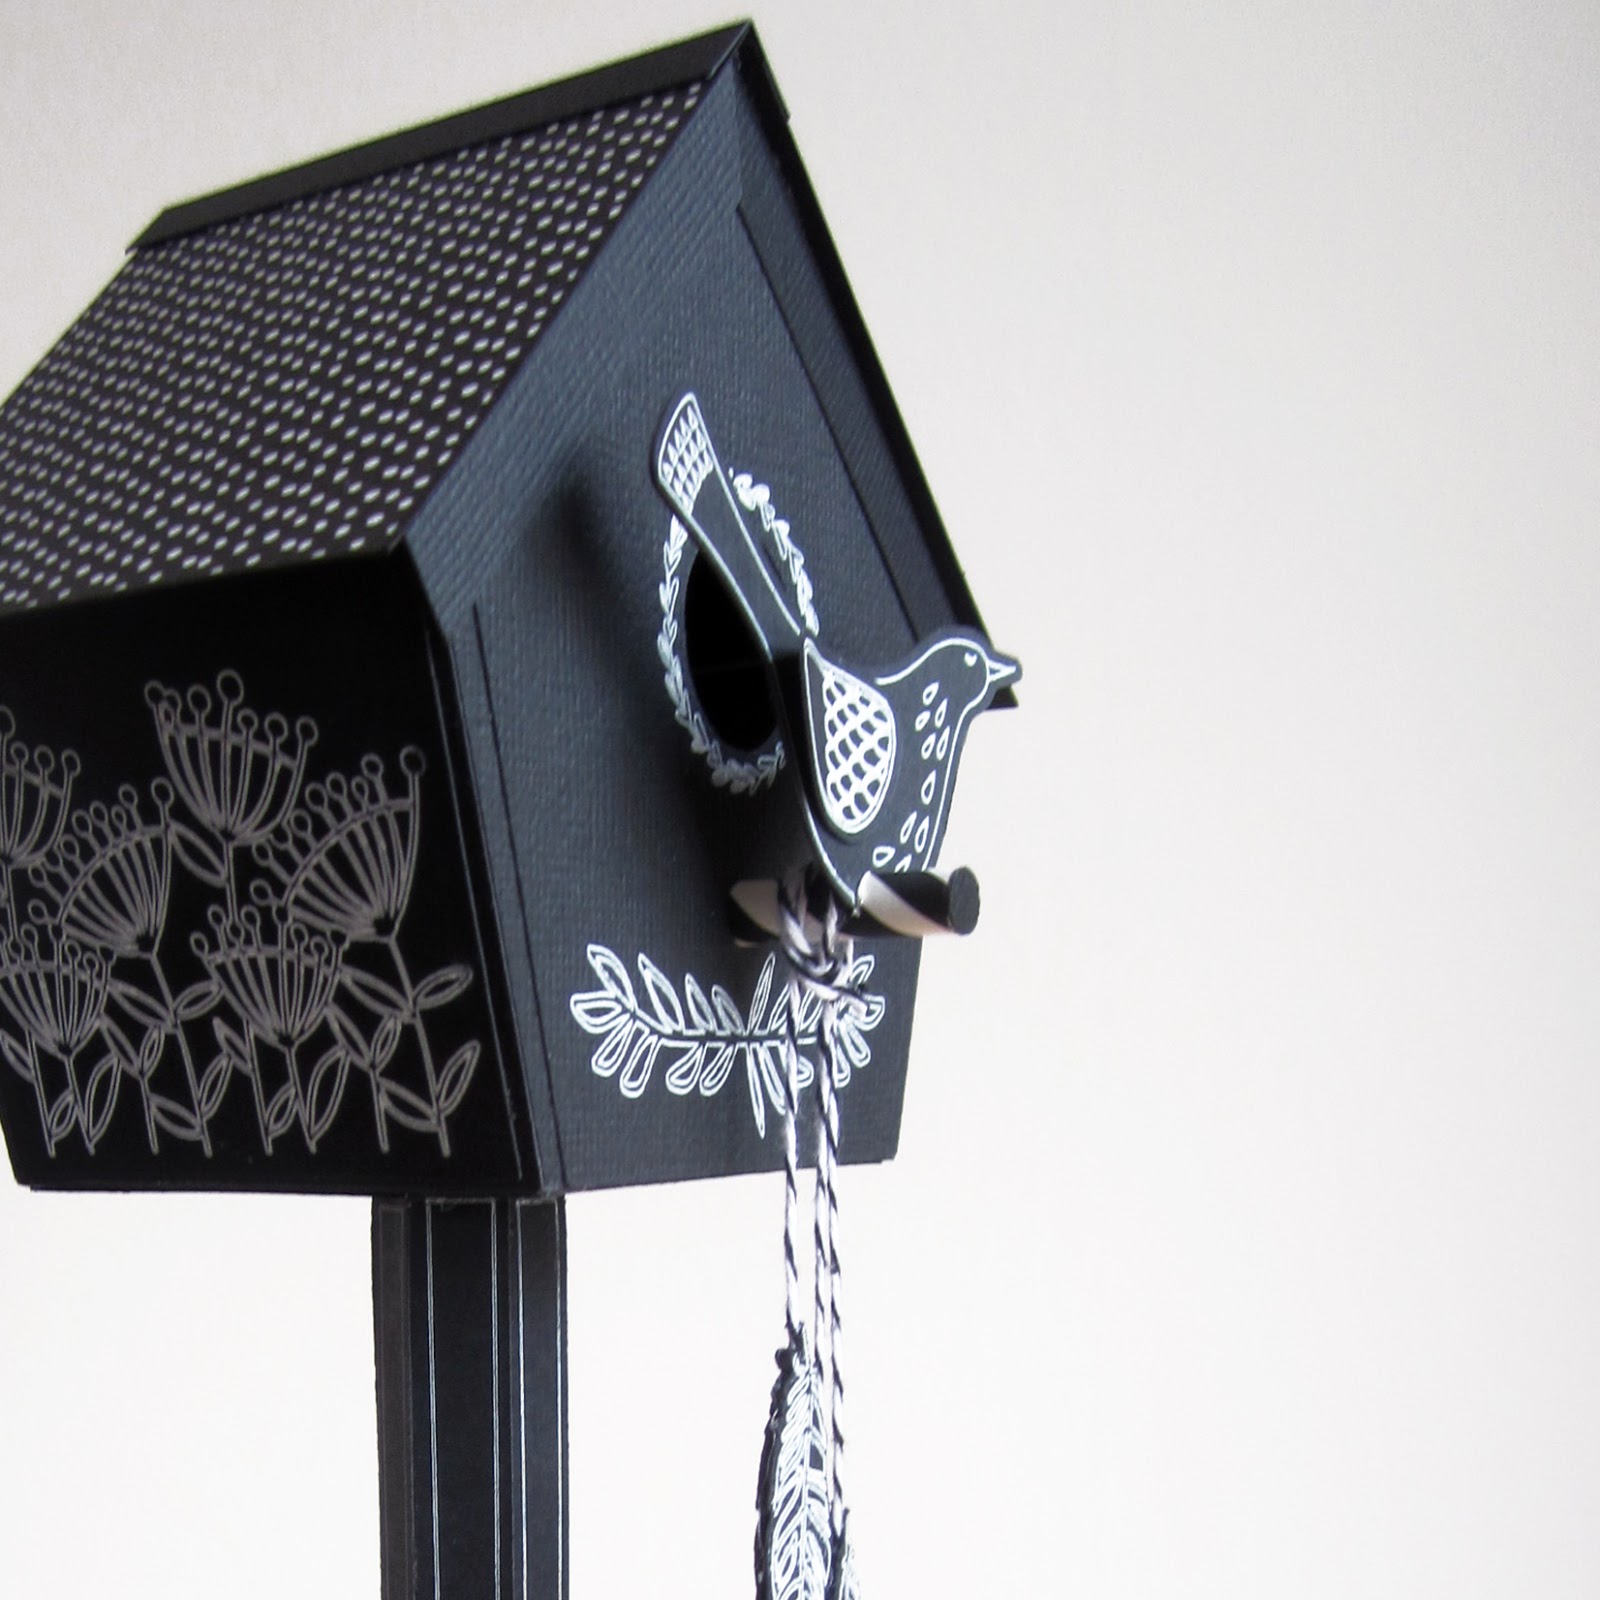
Hiya, Janet here with my first ever Design Team post for Simply Crafty SVGs. Today I have a fun little chalkboard birdhouse made by combining the Bird House Box and the Holiday Lamp Post. It’s made almost entirely from black cardstock and decorated with white gel pen. I’ve included details on how you can make this ‘hybrid’. I used a Silhouette Cameo® 3, but of course these svg files can be used with other desktop die cutting machines (details here).
MATERIALS: Black AC Textured Cardstock White Uni-ball Signo Gel Pen Black & White Baker’s Twine Black & White Patterned Paper (Shine Bright from Kaisercraft) Black & White Paper Straw Beacon 3-in-1 Glue Silhouette Pen Holder Silhouette Cameo
Adding a Perch
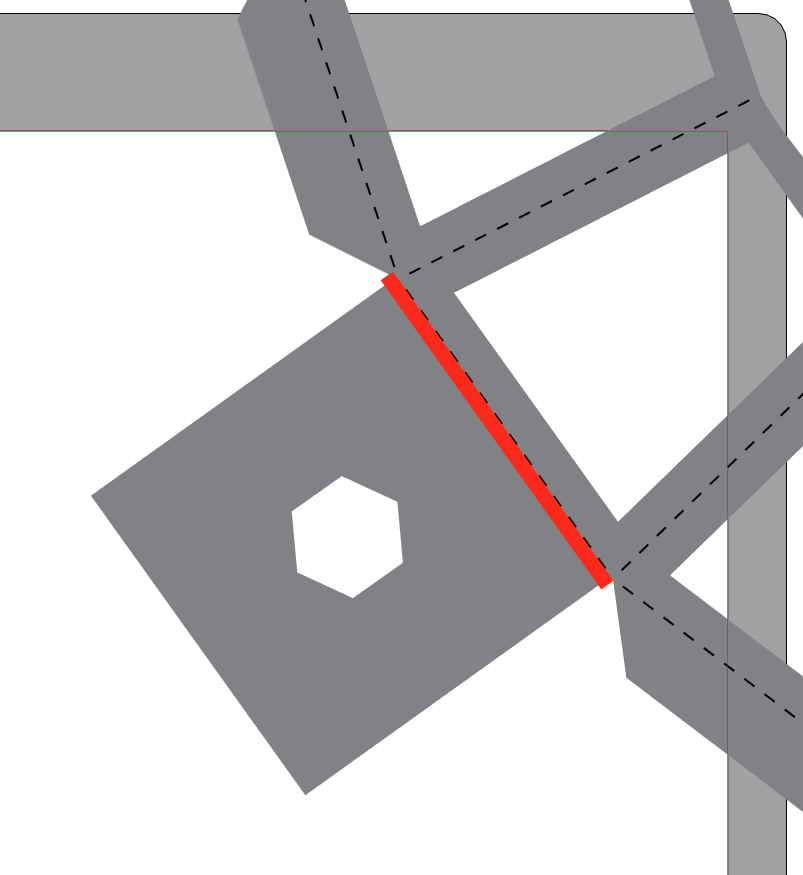
Prior to cutting add holes to the birdhouse file to allow a perch (paper straw) to pass through from front to back. Also added corresponding holes to the front and back panels. It is easy to match them up by measuring the diameter of the straw and drawing a circle in the software of the same size. Then temporarily position the panels in place on the main piece on the virtual cutting mat, and copy the hole to the correct position on all of the pieces. Make it an integral part of the design by selecting each part and one copy of the hole, and then making each into a compound path.
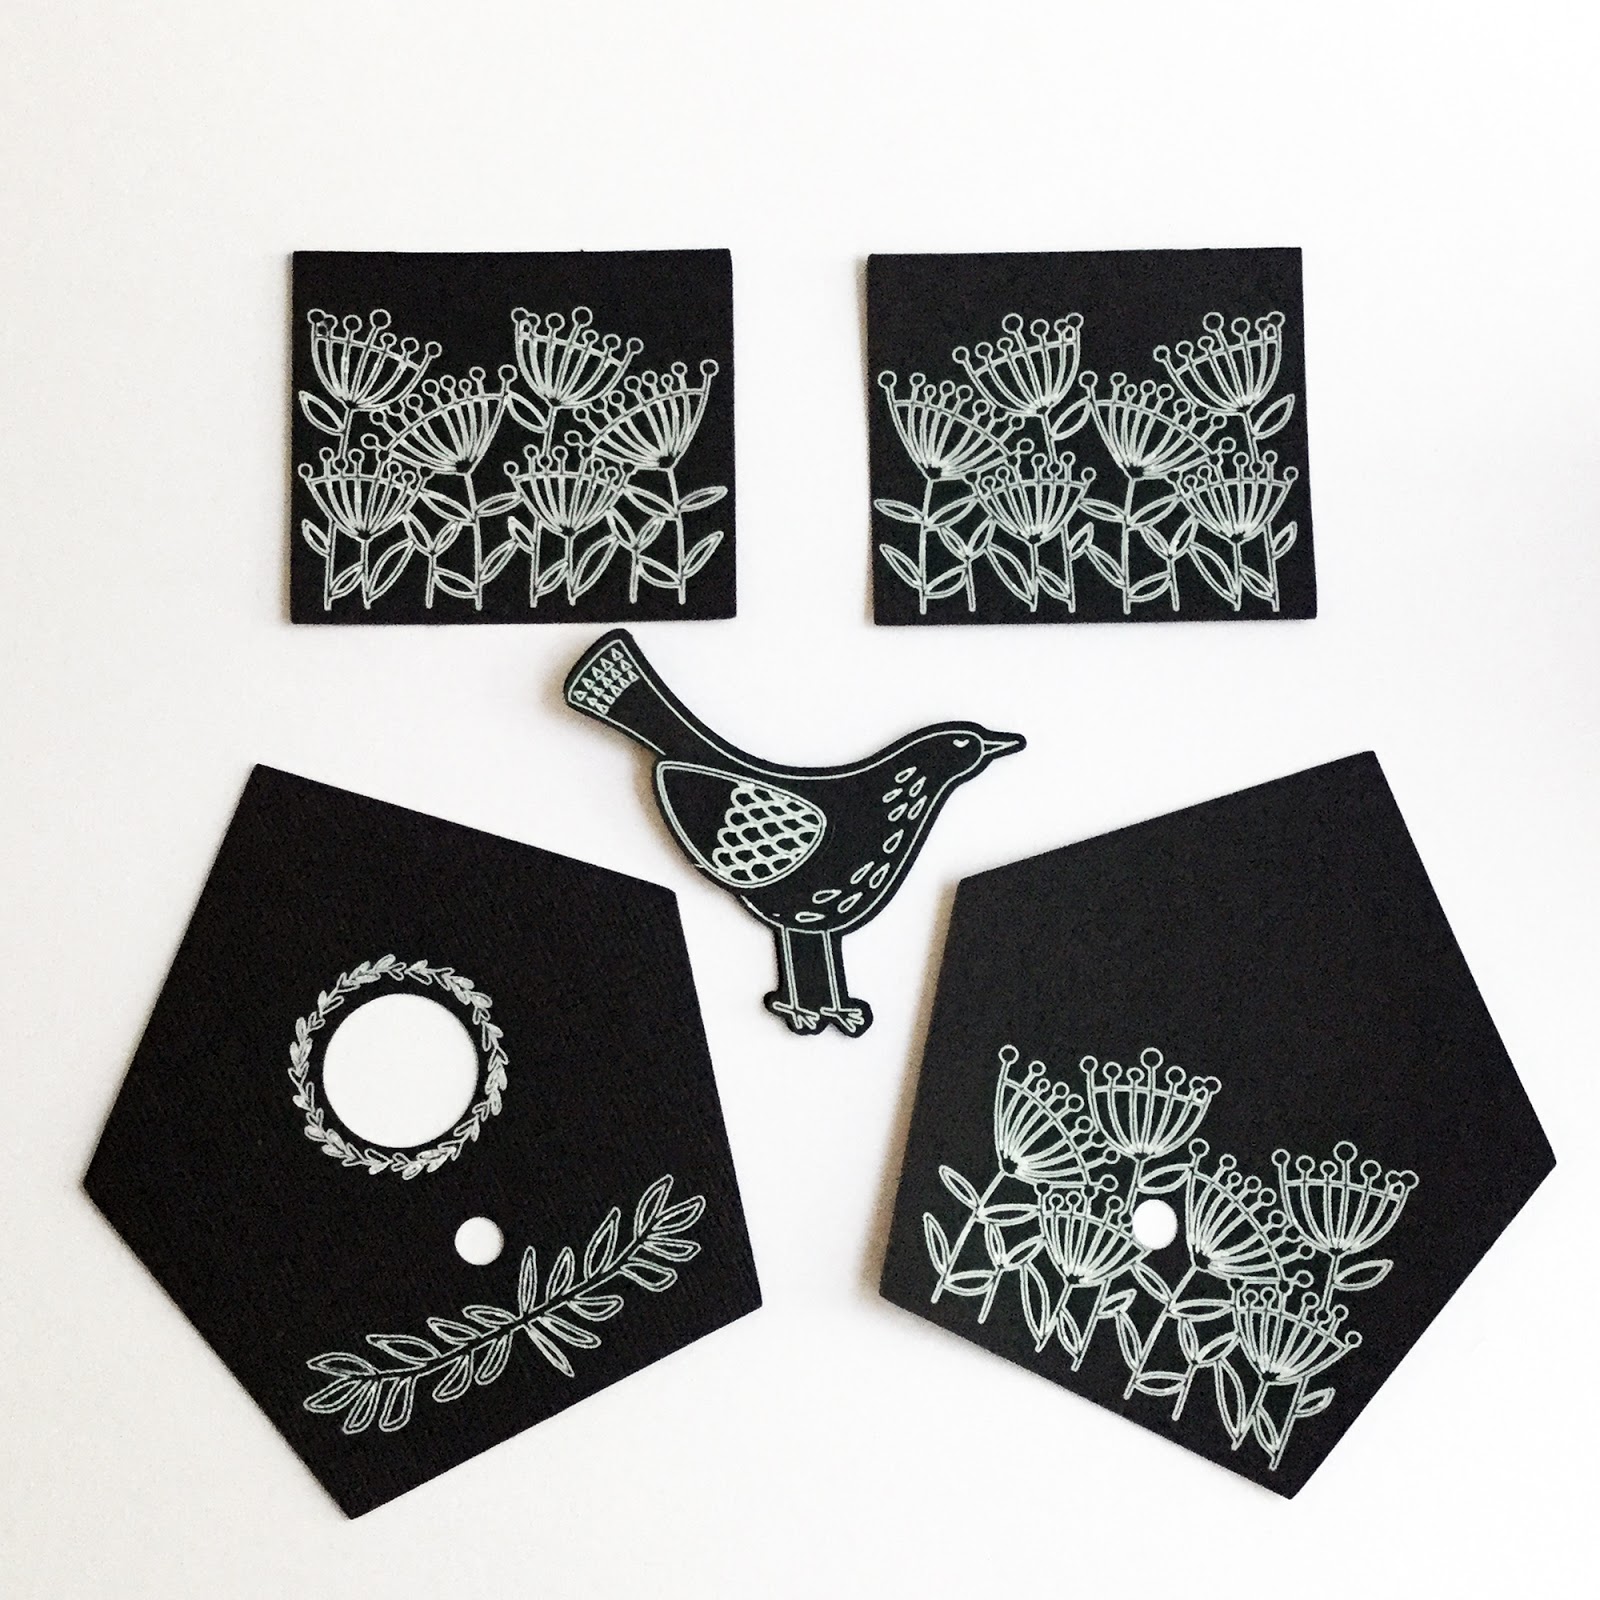
Decorating the Birdhouse
The main birdhouse makes extensive use of the Silhouette Cameo’s sketch facility to draw the decoration using the Silhouette Pen Holder and my favourite white gel pen with designs from the Silhouette Design Store (listed below).
The Cameo 3 has a dual carriage and so can use a pen to sketch in one holder with the AutoBlade in the other. I usually do the sketching first with a pause to let the pen dry before continuing to do the cut – no smudges that way!
Constructing the Birdhouse
The construction part is straightforward as Sandy includes a set of instructions in pdf format with each of her files.
I also recommend following Sandy’s advice for crease lines, and use a shallow continuous cut instead of the dashed lines (these files are supplied with both).
Using textured cardstock gives a variety of surfaces; use the rougher side facing out for the main parts, and the alternate with the smoother side for the sketch work on the panels.
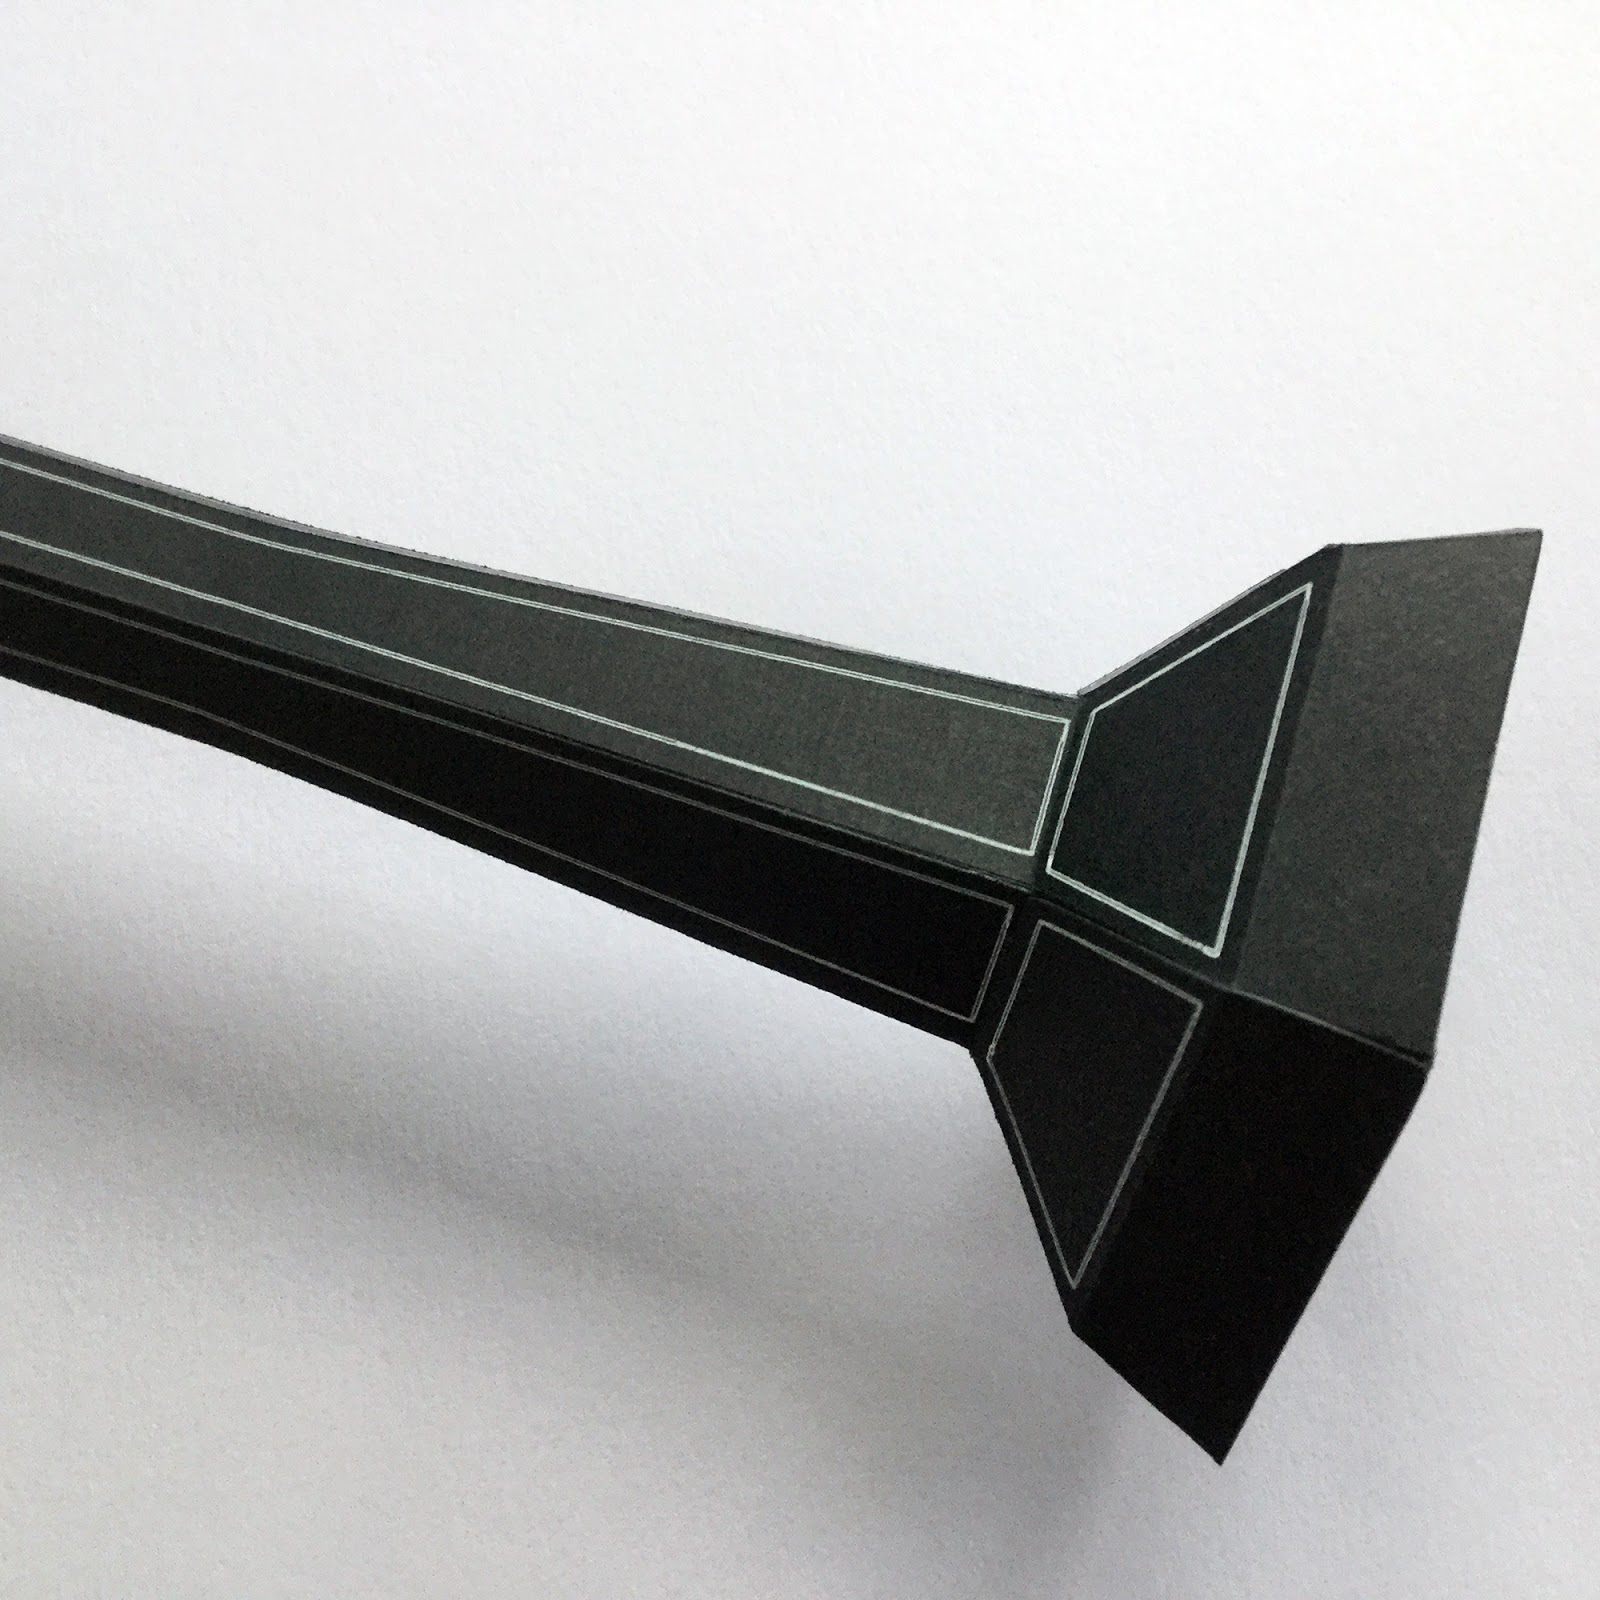
Making the Stand
Use the pole and base pieces from the Holiday Lamp Post to make a stand for the birdhouse. A pinstripe line can be added to the pieces by using the polygon line drawing tool, adding a line just inside the outer faces. Then use the sketch function to sketch the lines before cutting out the pieces.
Once the pole and stand are constructed and attached to each other use the base from the lantern part to attach them to the birdhouse. Simply use the knife tool to ‘remove’ the mounting base from the lantern.
Push the tabs at the top of the constructed pole piece through the hexagonal hole, bend them over and adhere them to the mounting base. When it is firmly stuck, adhere the new top to the underside of the birdhouse.
Adding the Bird
Save the waste circles cut from the birdhouse and adhere them to the ends of the trimmed straw. Then cut a slit in the straw with a serrated knife. Carefully trim the legs off the bird’s body and push the bird into the slit. A blob of adhesive behind the bird ensures that the bird stays in place. Once dry push the perch through the holes in the assembled birdhouse and add more adhesive at the entry points to keep the perch in place and the bird upright.
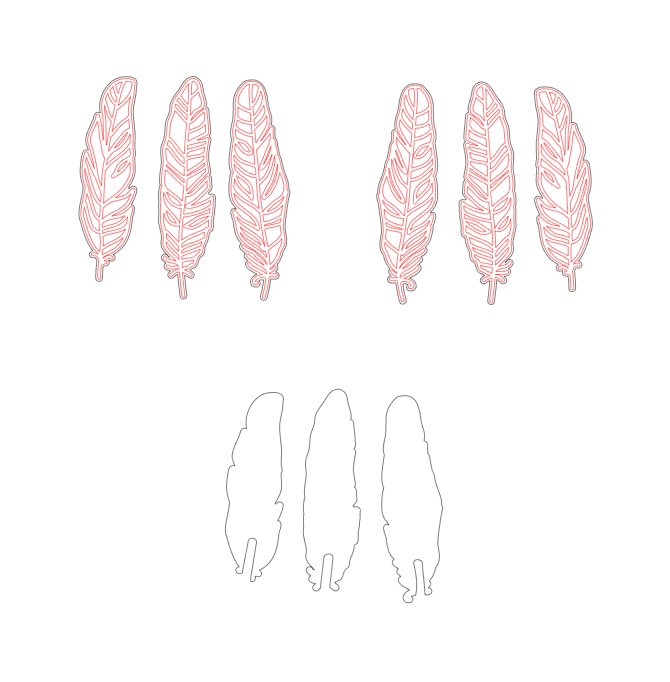
Feather Embellishments
Sketch and cut two sets of feathers, one the mirror image of the other. Make an additional set with a slit at the quill end, so that the feathers can be layered back-to-back with a piece of twine entrapped between the layers.
Finally tie the feathers onto the perch to hang below the birdhouse …
… and that completes the chalkboard birdhouse.
It’s such fun to combine files to make something unique. I hope you’ll try it.
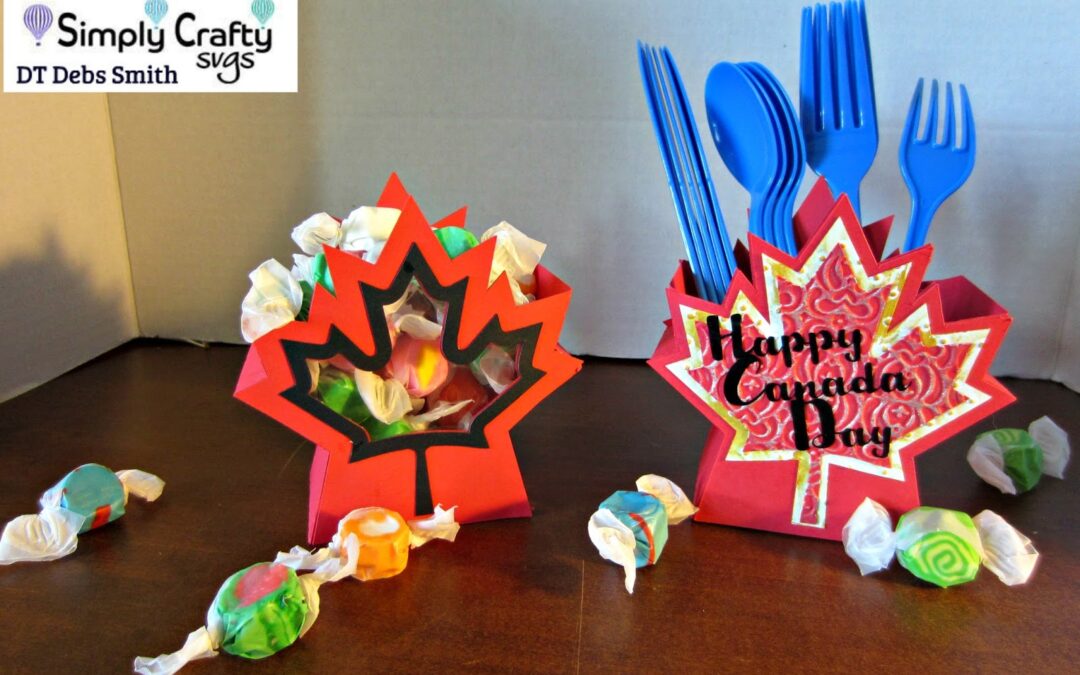
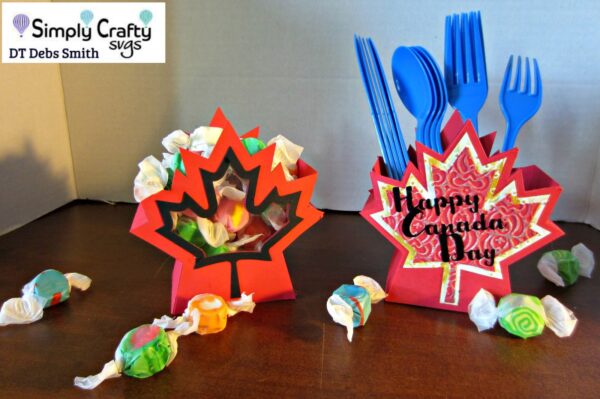
Hope everyone had a great weekend!!! Can you believe next weekend Canada celebrates 150 years old. Simply Crafty SVGs has these great boxes, Canada Day Box and Lantern and they are so easy to make I embossed the leaves and added Inca gold to make it pop. For the candy box I used transparent plastic, you could also use Vellum, that way when the candy is gone it can double as a lantern ( designed to be a lantern). These will be a great addition for every Canada Day Party!
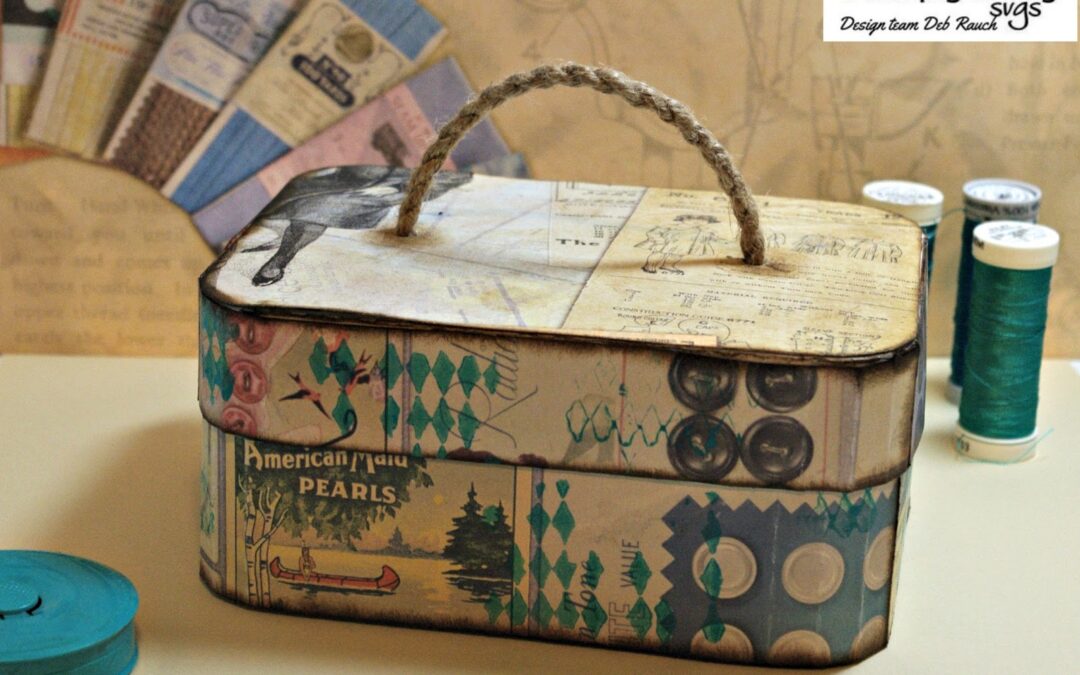
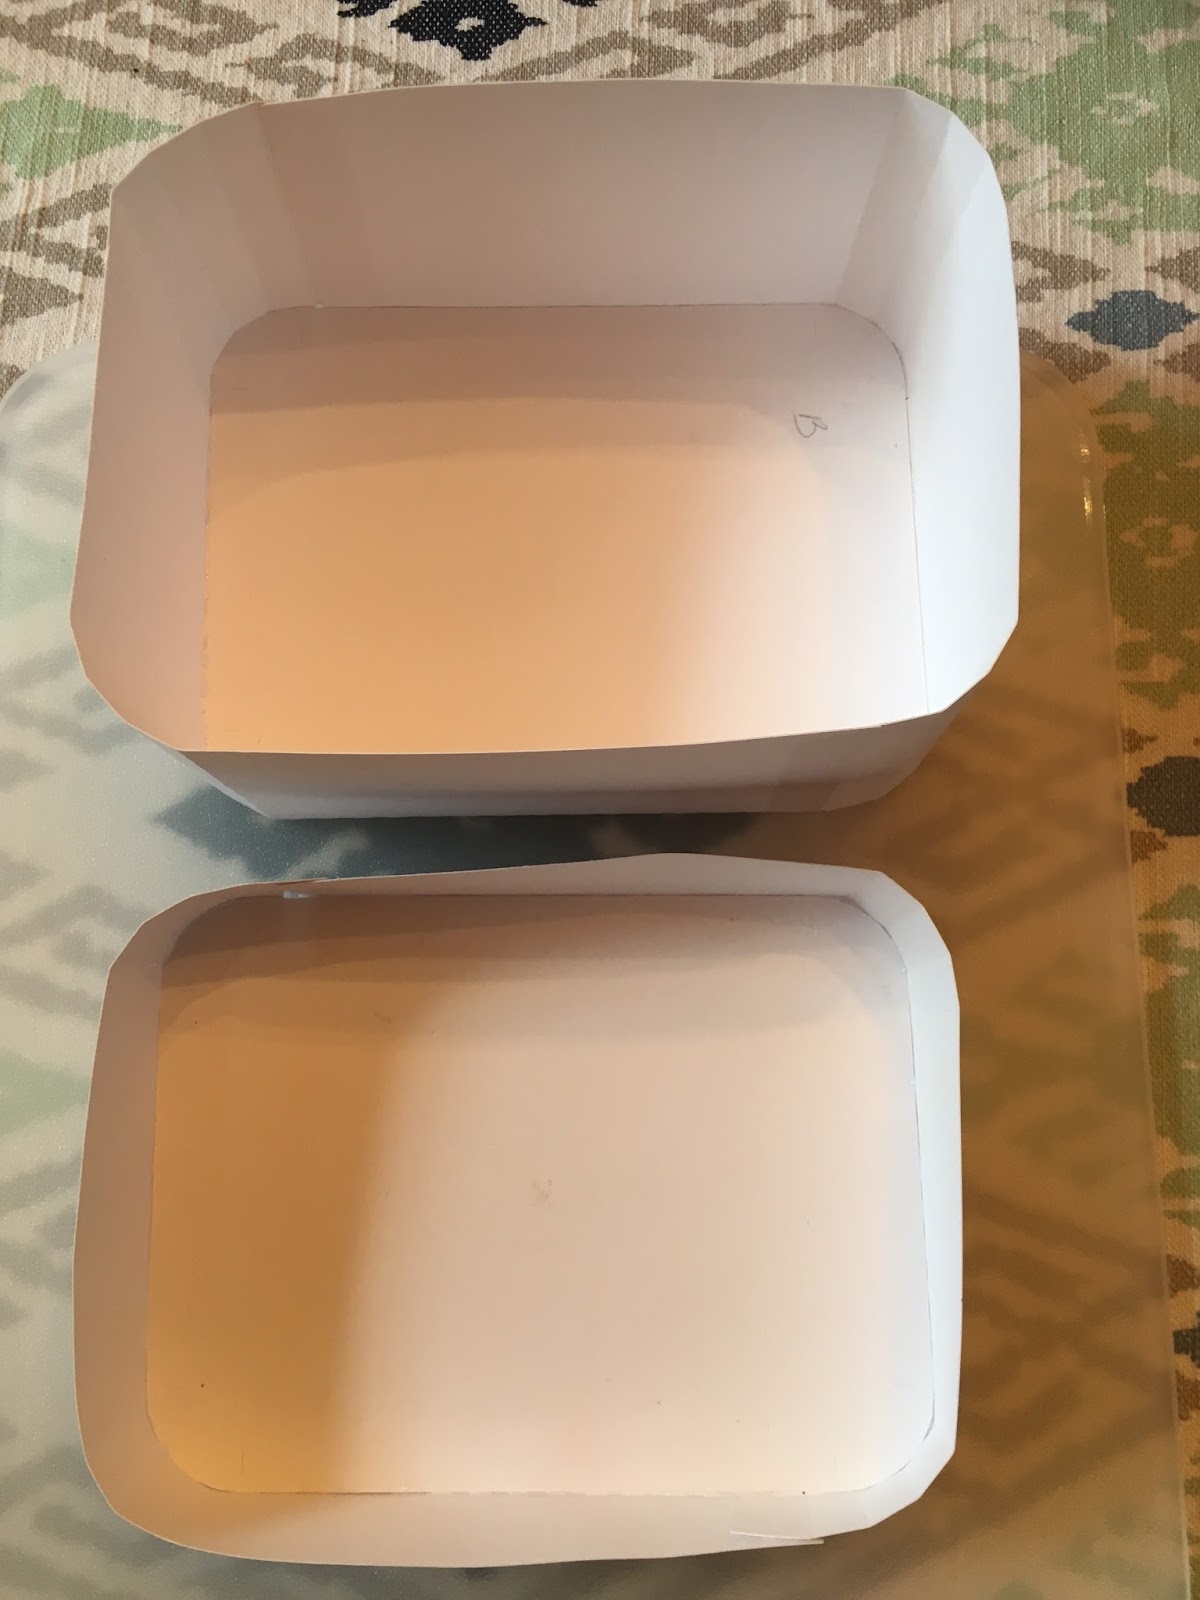
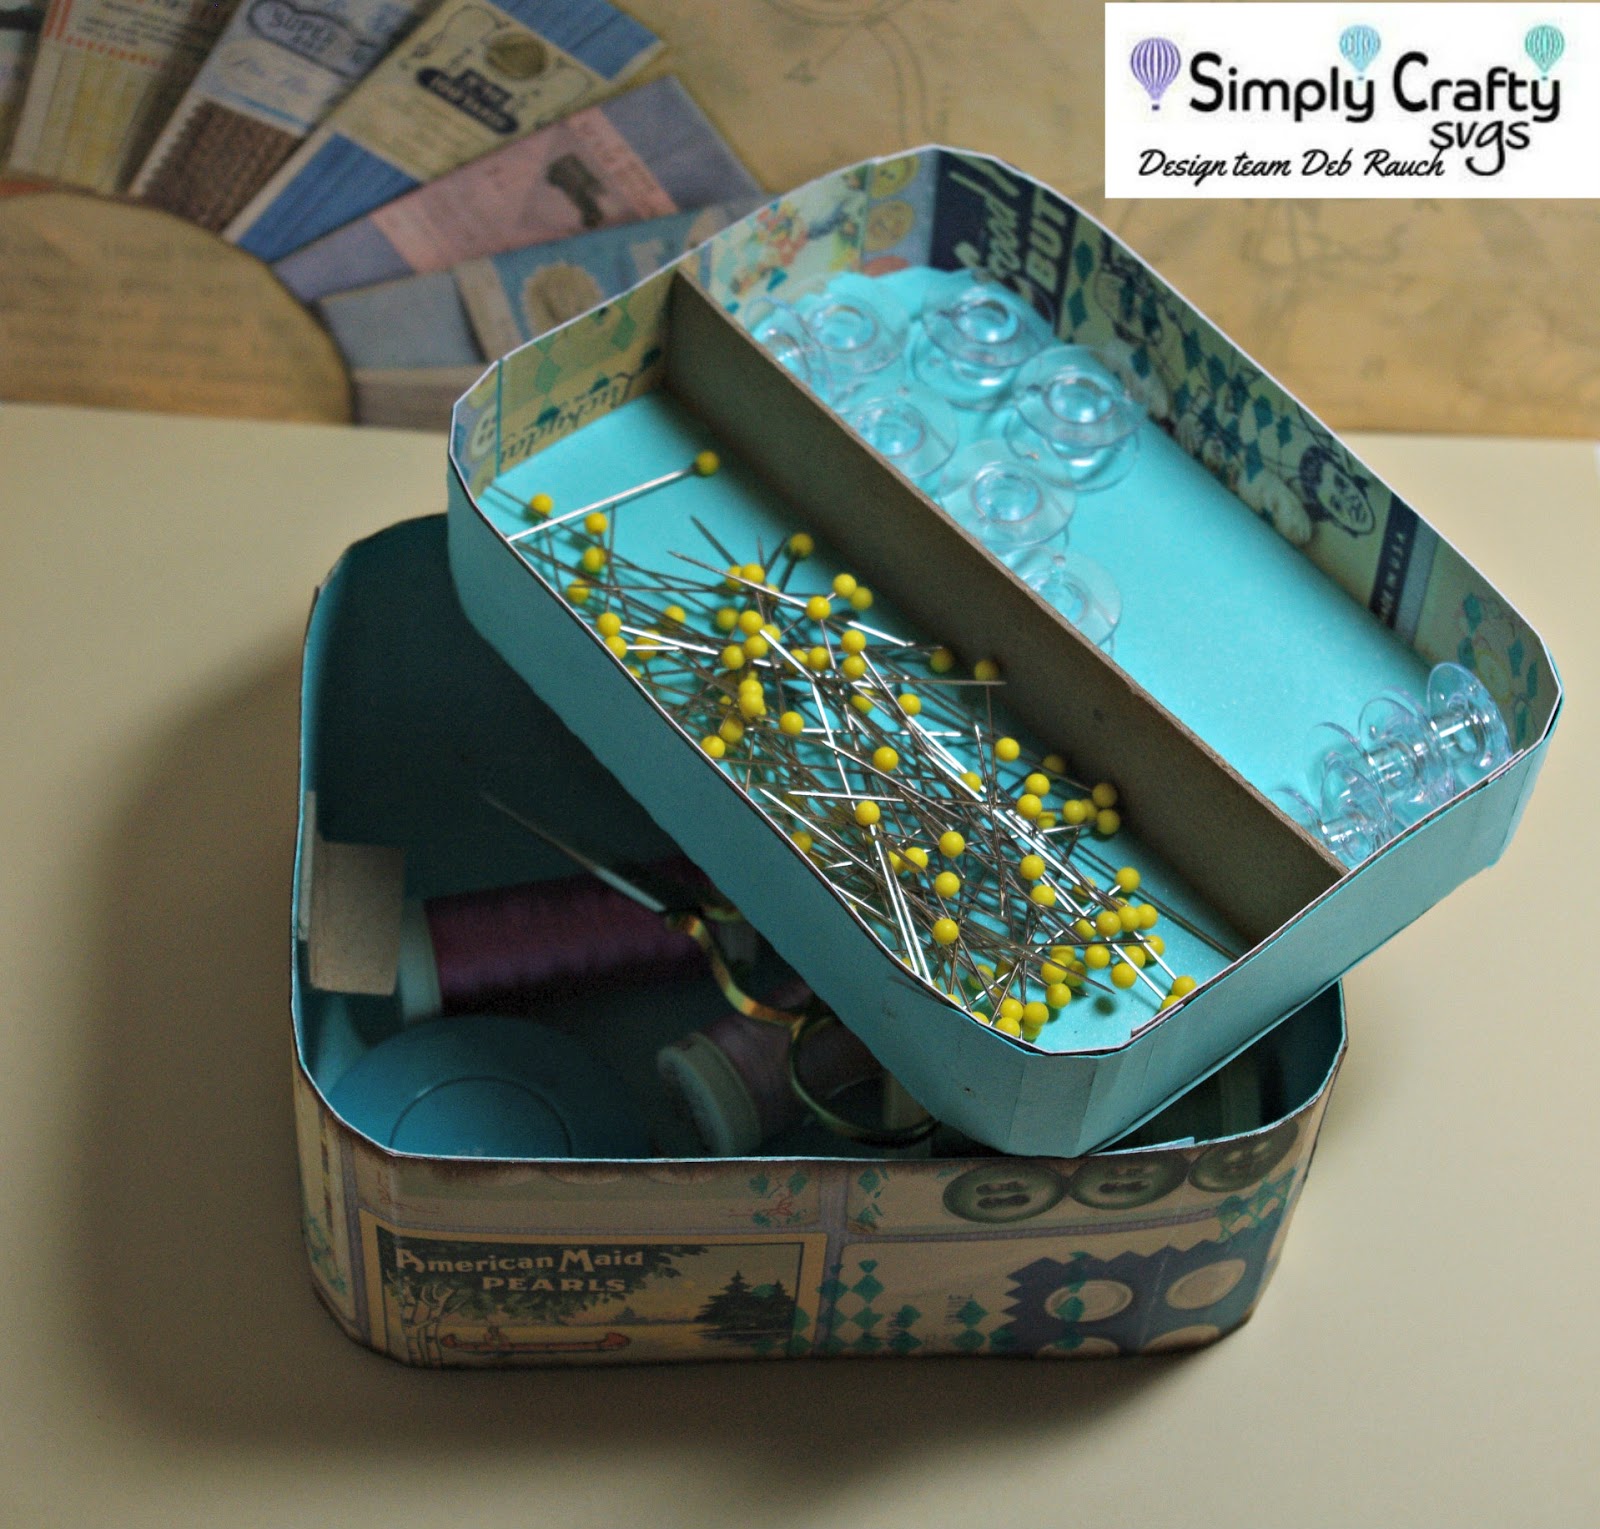
Hi there! I’m back today with my version of Simply Crafty SVGs Vintage Vanity Case. When I saw the Vanity Case file, the first thing that popped into my head was a little sewing box. I did made some modifications to this file to meet my needs. The first thing I did was cut out the bottom pieces. I knew I wanted the top to overlap the bottom so I enlarged the top pieces just a tinch. For the inside tray, I decreased the top piece a small bit, but it actually took about 3 tries to get it right. With trial and error, I got all the pieces cut, put together, and they fit like a glove! It’s a good thing I have patience haha.
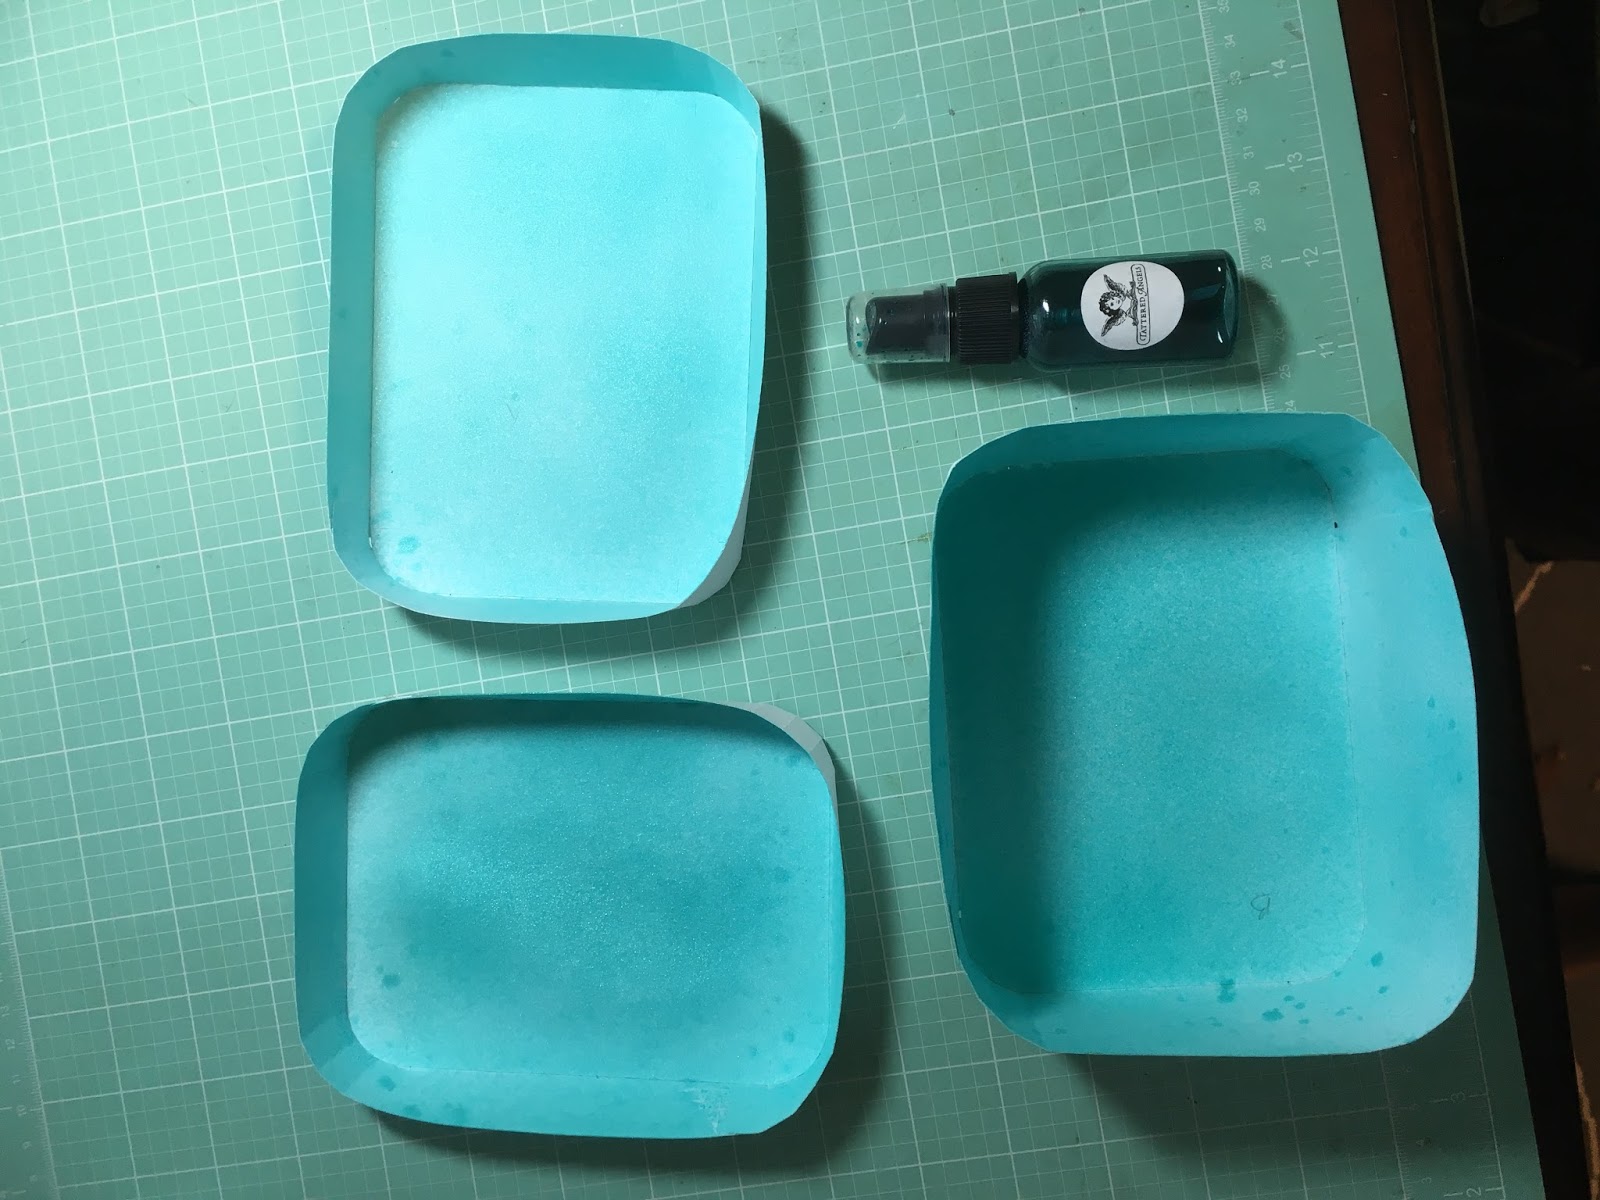
Now that I have all the pieces sized correctly, I wanted some color on the inside. I sprayed the inside of all the pieces with Tattered Angels Glimmer Mist in Turquoise Blue. I just love using Tattered Angels Glimmer Mists as they give good coverage with a nice sparkly sheen.
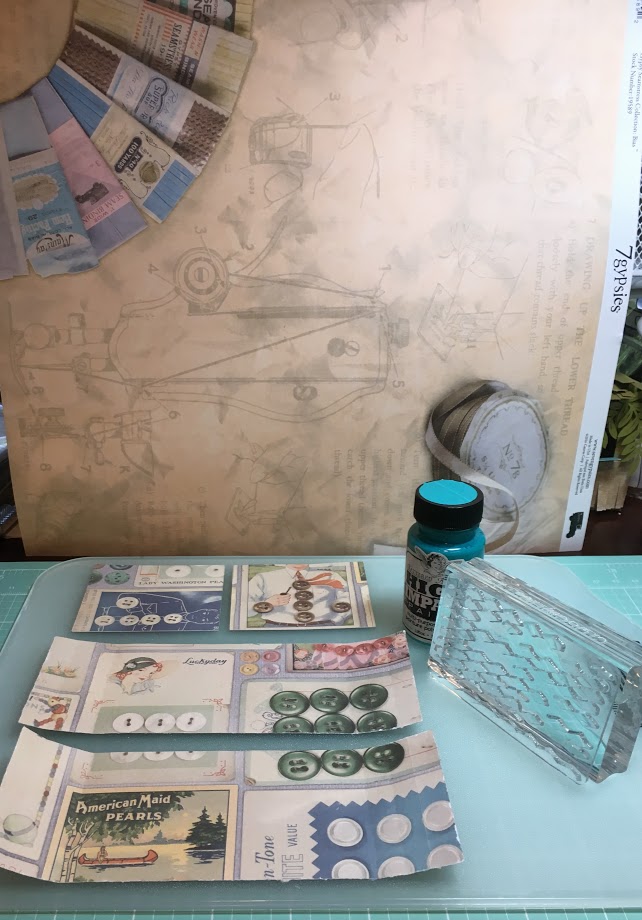
Next up was the covering for the box. I had chosen two different sheets of paper by 7 Gypsies. On the bottom and the top side I used Gypsy Seamstress 12 x 12 Buttons. For the very top of the box, I used a coordinating piece of 7 Gypsies paper, Gypsy Seamstress 12×12 Patterns. I used my electronic cutter to cut out the top and bottom pieces, making sure to make the top piece a tiny bit larger so that it fits over top of the bottom. This paper is very thick so you have to set it to Cardstock 120 lb. to get a good cut.
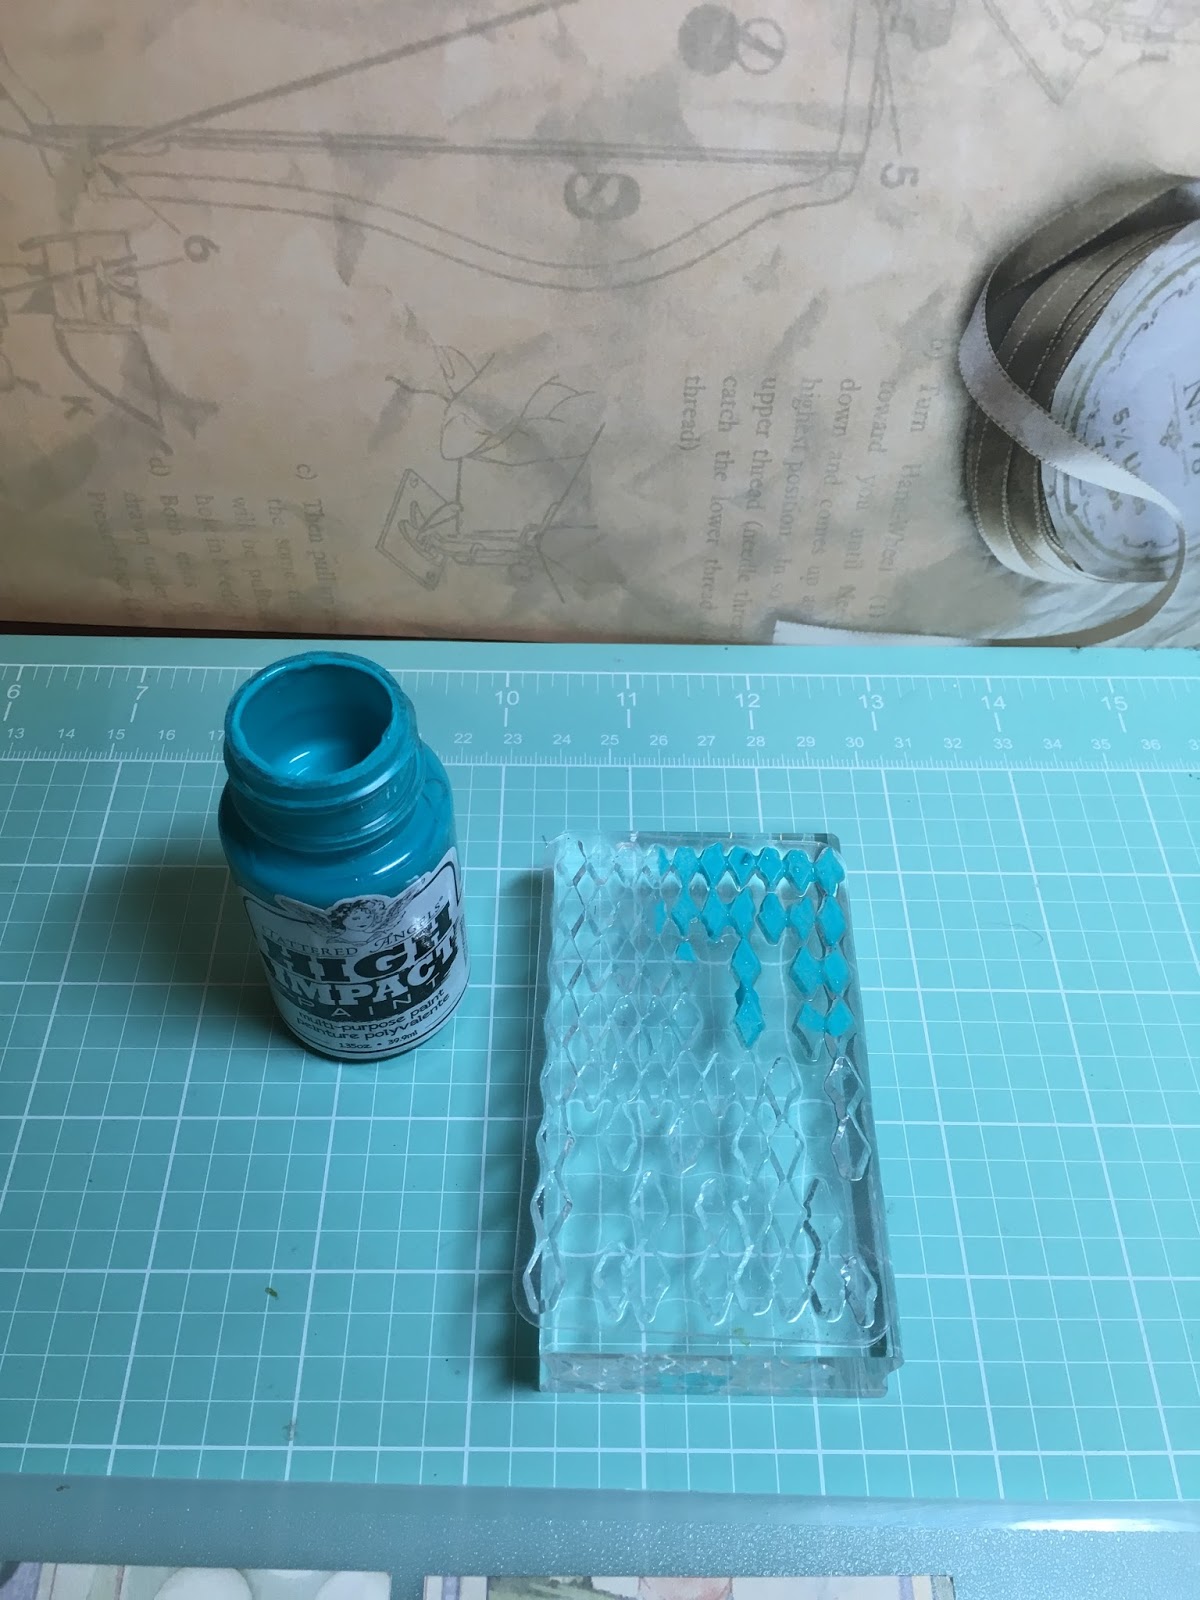
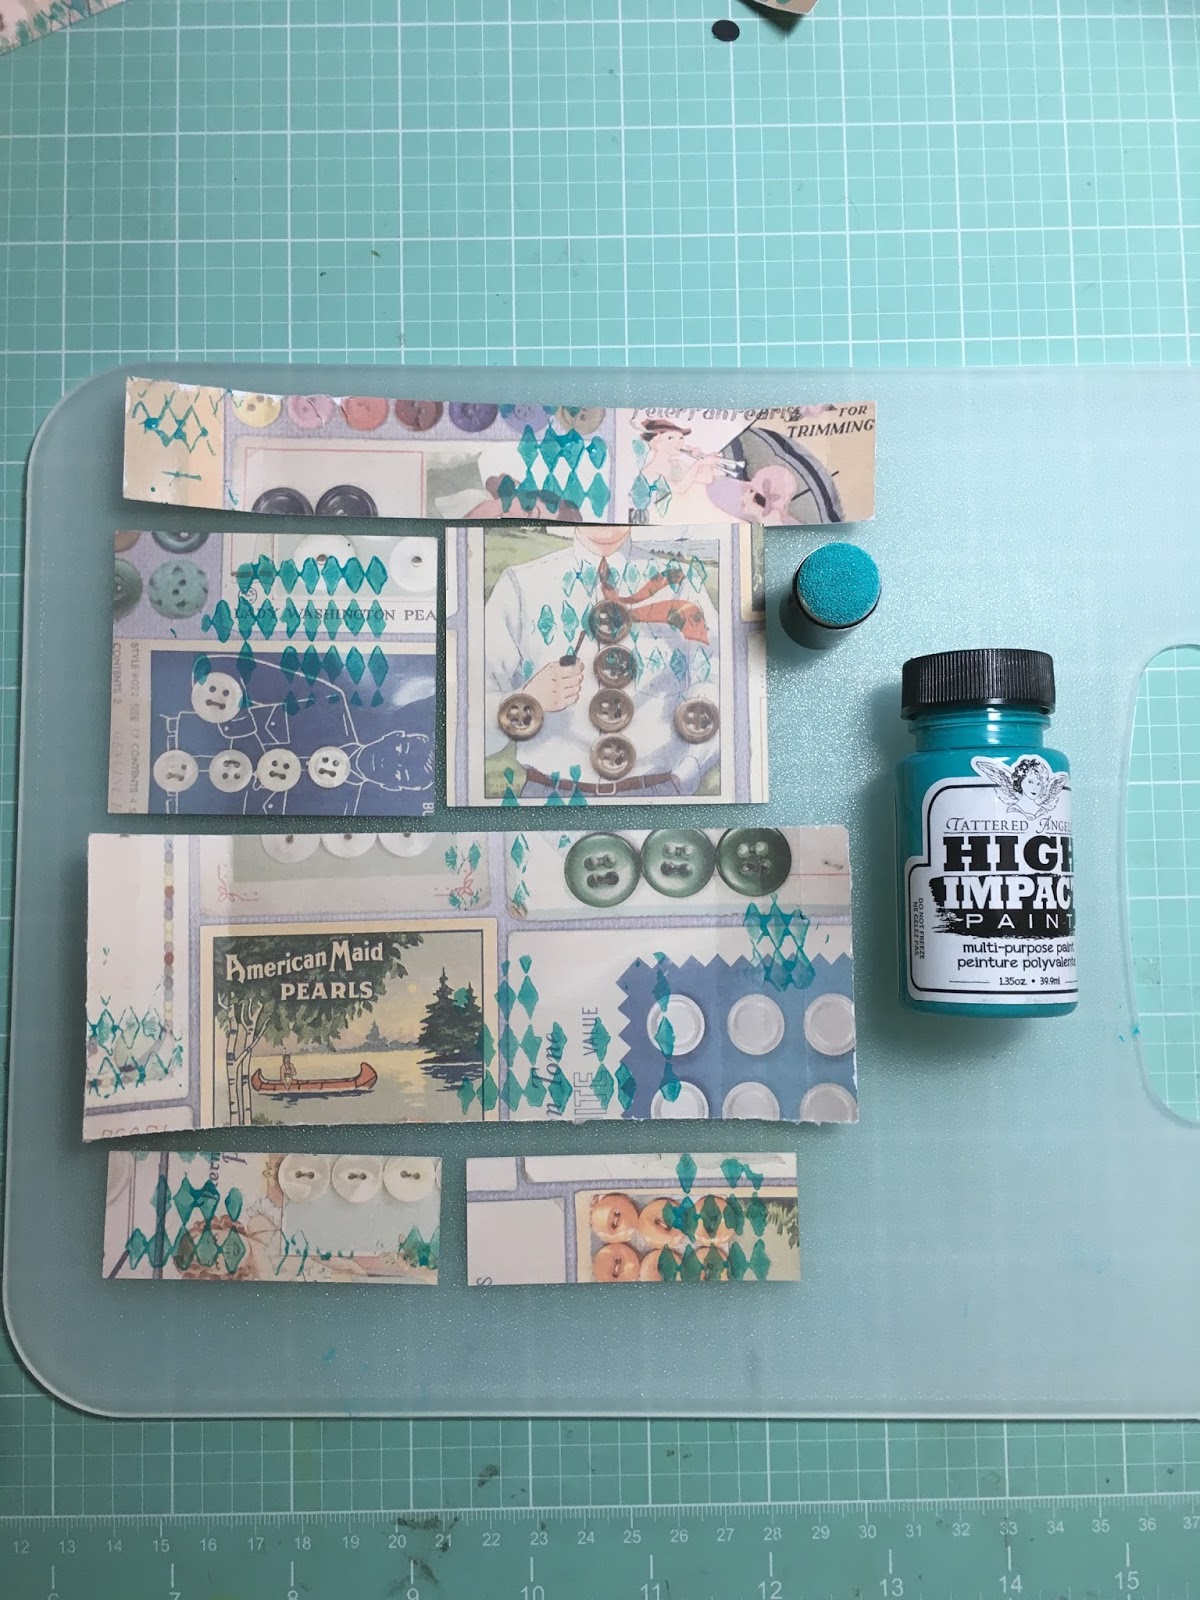
At this point, I felt like the cover pieces needed a little color and texture. I got out my Dylusions Basic Background Stamps and chose the diamond stamp, and for color, I used Tattered Angels High Impact Turquoise Paint. I used a small dauber and applied the paint to the stamp and just stamped randomly on the outside pieces of the box.
I then glued all the cover pieces onto the box. For the pull-out tray, I cut the small pieces for the top and applied them inside the tray piece. I also added a very heavy piece of chipboard to make a separation in the tray. For the tabs to hold the tray in place, I used the same heavy chipboard, cut a small square, and folded it in half. I glued one half to the side of the box. To make the tab stand up, I added quite a bit of hot glue underneath the “tab” portion that sticks out.
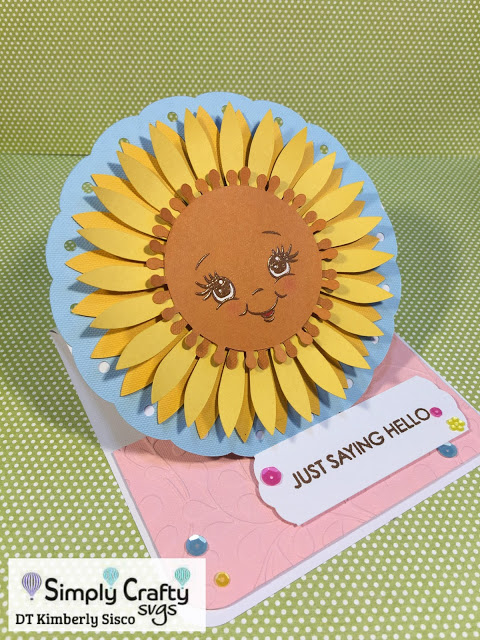
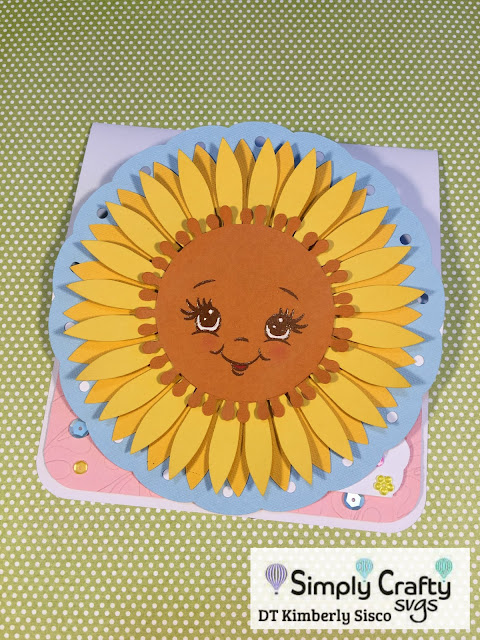
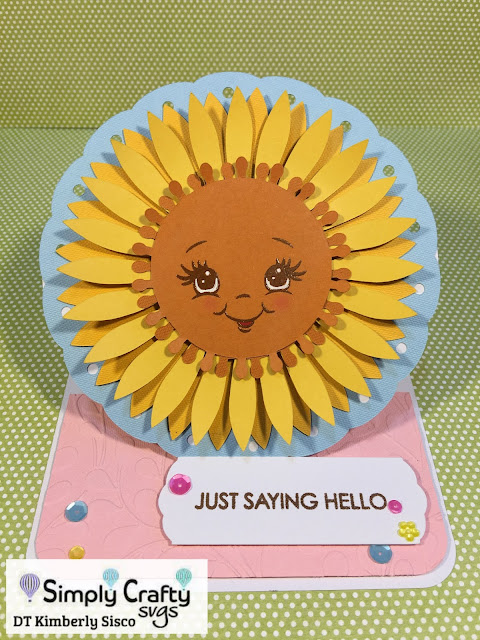
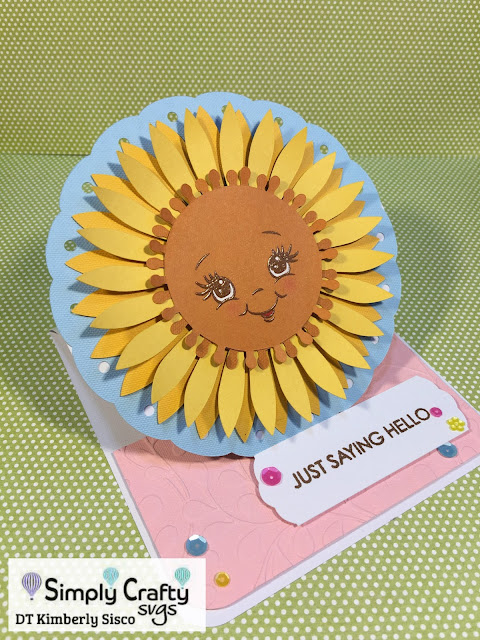
Hello Friends! Thank you for stopping by today. I am excited to share with you my first design team project for Simply Crafty SVGS. Today I am sharing this amazing Sunflower Card. I fell in love with this card as soon as I saw it and knew I wanted to create two different cards for you to show how versatile these cut files are. I created my cards in Cricut Design Space but these files can be used with any electric die cutting machine. First, I want to share the portrait card that is included in the svg file.
This is an arched portrait card that measures 5″ x 7″. I love all the dimension the sunflower has. I used an embossing folder on the pink panel and added some copper glitter glue to the center of my flower. Next, I created an easel card and I did this by using the card base of the portrait card. These SVG files are very versatile, as I said.
This card just makes me smile! I love her sweet face. I used a Peachy Keen stamp to create her face. If you would like a video tutorial on how I created these cards in Cricut Design Space, please, leave me a comment. If you have any questions, please, let me know.
Here is a process video on how I assembled these cards or watch Here
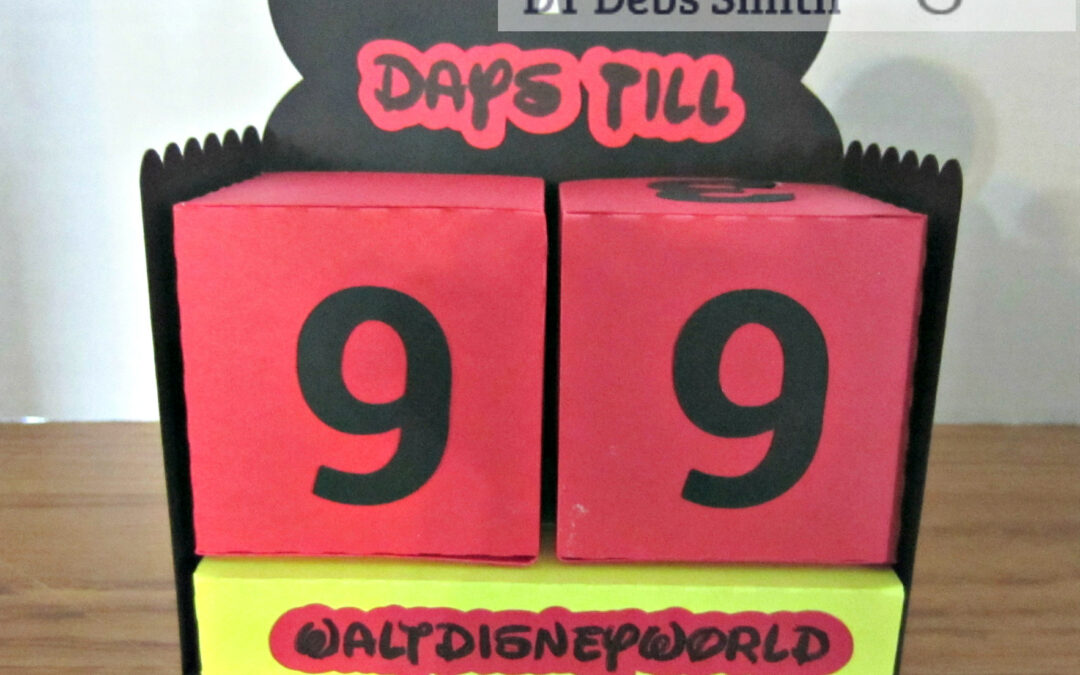
The other day I posted the Perpetual Calendar SVG Design and promised you a different spin on the file. My family and I are heading to Walt Disney World in September so what a better way than having a countdown clock that can be used time and again. You can make it to cater to your vacation.
I cut out two 2 inches circles for the ears and used my silhouette Cameo and that Waltograph font for the writing and offset it . Colours are of course Mickey mouse. I did have to make an extra block and cut out more numbers since the countdown started at 99 days.