
Hiya, Today I have a wacky 3D project for you using the fantastic Dog Box Set from Simply Crafty SVGs.
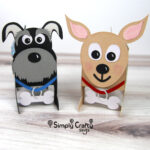
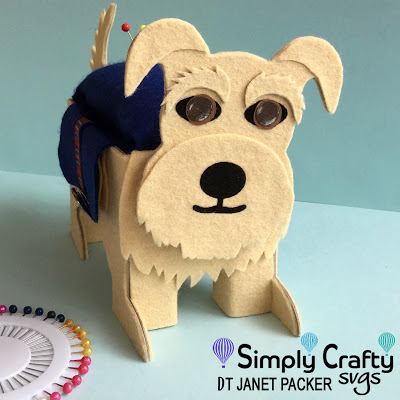
The file makes a fabulous lidded box with Chihuahua and Terrier variations. I fell in love with the terrier version, but thought it wouldn’t be too difficult to make it look a bit more like my own pet, a feisty Lucas Terrier. Now comes the wacky part – with a few simple design changes I adapted the design to become a pin cushion and needle case with a small storage compartment for sewing accessories.

The file is designed to be cut from cardstock, but I made my box from felt-covered chipboard with some additional felt elements. I’ve included details on the adaptations I made, but this is one of those projects that you can truly make your own. I used my Silhouette Cameo® 3, but of course the SVG files can be used with other desktop die cutting machines (details here).
Materials Used:
Silhouette Chipboard (light-weight grey board)
Coloured Felt/Flannel 12″ x 12″ Squares in blue (1) & beige (2)
Black felt scraps or Flocked Heat Transfer Material
Heat N Bond Ultra Hold Iron-On Adhesive, or similar
12″ x 10mm/0.75″ Tartan Ribbon
Snap Fastener
Card Scraps
Toy Stuffing & Wadding
Beacon 3-in-1 Glue
Silhouette Cameo
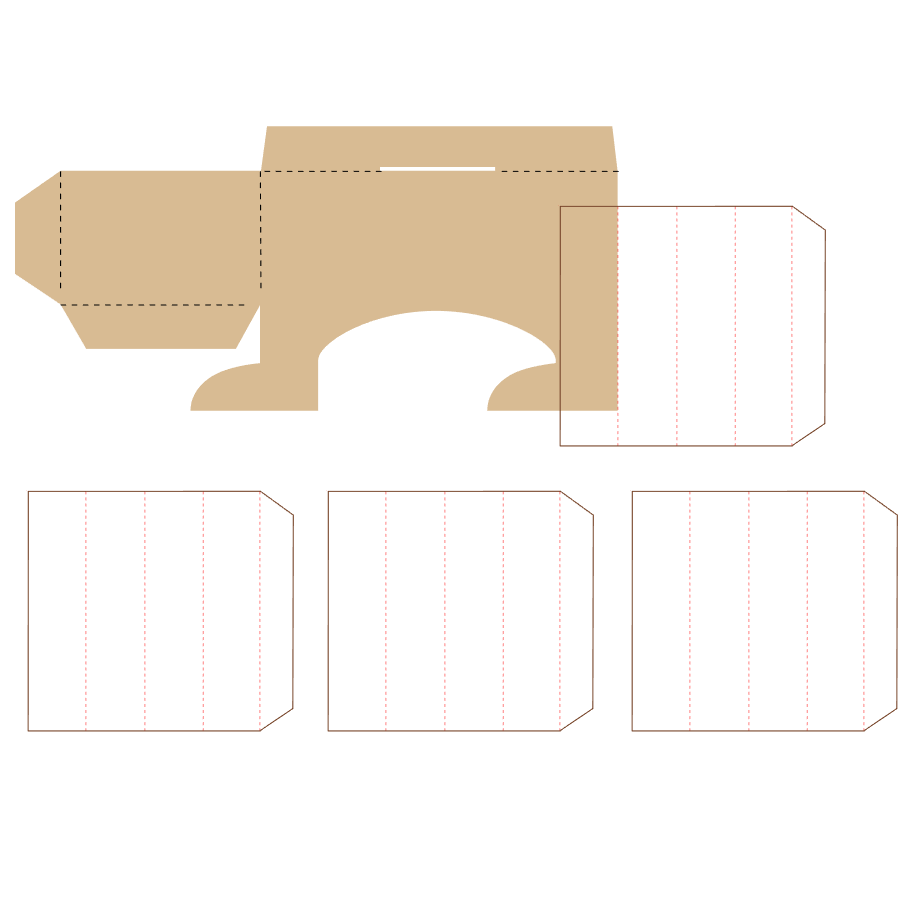
Select and Cut the Pattern Pieces
Cut all pieces from the Box1 file, and the leg reinforcement pieces from the Box 2 file in Silhouette Chipboard. Cut selected pieces from the Terrier file (I cut the head twice, and one set of those fabulous eyebrows).
Covering the Pieces in Felt
Apply the iron-on adhesive to the back of a beige square of felt using a domestic iron following the manufacturers instructions. Draw around the board pieces shown on the adhesive side of the felt, cut them apart then trim and apply felt to the board pieces. Re trim the more intricate parts.
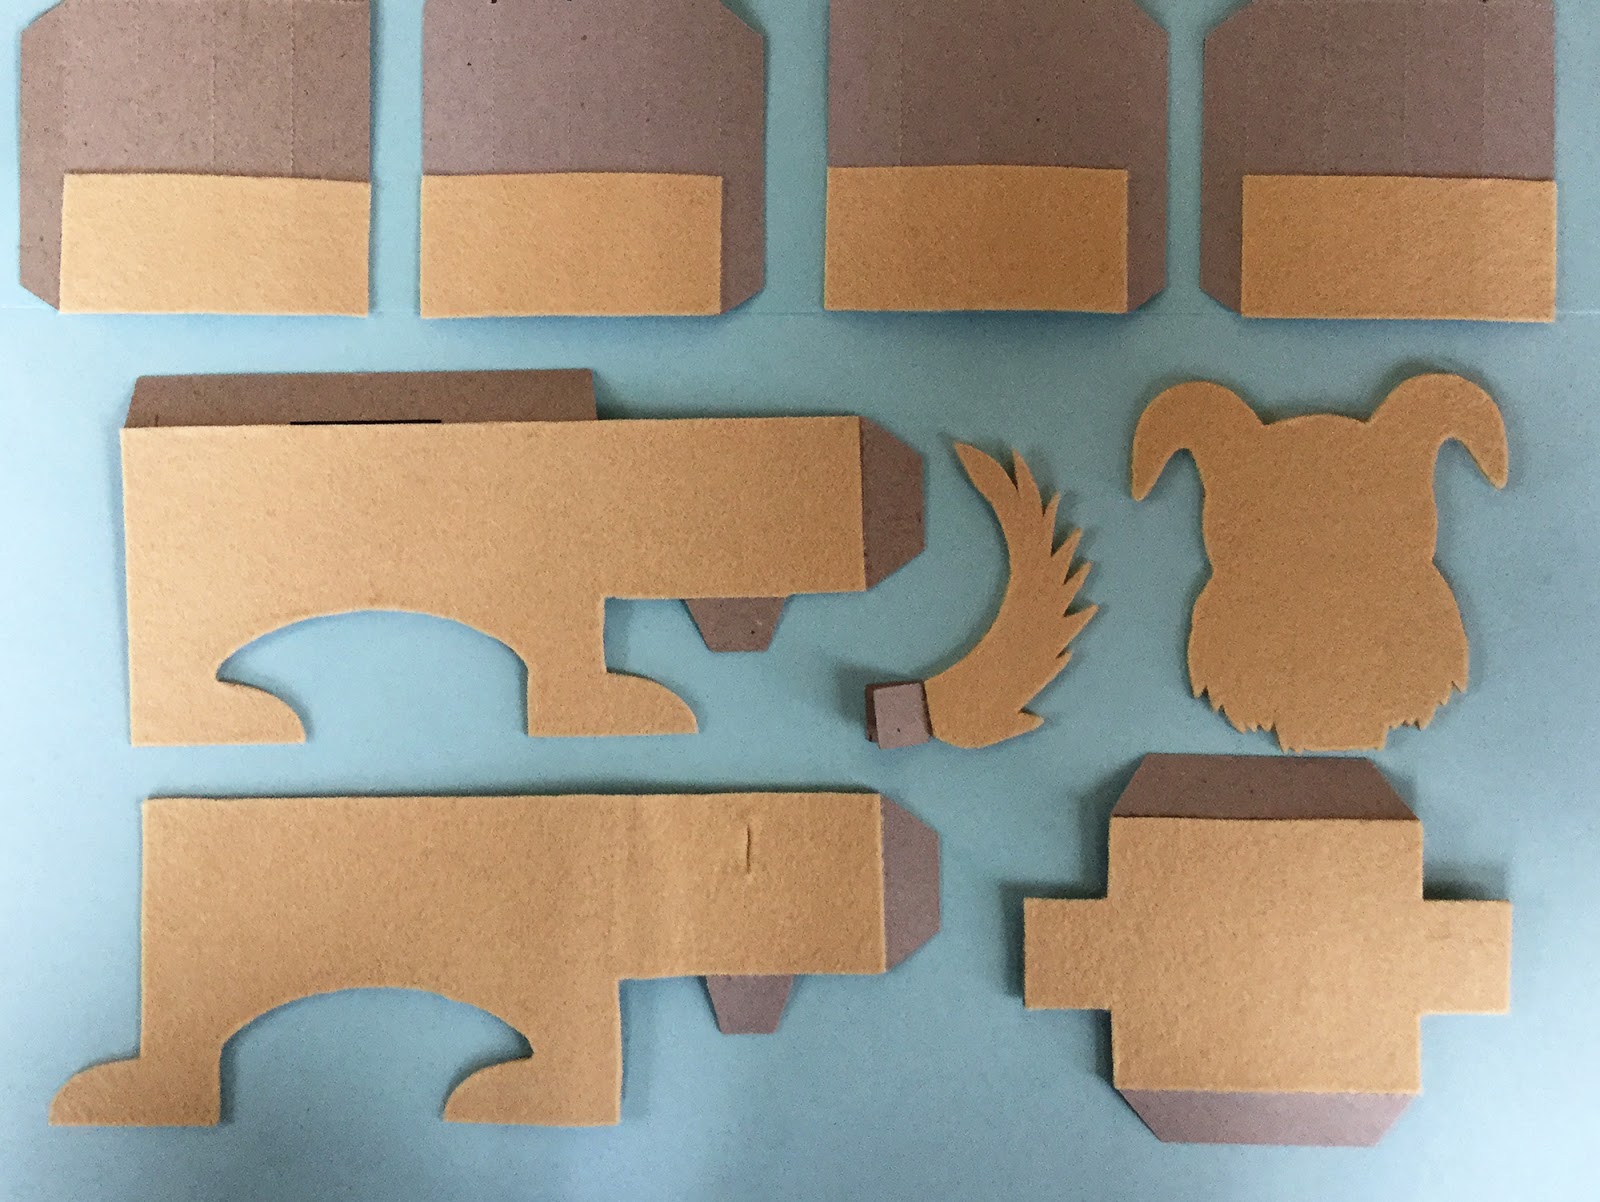
Ordinarily, I cut the felt on the Silhouette, but because only selected parts of these pieces need to be covered, it is quicker and easier to cut them with scissors using the Silhouette-cut board pieces as guides rather than edit all the pattern pieces in the software.
Strengthening the box
Design and add a leg at each corner to be partially hidden by the leg parts of the original box sides (all the parts are labelled in the PDF Instructions which accompany the file). Adhere the legs once the box sides and re-enforcing pieces have been assembled. The box bottom needed to be trimmed before fitting. I just did this by eye with scissors

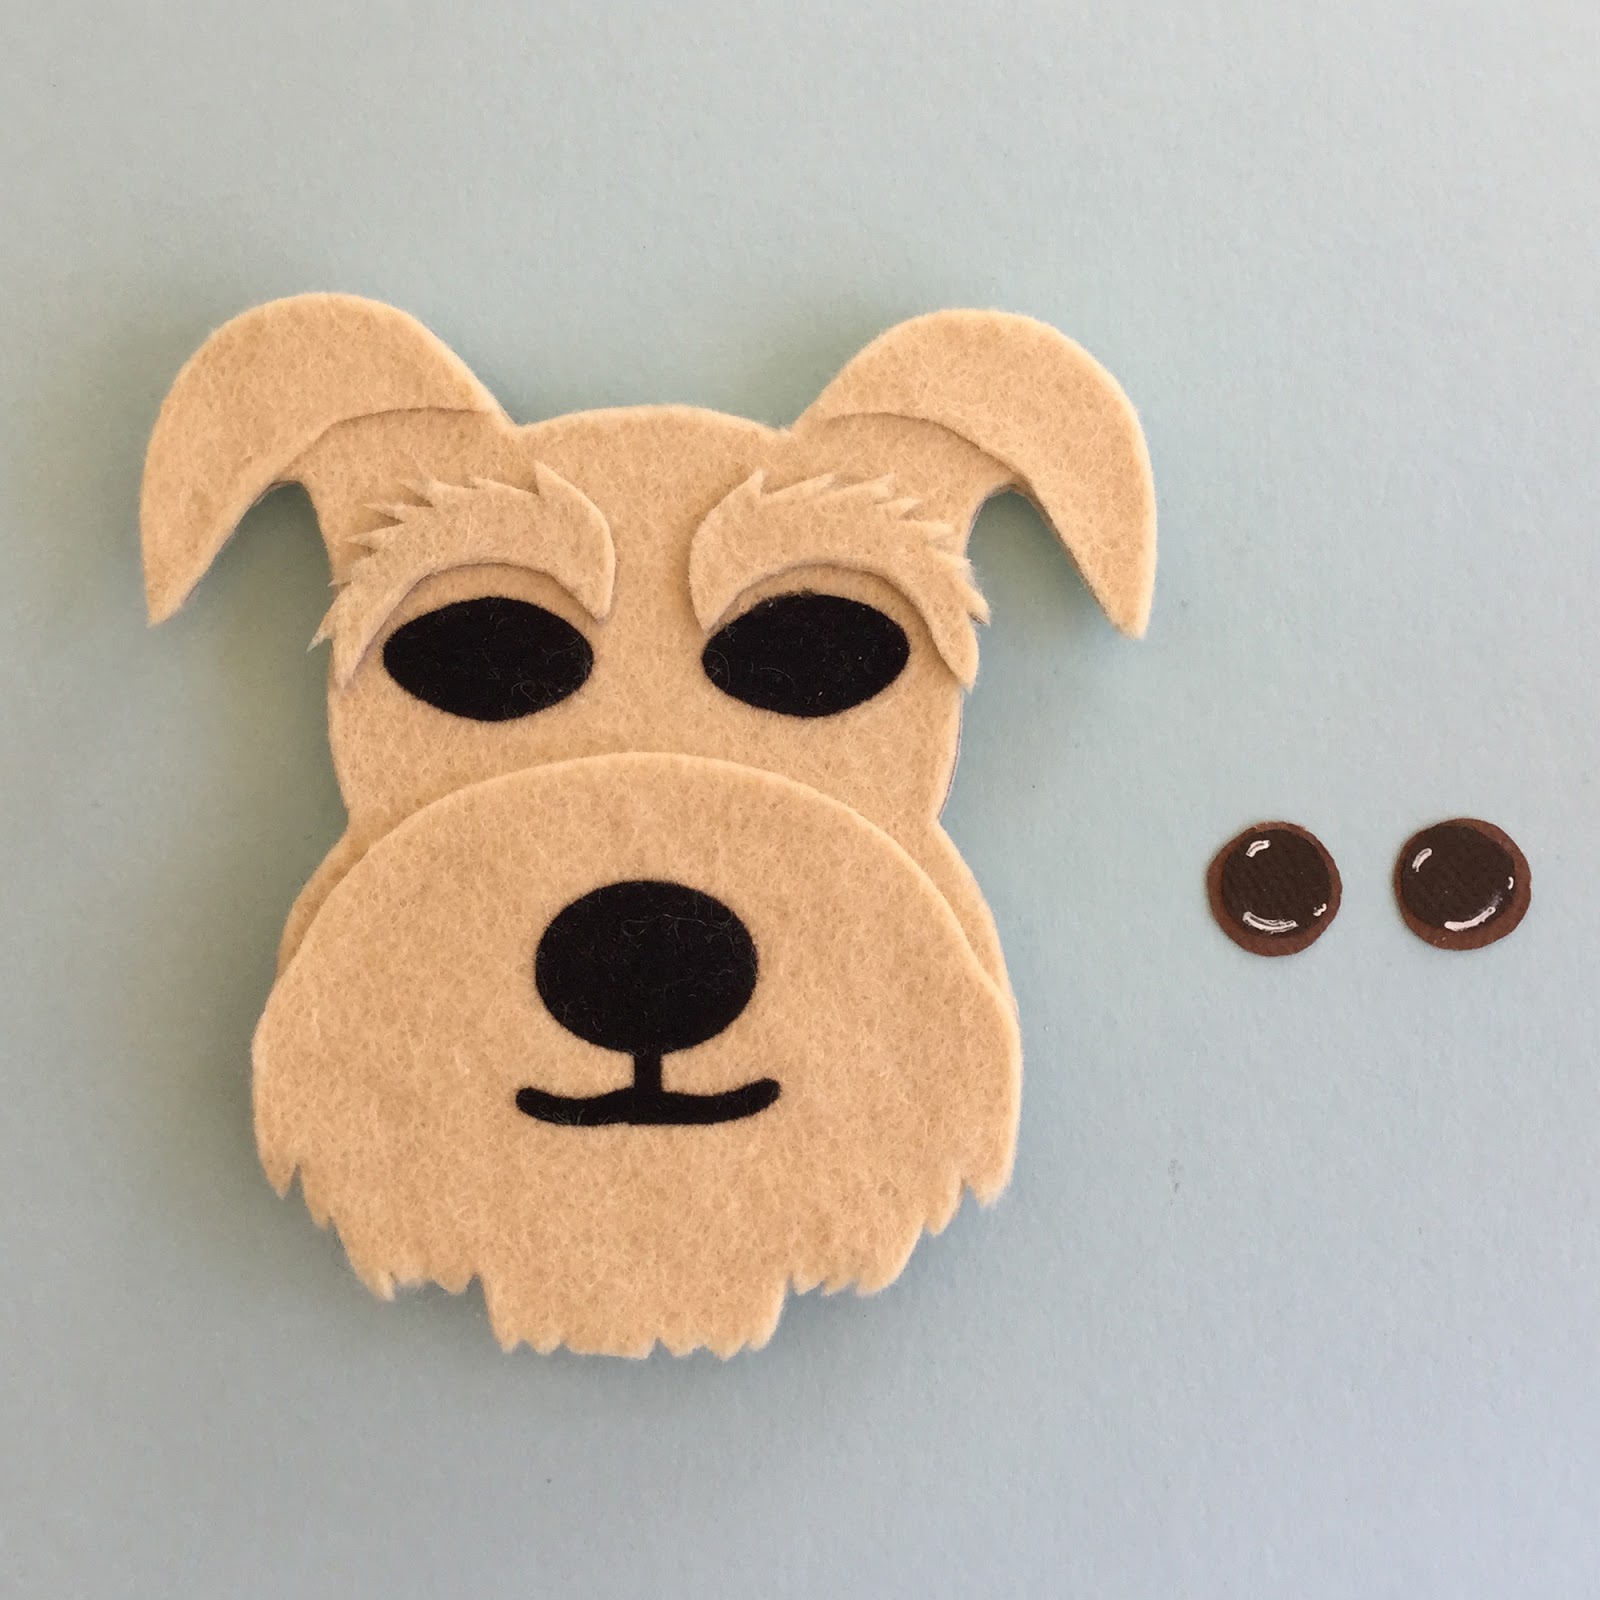
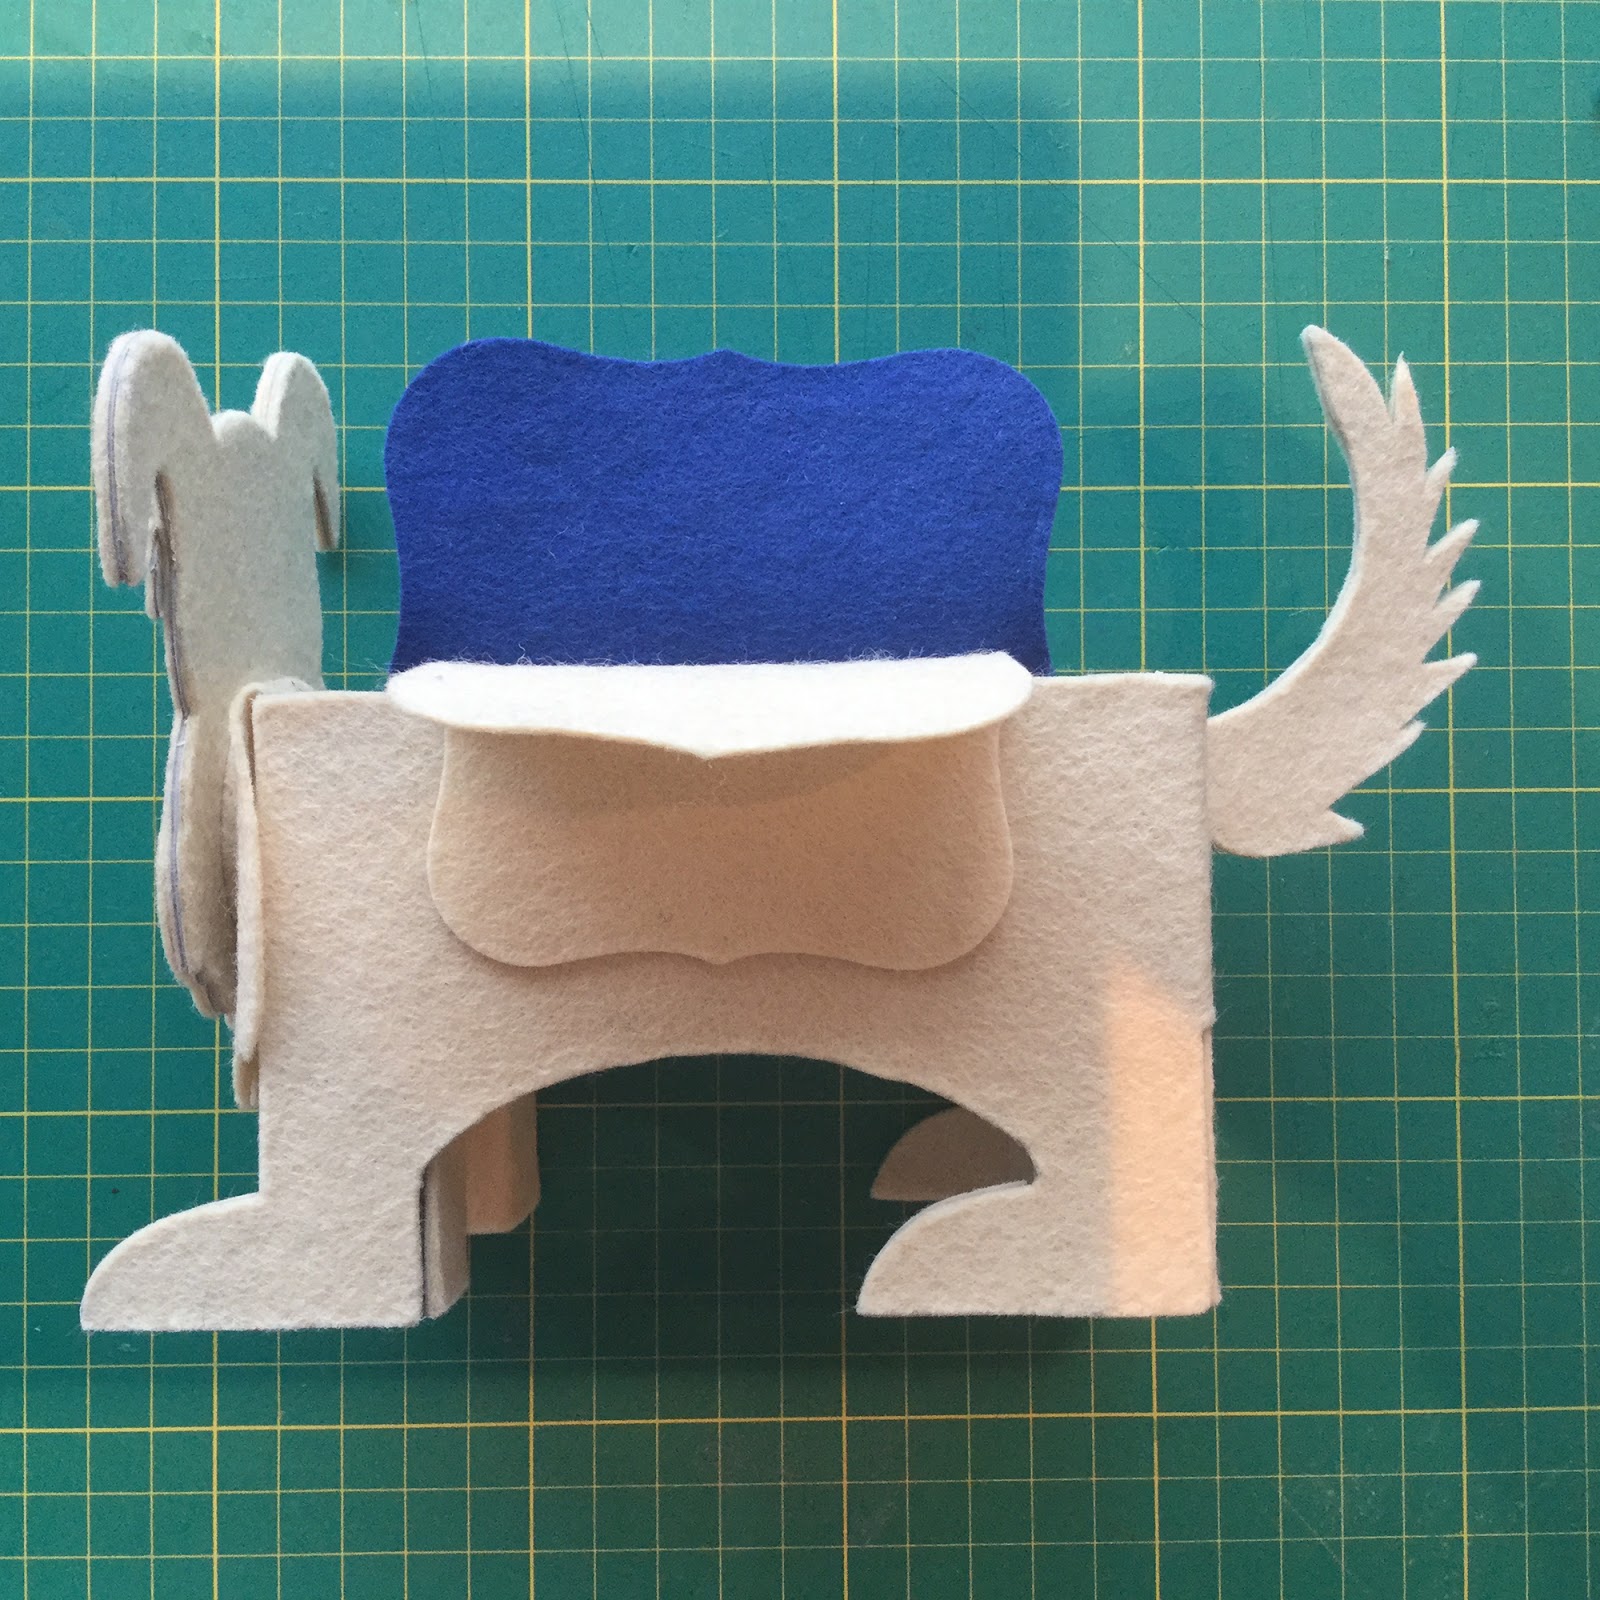
Terrier Customisation
Cut and apply features from felt/heat transfer, adapting them if you wish.
I changed ear and eye shape, and added a mouth and card eye detail.
I made a ‘neck’ with a stack of board circles covered in beige felt which sat between the head and the body. The head and neck were adhered at a slight angle as that is how our terrier often stands.
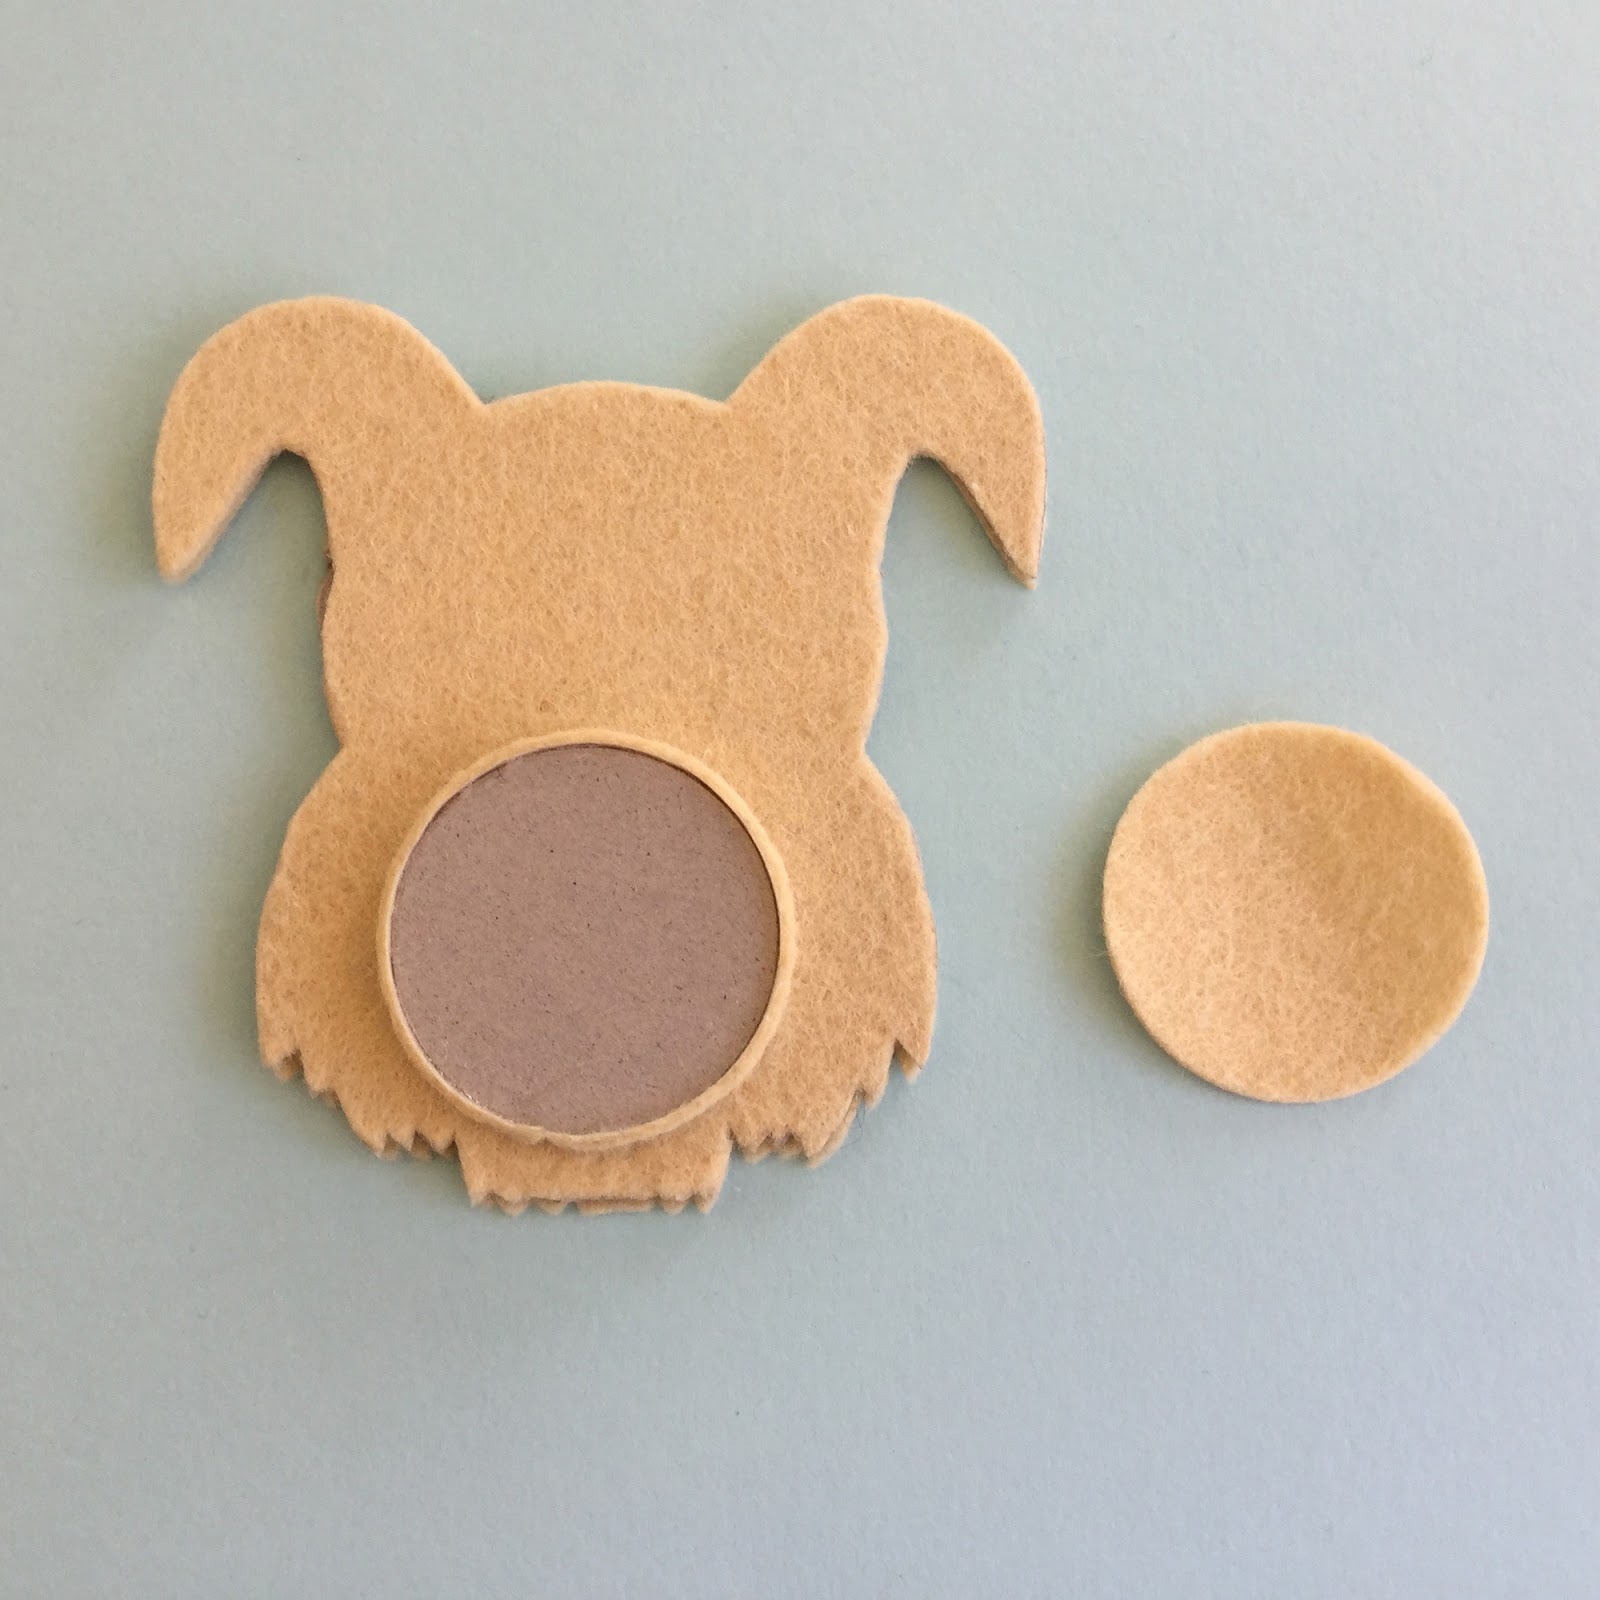
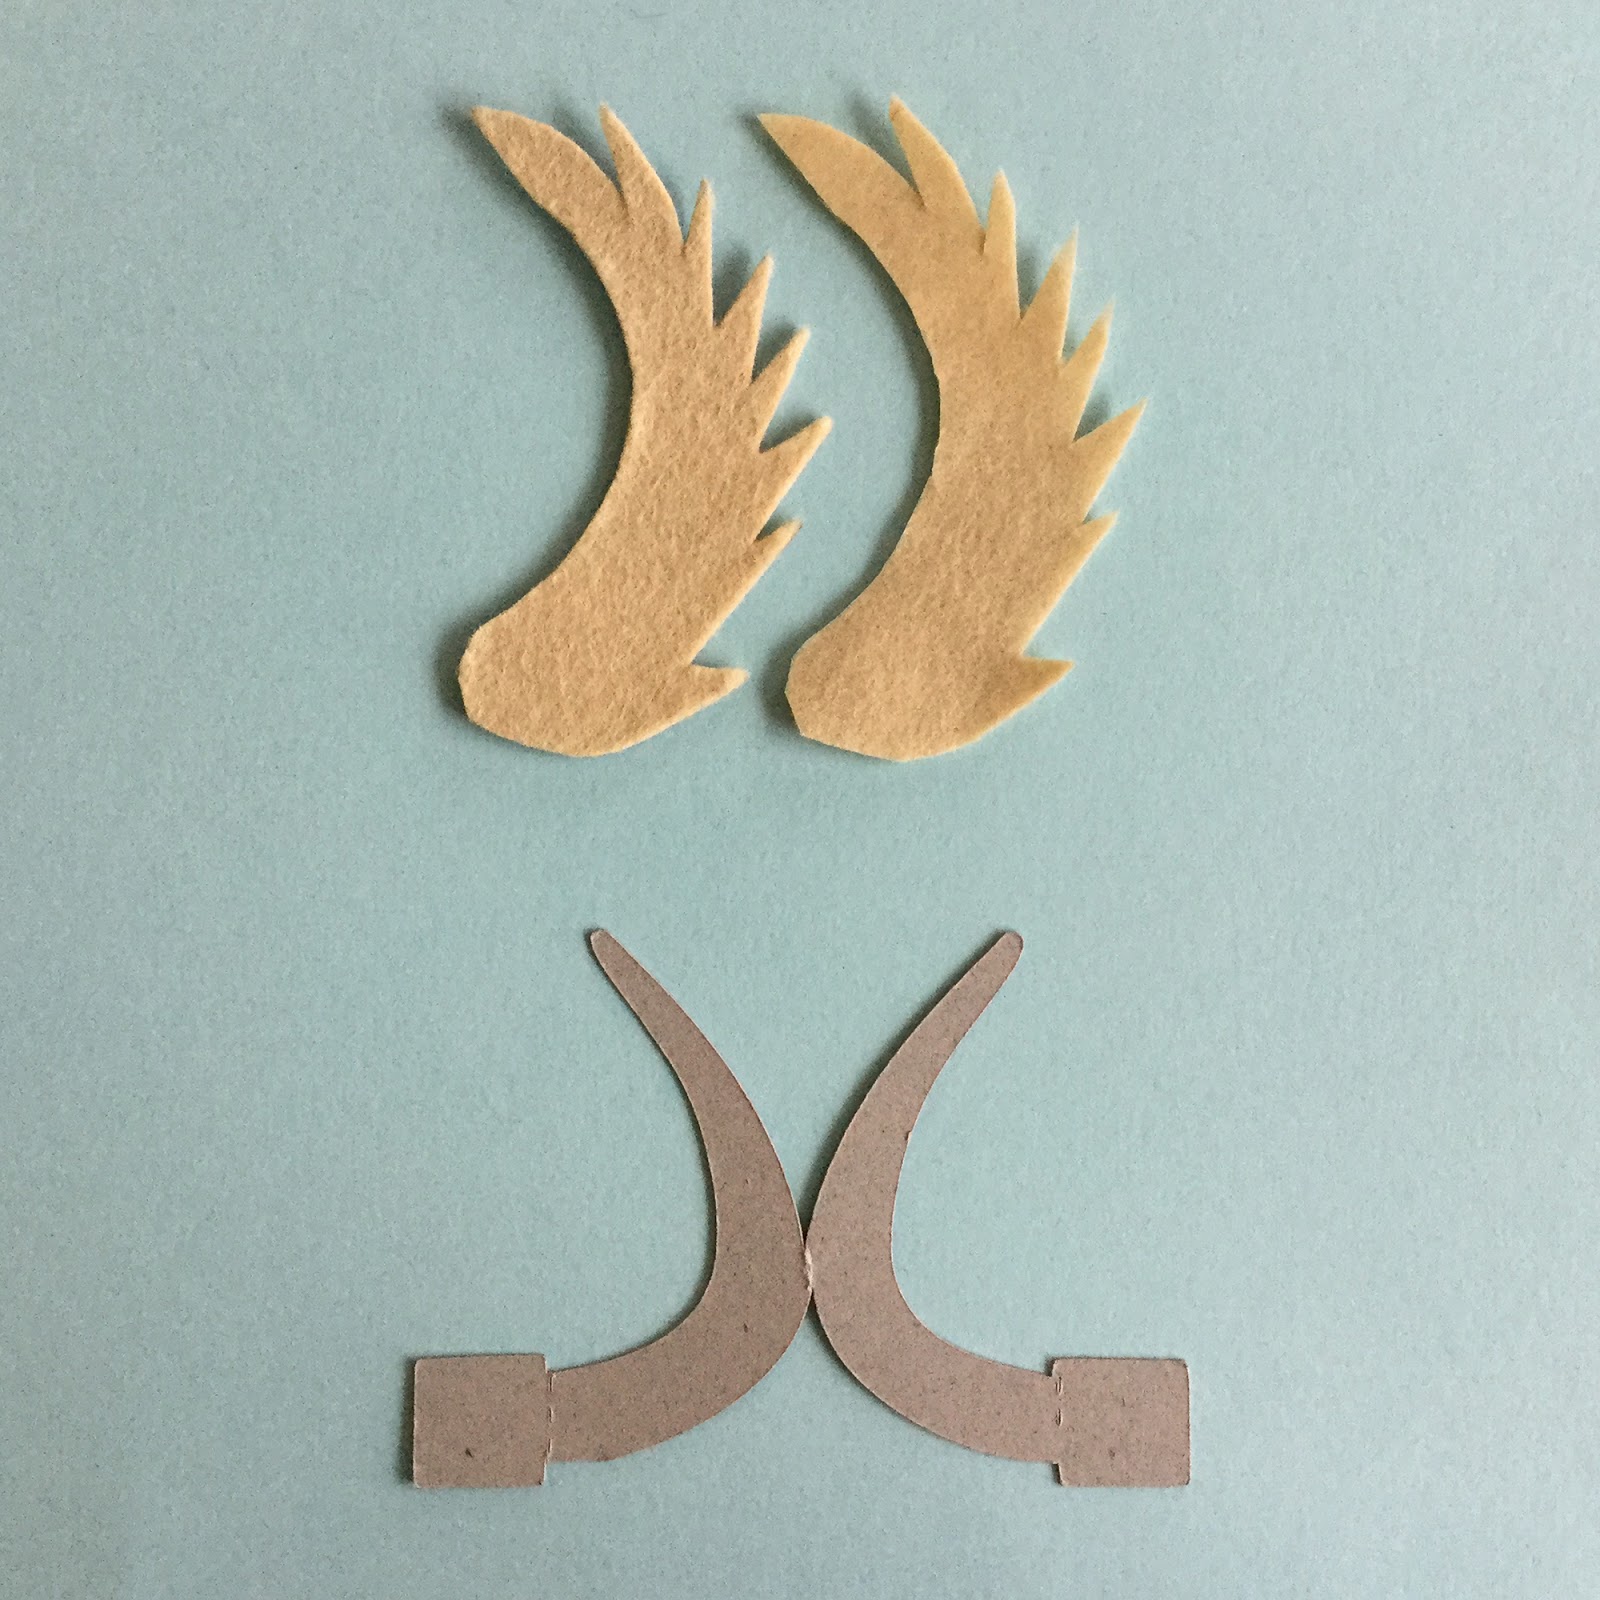
The chest piece is an enlarged snout piece and the tail is an enlarged eyebrow!
The Pin Cushion
Make a sausage of stuffing wrapped in wadding and wrap a piece of blue felt around it. Secure along the length and at the ends with liquid adhesive. Cut a rectangle of board to fit the dog’s back and cover in blue felt, securing with glue. (Optional) Trap some thin ribbon to form a handle between rectangle and ‘sausage’.

Adhere the ‘sausage’ to the rectangle leaving it to dry under a heavy weight (I left mine in a cold heat press overnight).

The Needle Holder/Dog Coat
Add a shaped piece of blue felt folded over the side of the box (I used a bracket shaped square). Adhere it to the inside of the box only, leaving the outer part free. Add a smaller beige felt shape folded in half to serve as a needle holder. Adhere only on the folded edge. repeat on the other side.
Adhere ribbon to a narrow strip of felt, cut into two pieces, one longer than the other and attach a snap fastener to each end.

Adhere these straps to the blue squares so that one piece passes under the box so the fastener meets at one side.
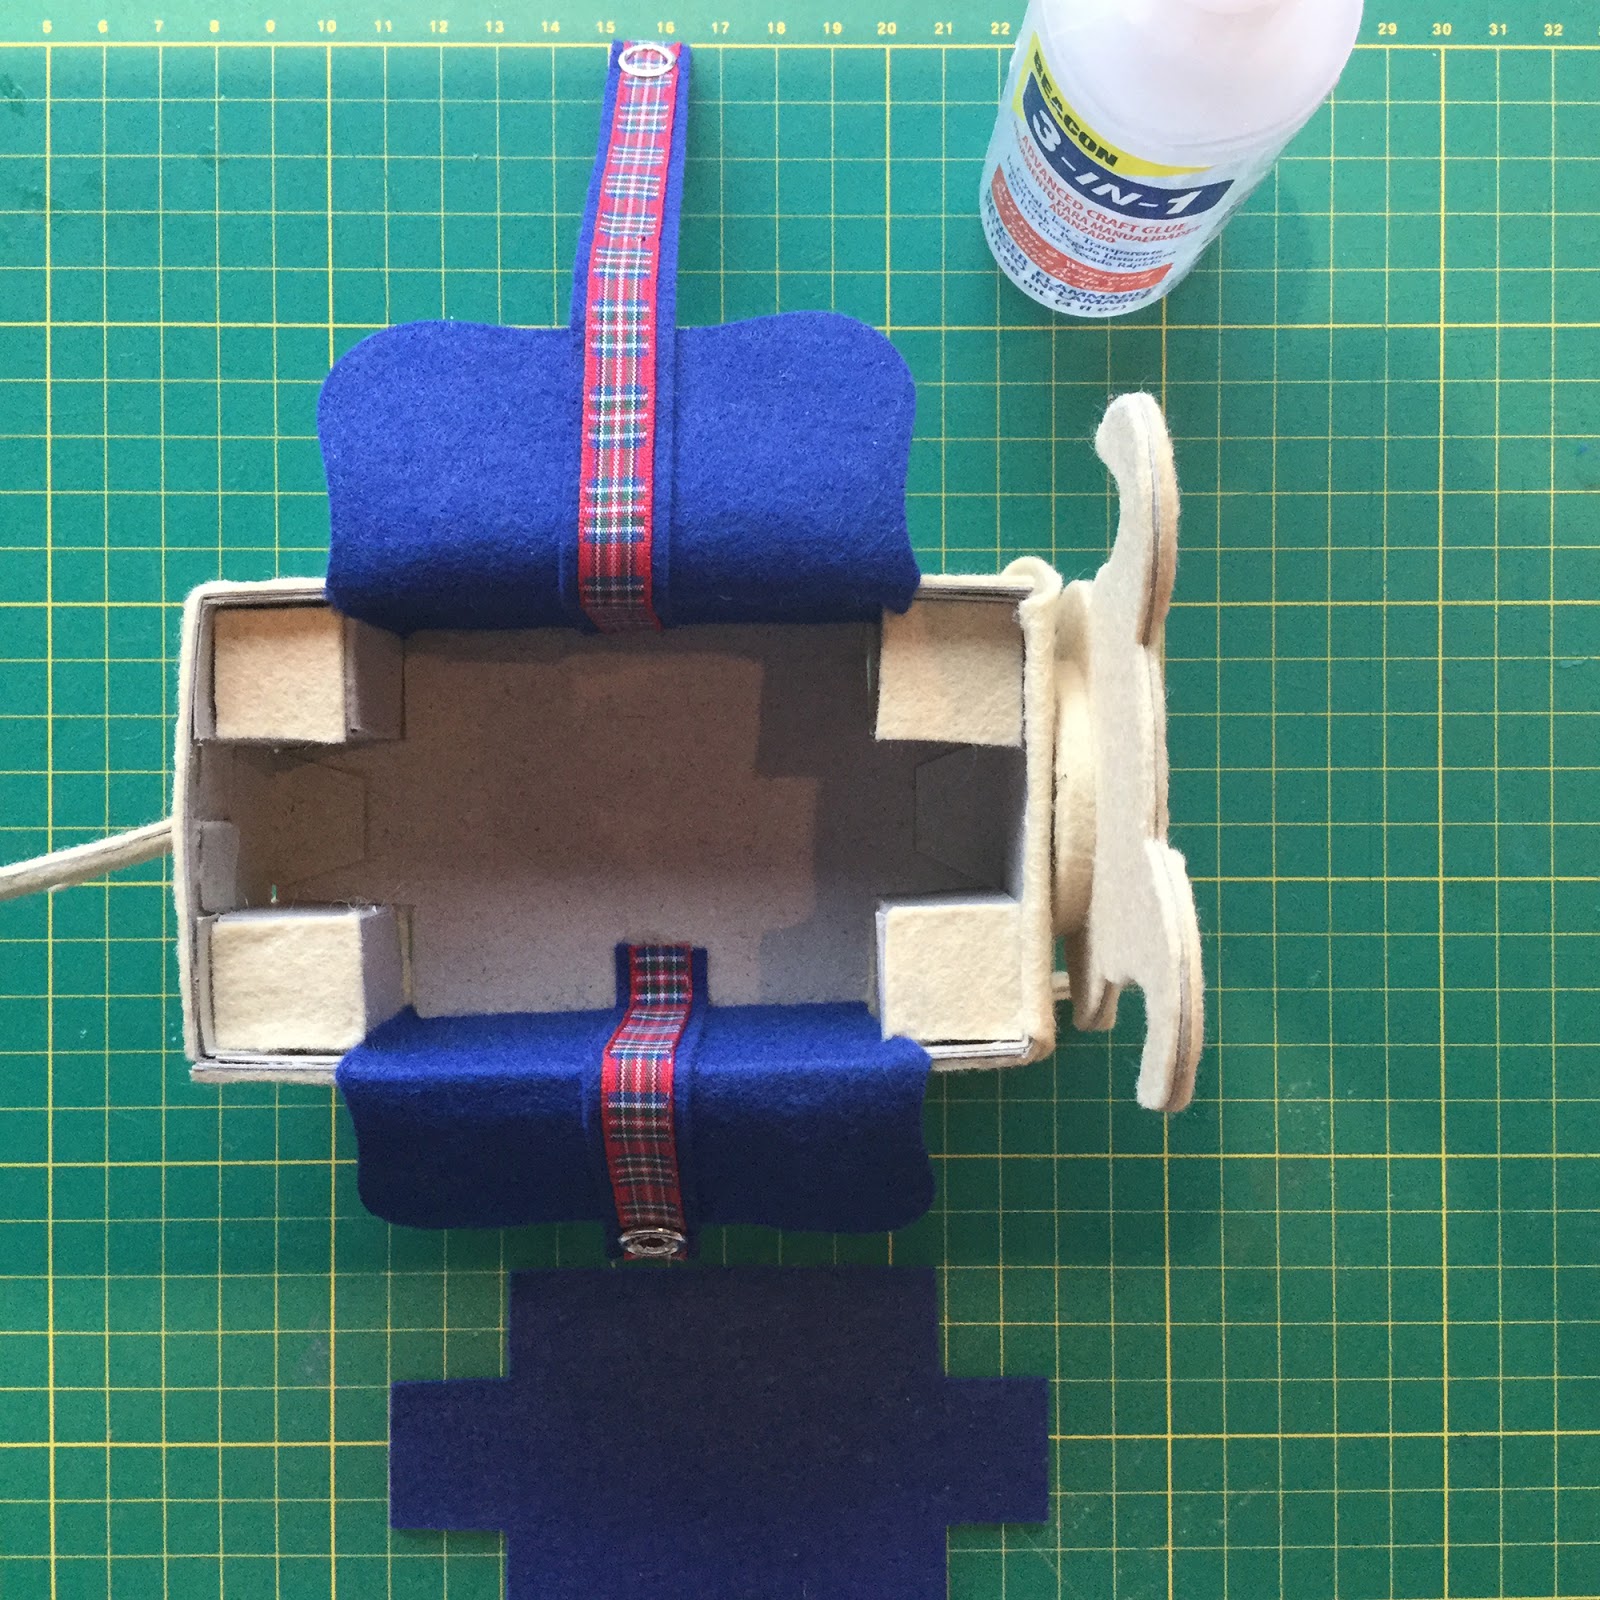
The Storage Compartment
Line the compartment with a blue felt scrap, trimmed to fit.
… and that completes the terrier pin cushion.

Have you used your pets for crafty inspiration? I recommend it – it’s a lot of fun!
Bye for now,
Janet, DT Member Simply Crafty SVGS