This 3D Haunted Hearse was brilliantly designed by Els Schutte! Check out that spider on the front hood and the rhinestone details on the side. I love to see other designers make my ordinary designs into extra-ordinary!
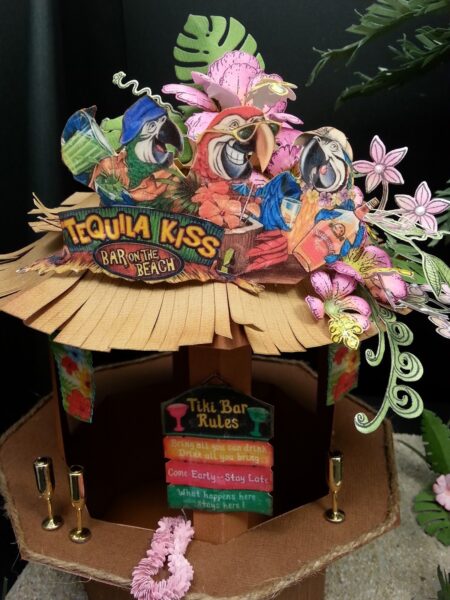
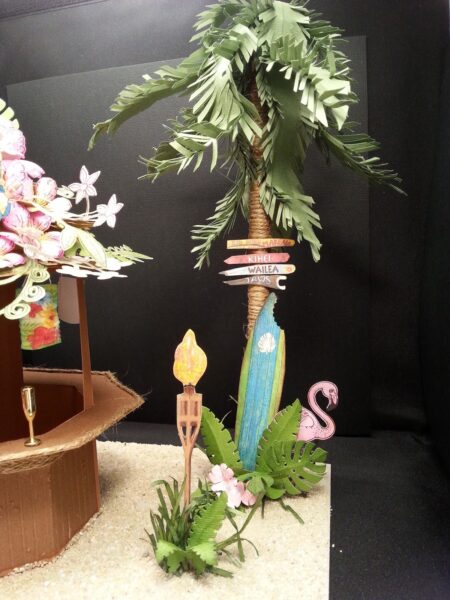
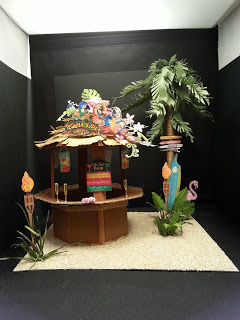
Look at the details of this Tiki Bar display designed eloquently by Els, using our Tiki Bar SVG Design! There is so much to look at! I will just let the pictures do the talking on this one!
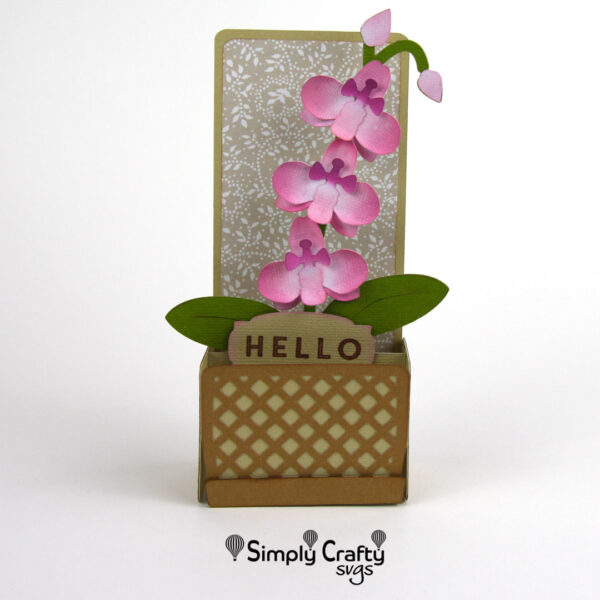
Hello, Janet here with a new folding box card. It was a treat to make this SVG file for the Orchid Box Card from Simply Crafty SVGS.
This is a quick and easy card to cut and assemble. Sandy’s version is beautiful in pink, but I made just a few little changes to make it more like the lovely white orchids that I have flowing on my window sill today!
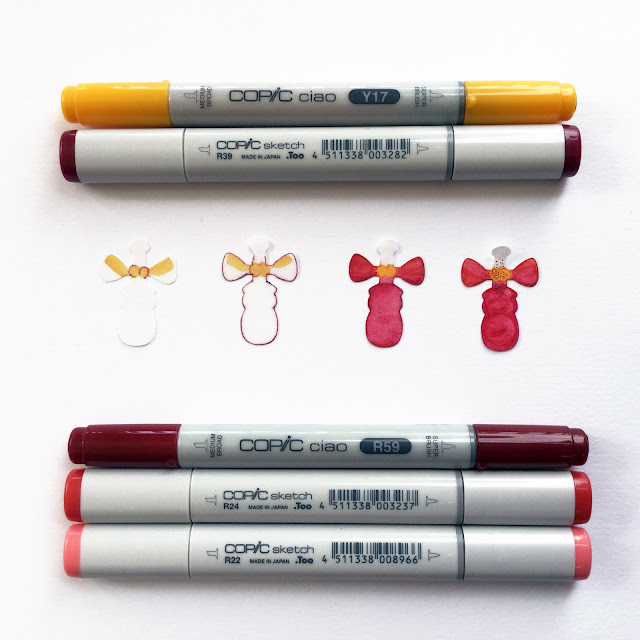
Materials I Used: White Extra Heavyweight Parchment Vellum 220 gsm (about 150 lb.) Silver Metallic Card Heavyweight White Glimmer Card Copic /Alcohol Markers Geometric Embossing Folder and Embossing Machine Beacon 3-in-1 Adhesive Dimensional Adhesive Pads Tonic Ball Embossing Tools
Print & Cut
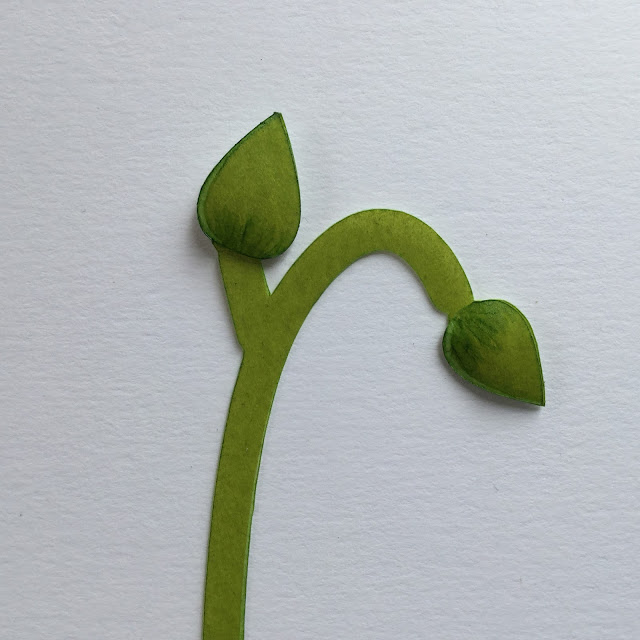
I used the Print & Cut facility on my Silhouette Cameo to make green coloured stems, leaves and buds, and cut them from thick parchment vellum (less translucent than regular vellum). The secret to perfect print and cut is to add a non-cut margin of colour around the printed shapes, printer’s call this a bleed. You’ll find more Print & Cut projects here.
Adding Dimension to Leaves and Stems
I shaped the buds with a ball embossing tool and layered them onto the stem using a triangular-shaped piece of dimensional foam between. I blended some green alcohol marker around the edges of the leaves and added some stripes along the length before attaching to the base with more dimensional foam to open the slit in each leaf.
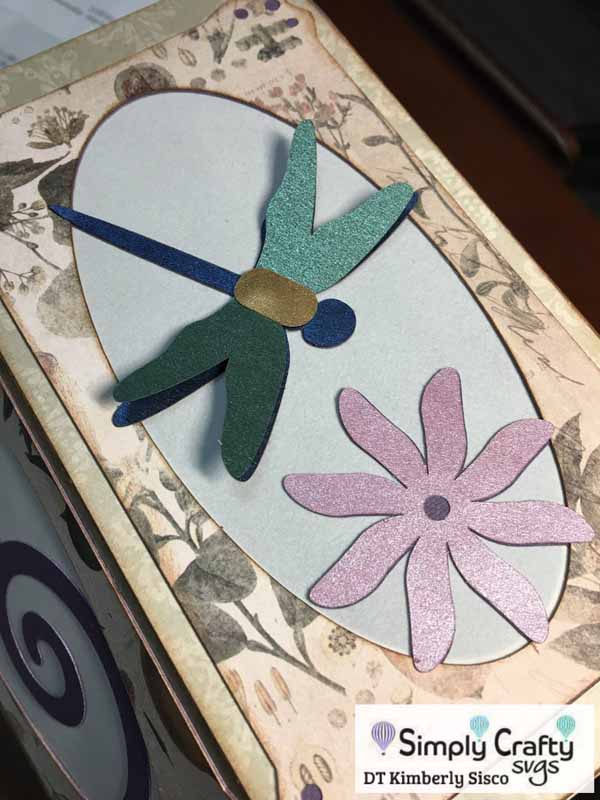
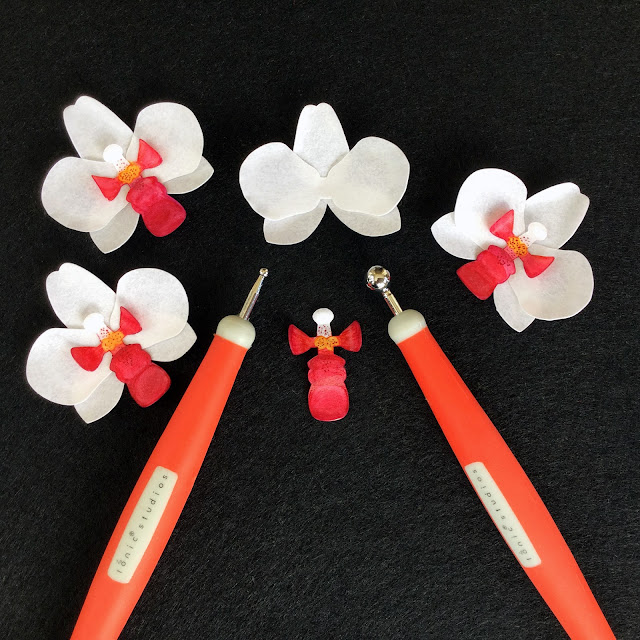
Colouring and Shaping Orchid Flowers
The flower parts were also cut from parchment vellum with no colour added (they fit on the same sheet as the Print & Cut stems and leaves). The orchid flower centres were coloured with the Copic marker colours shown in the photo. A Google image search on orchid flowers will provide a host of colouring guides.
The petals, sepals and centres were shaped with the ball tools on a soft surface (I used an old fabric mouse mat).
The individual flowers were assembled from the back forward using strong liquid adhesive. I used the ball tool to hold the parts together until the adhesive had stuck.
Card Assembly
The card base pieces were cut from white cardstock and the pot and panels from metallic silver card. The pot and panels were embossed using an embossing folder. The card assembly was very straightforward, following the PDF instructions included with the SVG file.
The finished card will fold flat to fit into regular envelope. It makes a lovely card suitable for so many different occasions.
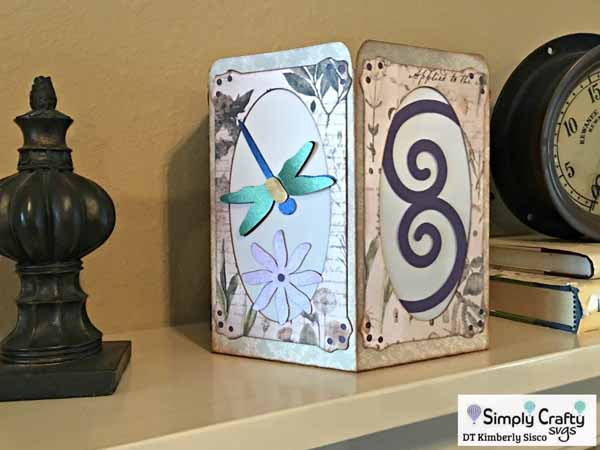
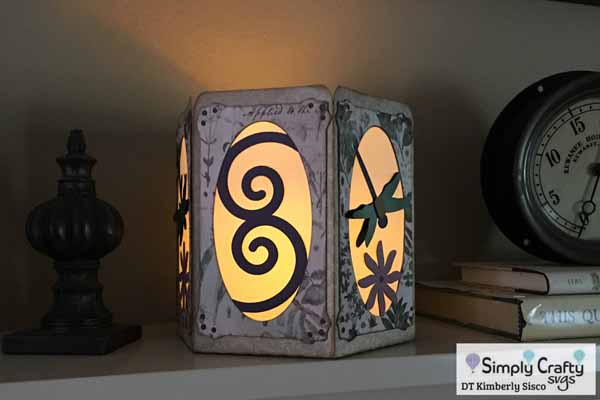
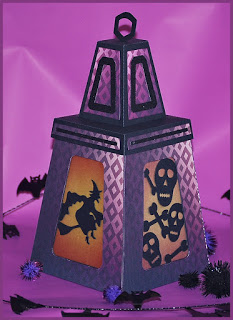
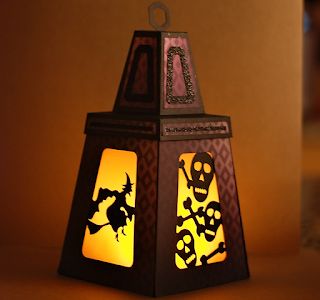
Today, we have Mike from DeZinesbyEM, who is our guest designer this week! He created the Spider and Skulls Halloween Lantern. The top comes off and you can put in an electronic battery powered tea light. If you go to his blog, he kindly created a video showing how he customized the lantern in Silhouette Studio, as he added a witch to a panel And he printed his own color vellum.
Mike Fernholz , Guest Designer for Simply Crafty SVGs